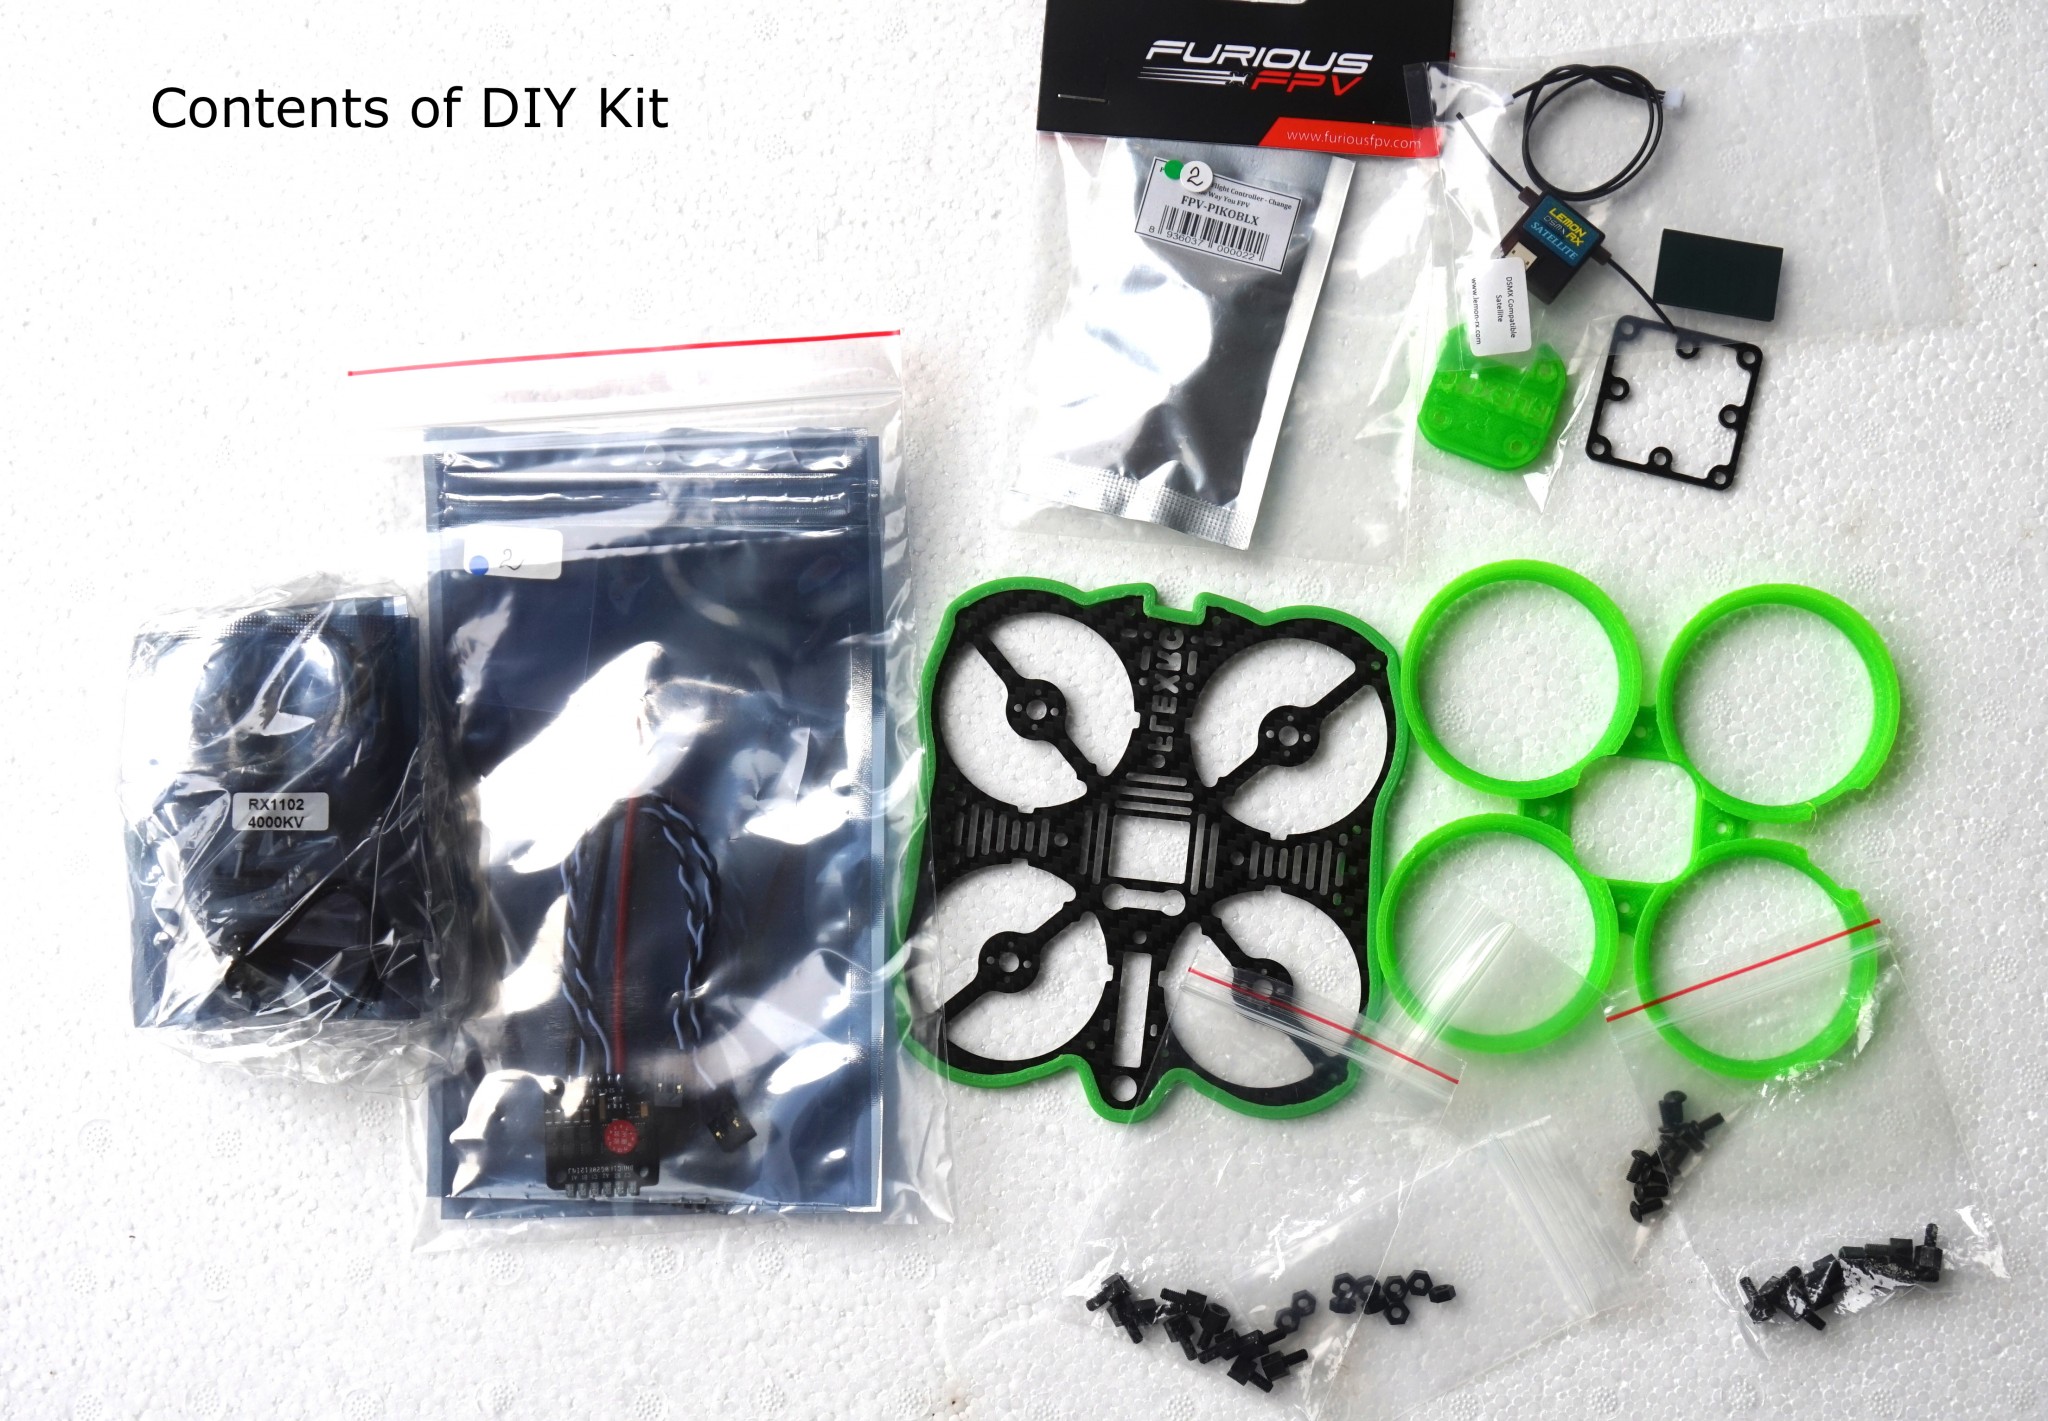
Mini Owl Piko Edition DIY Kit contents:
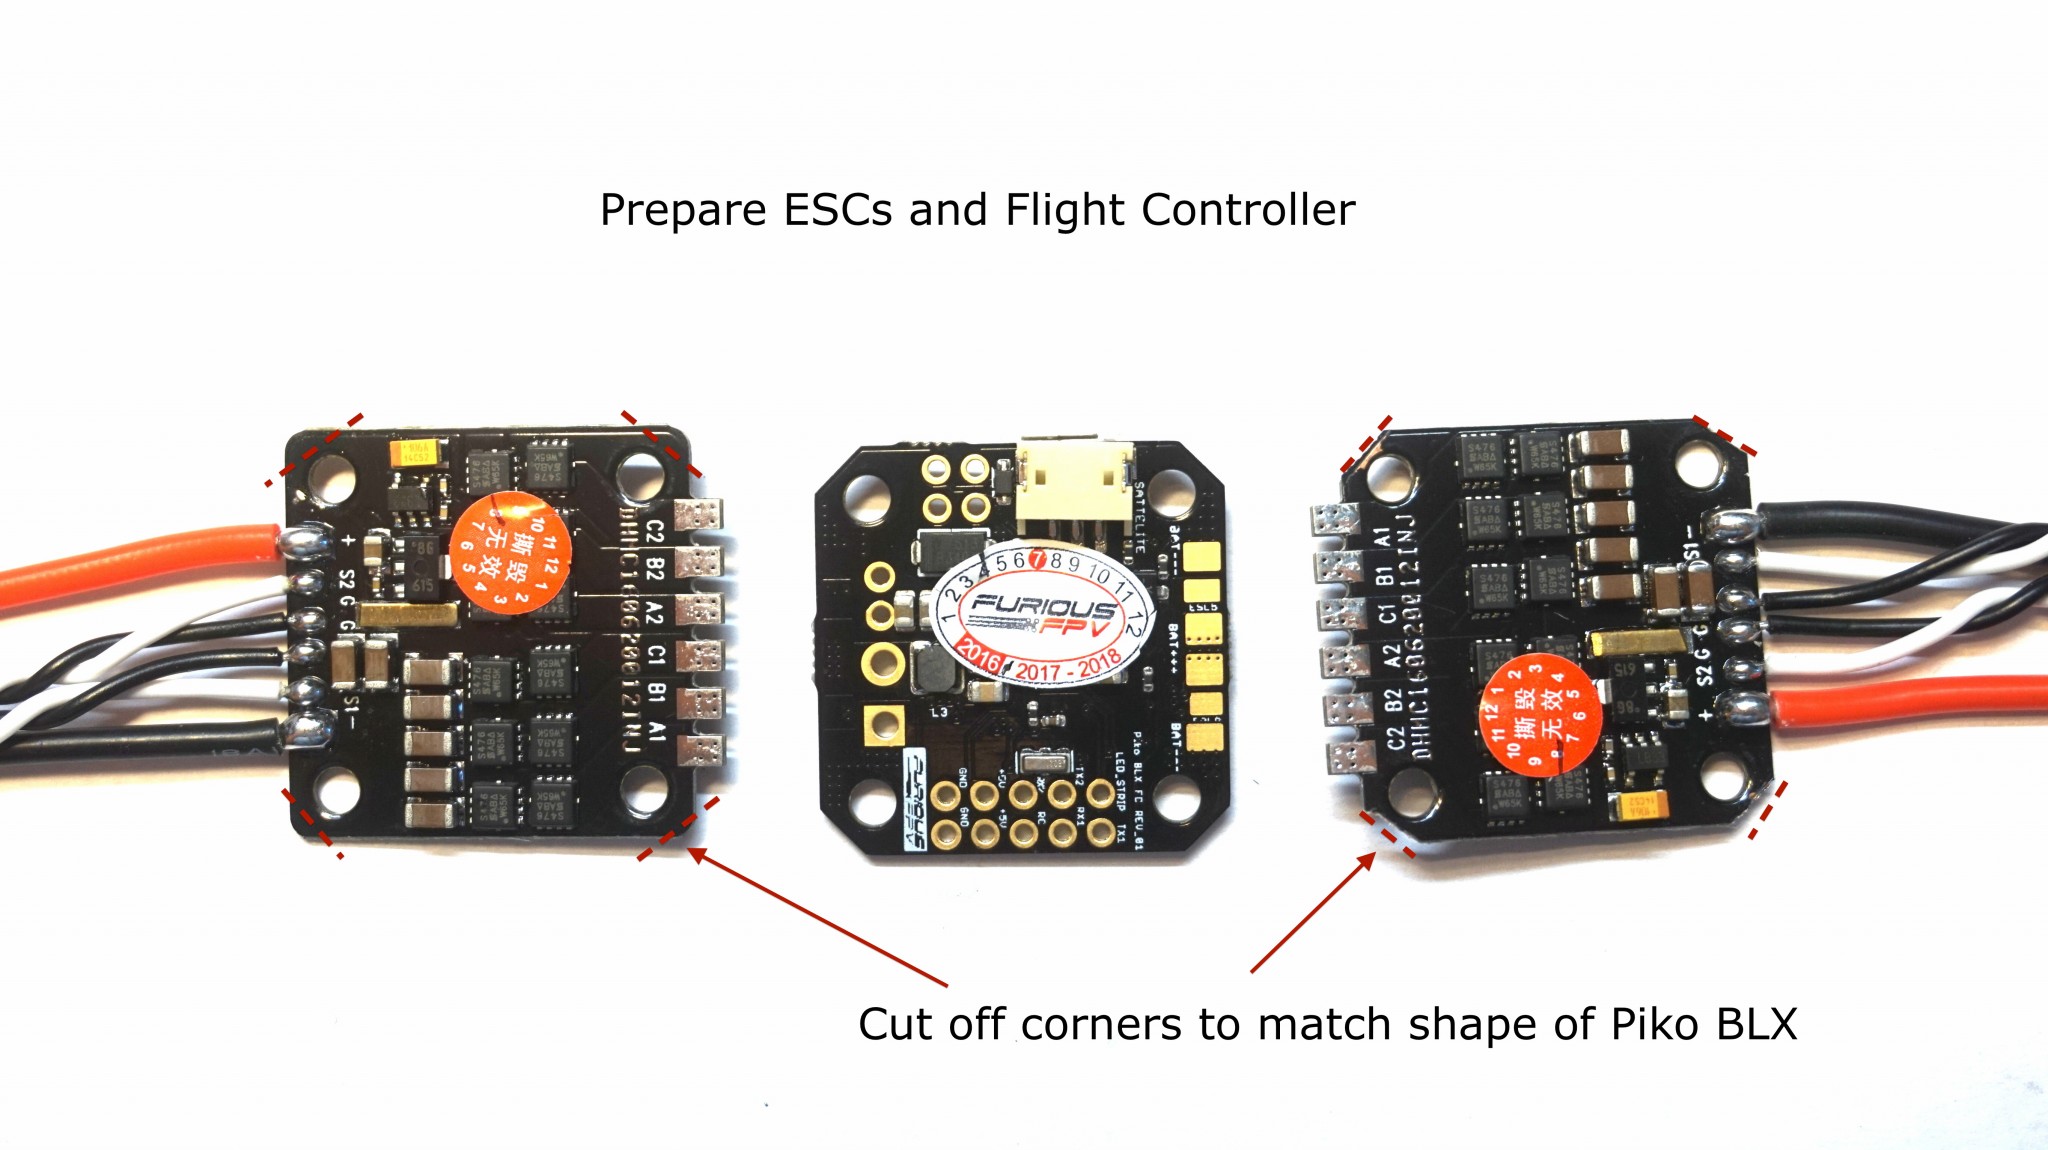
Unpack and prepare BusyBee2 2 in 1 ESCs and Piko BLX Flight Controller for assembly.
Cut off all corners from both ESCs to match shape of Piko BLX:
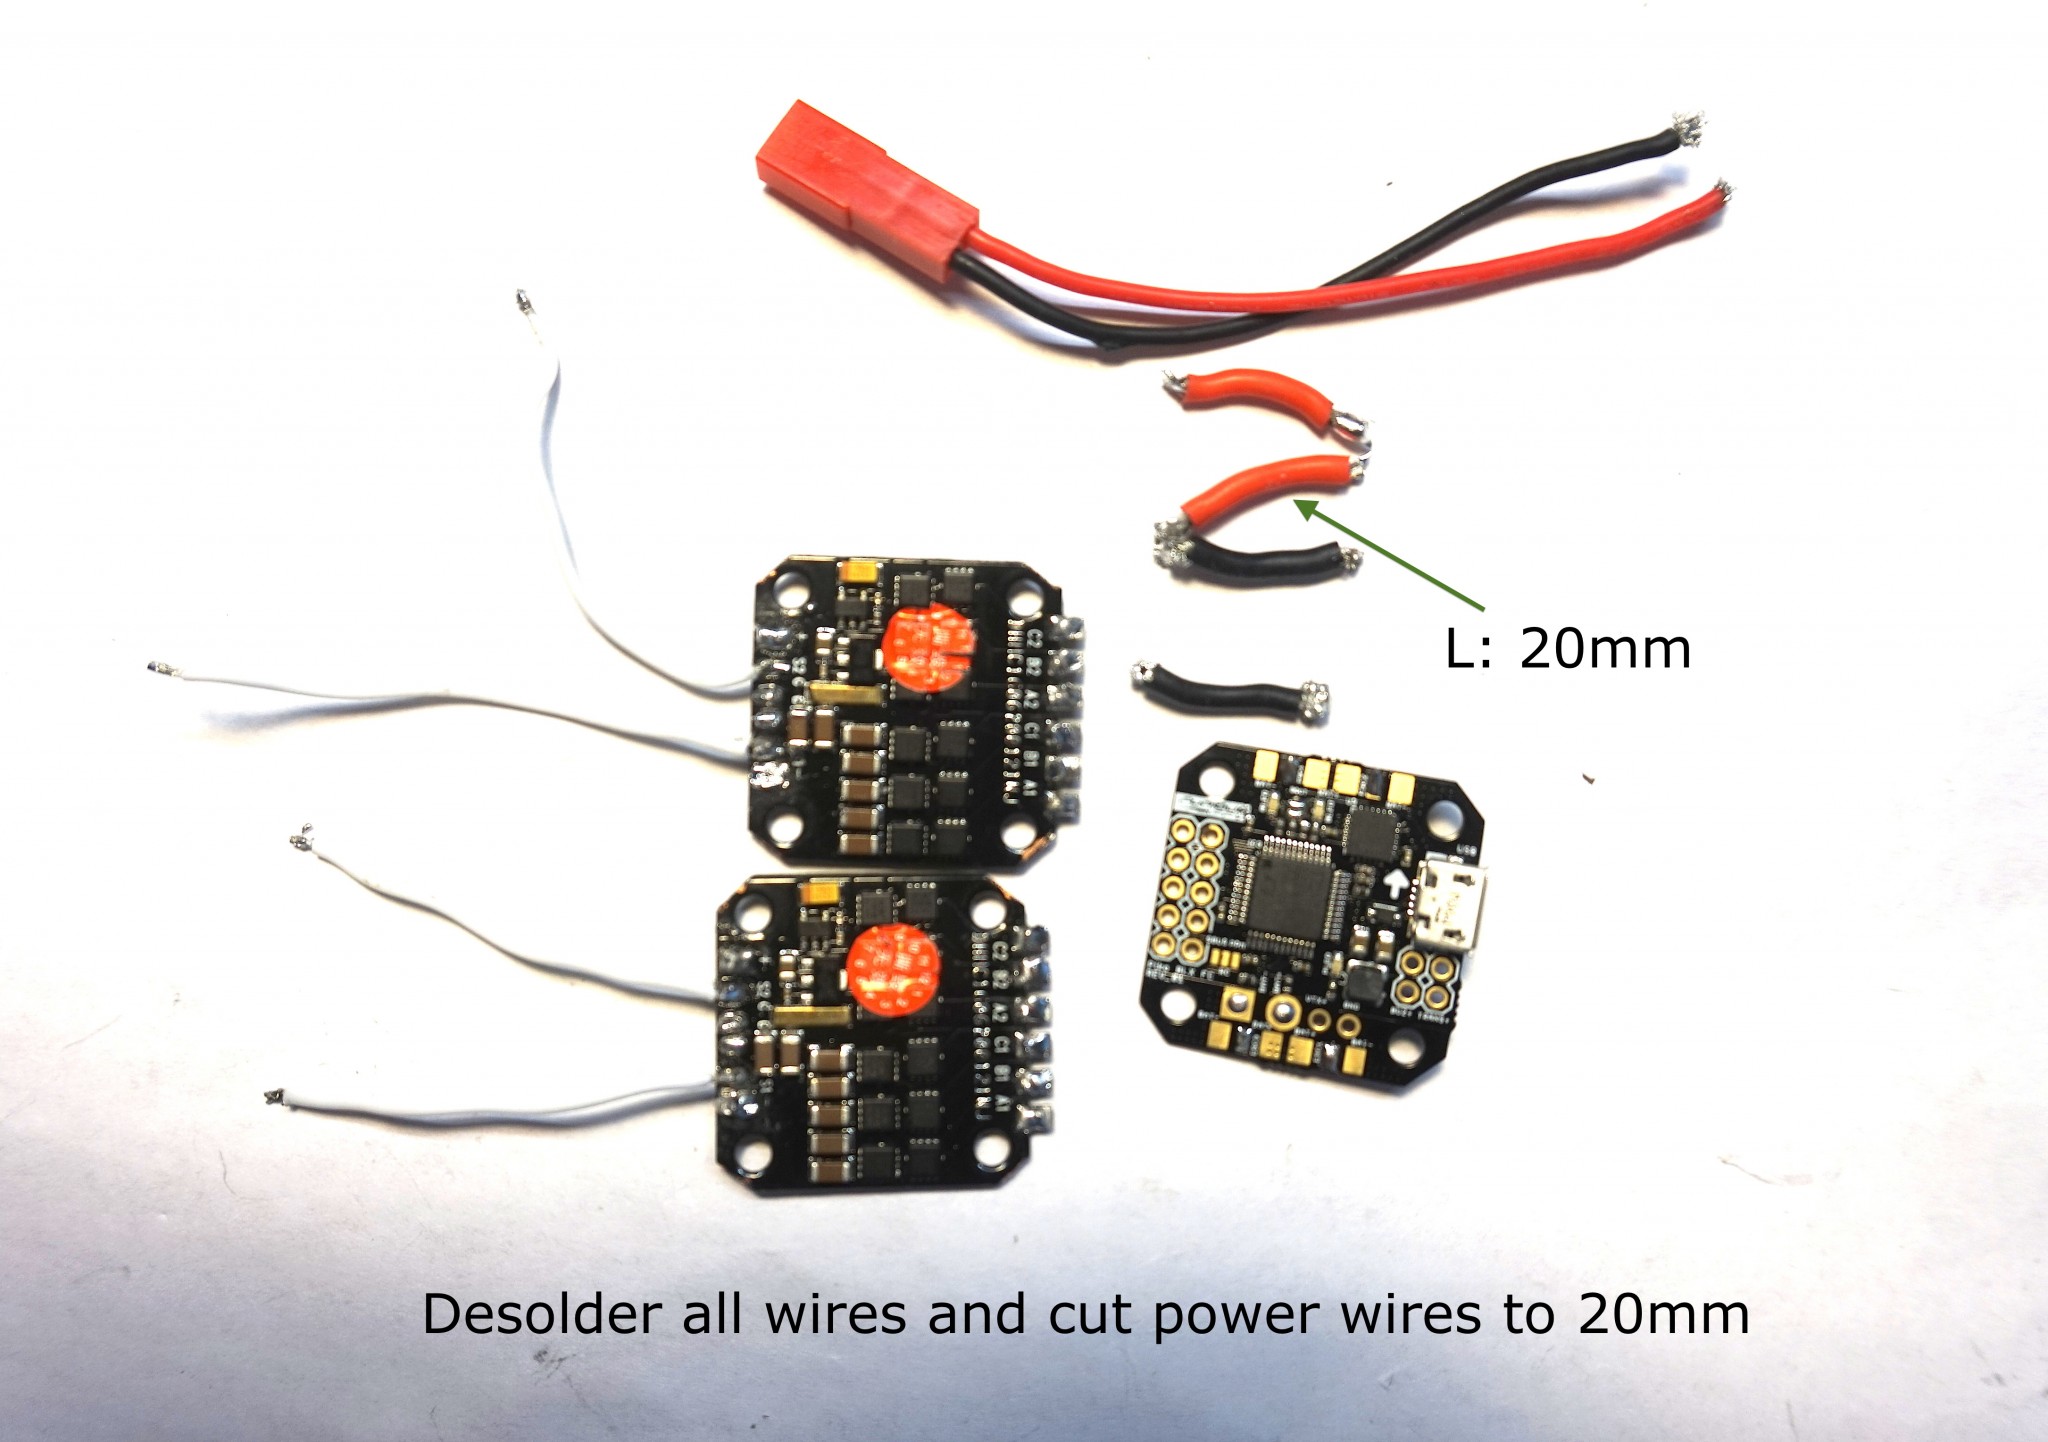
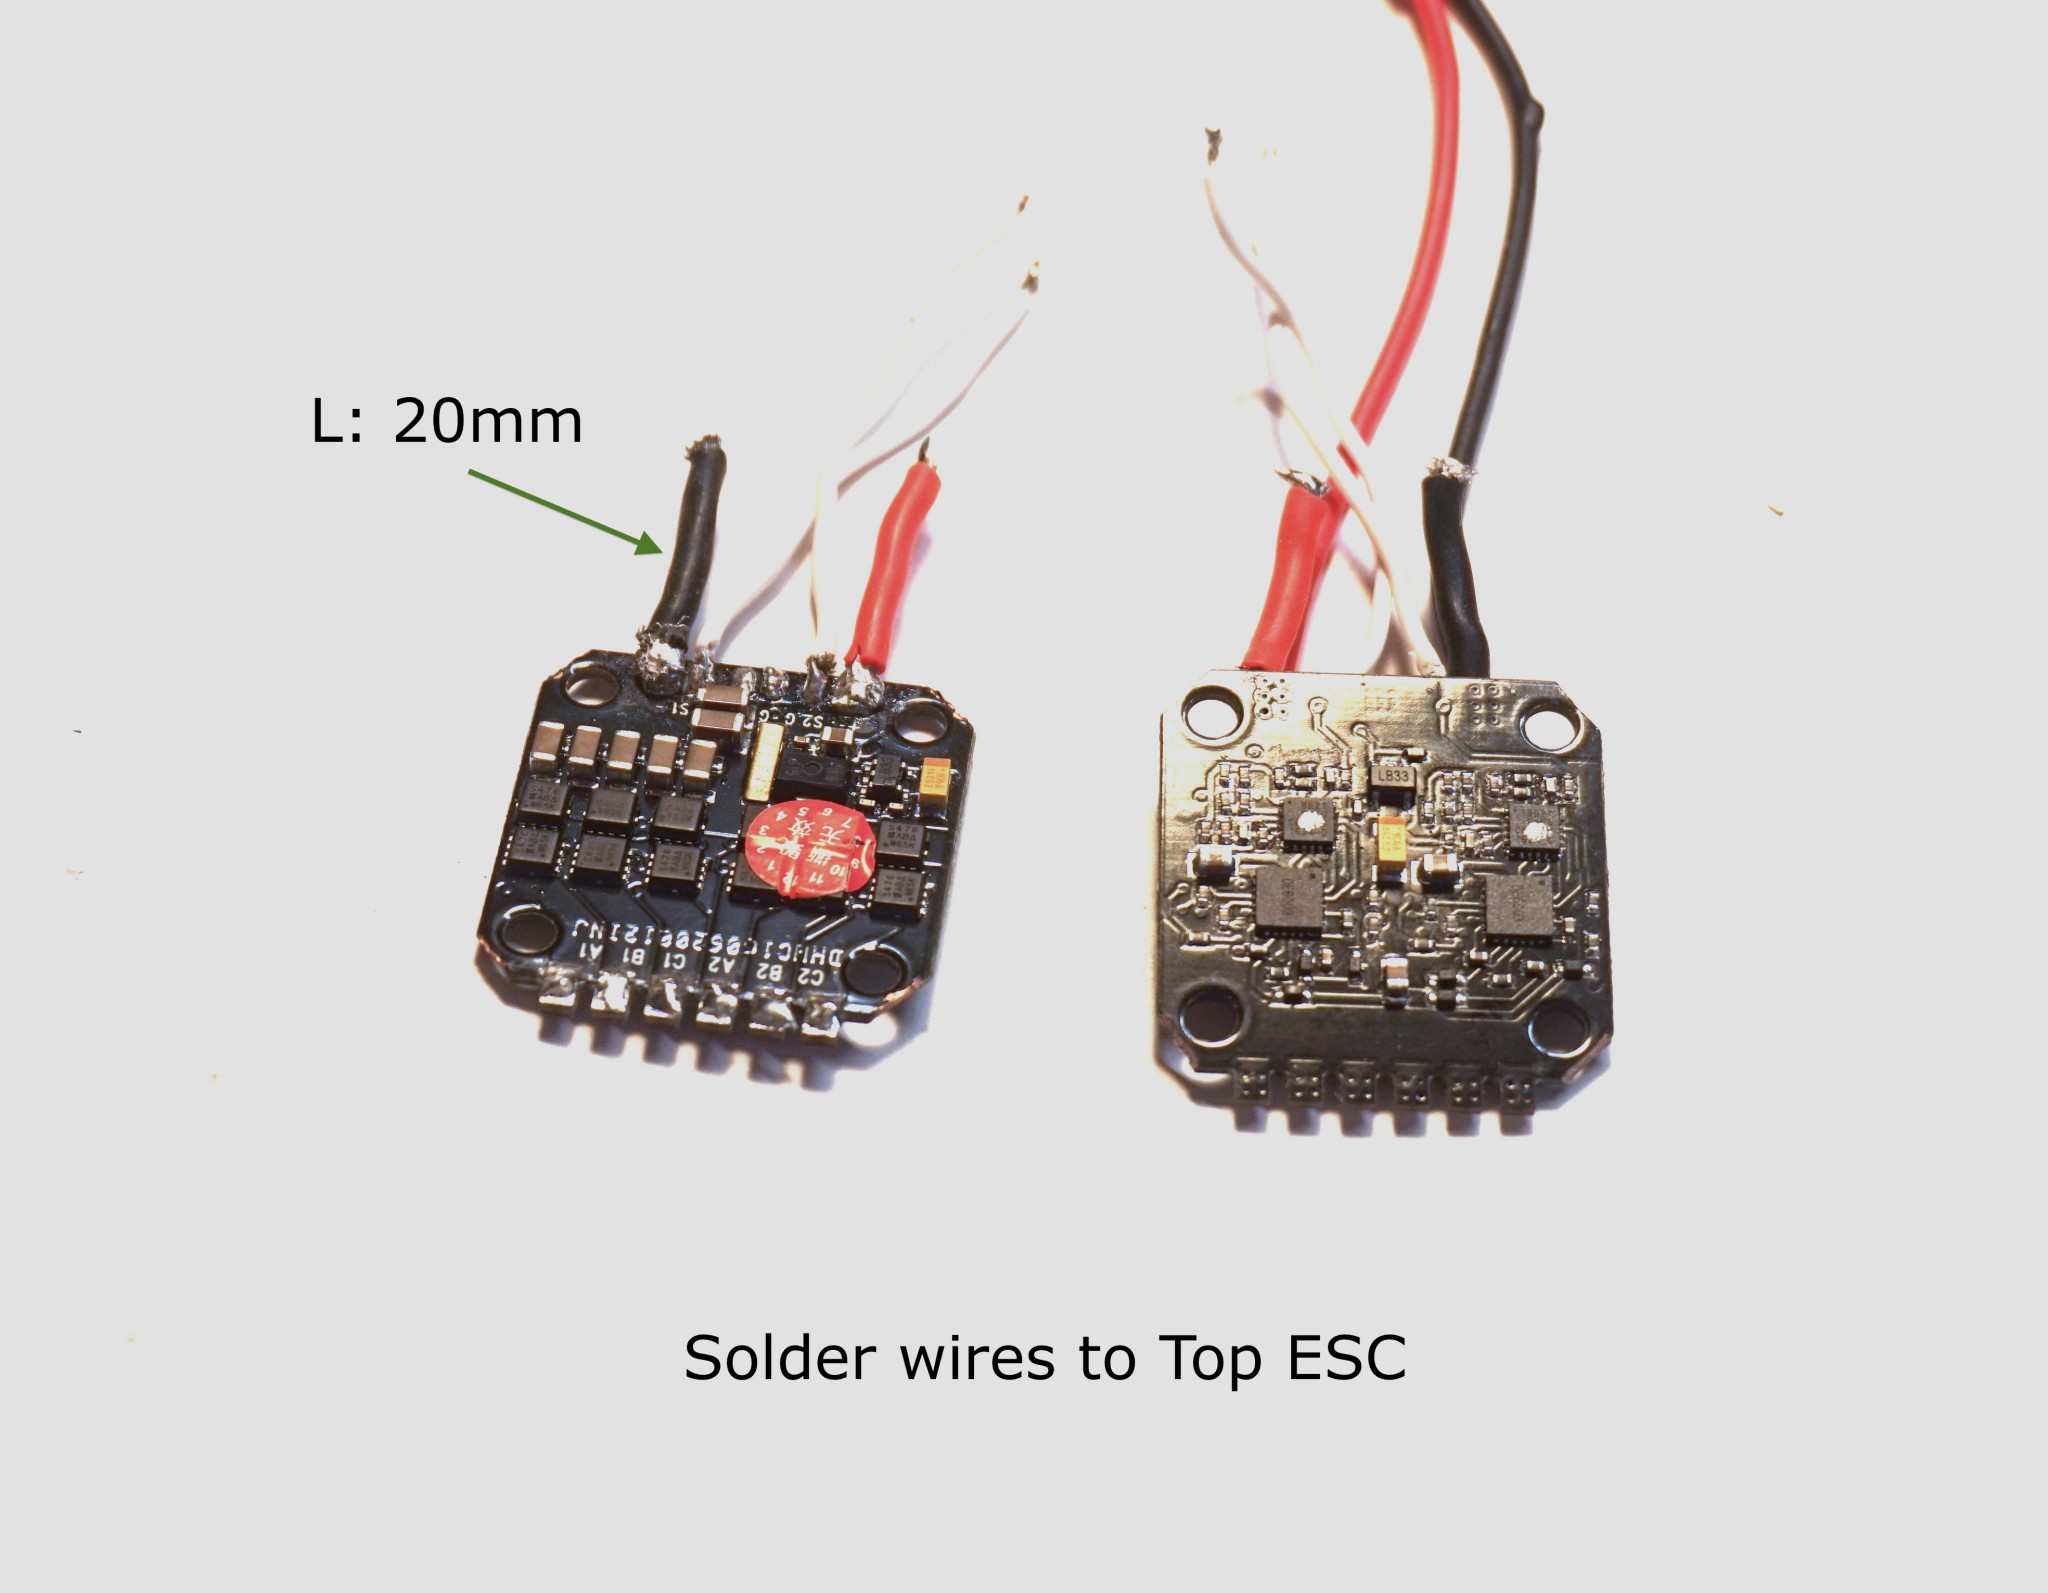
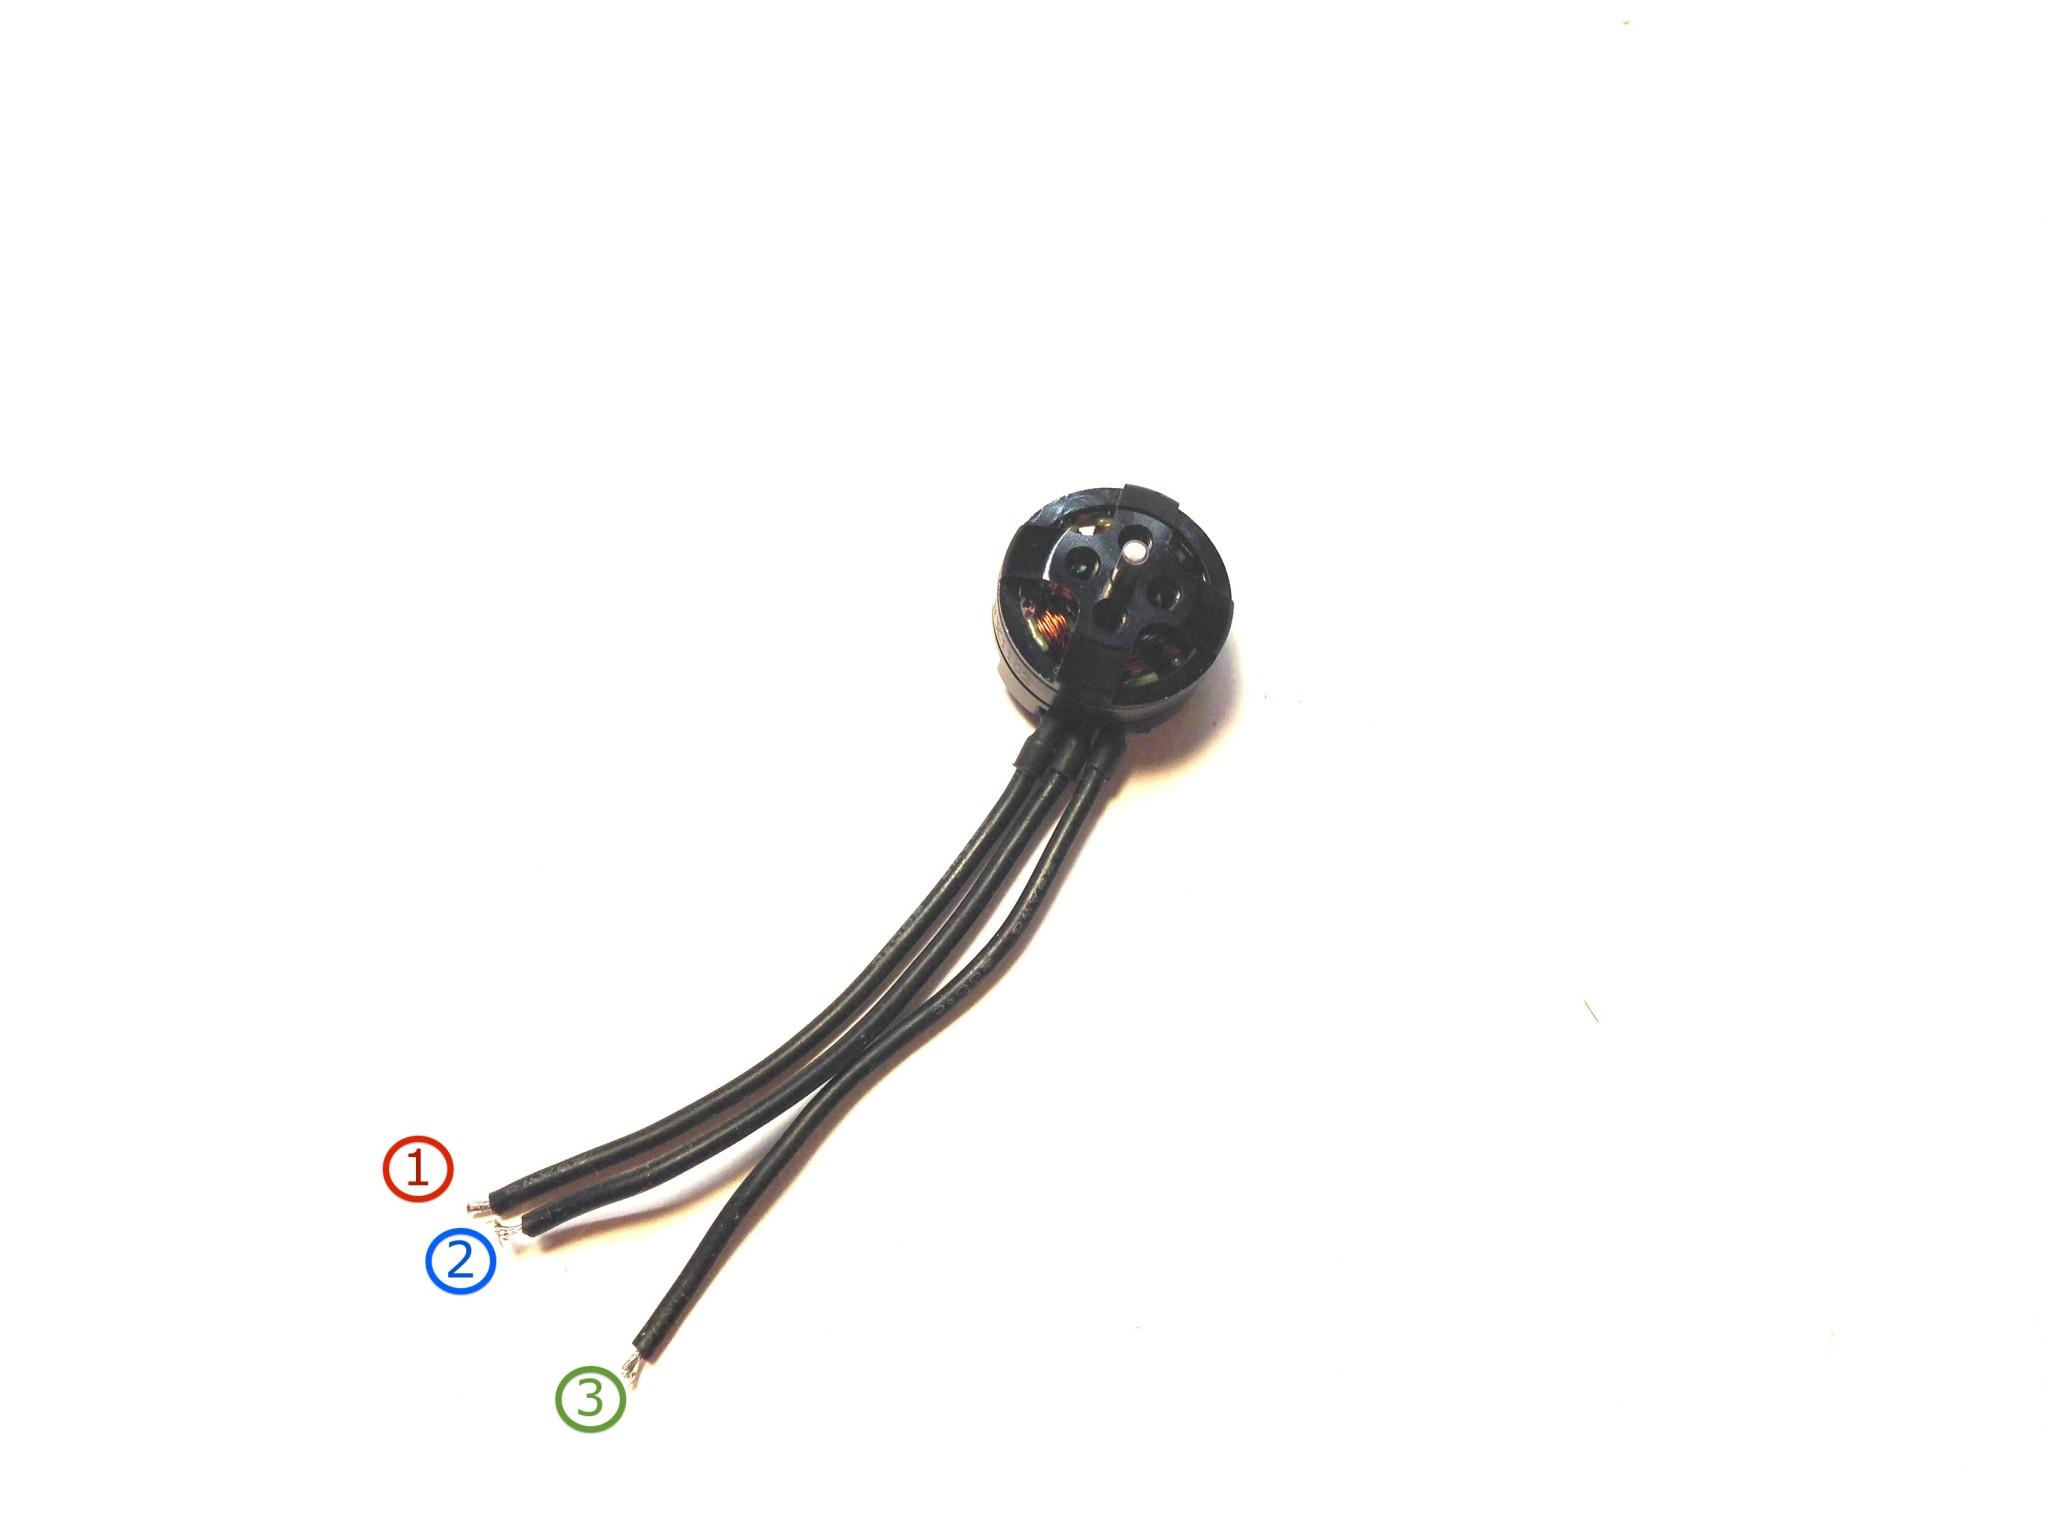
Desolder and cut wires to approximately 20mm:
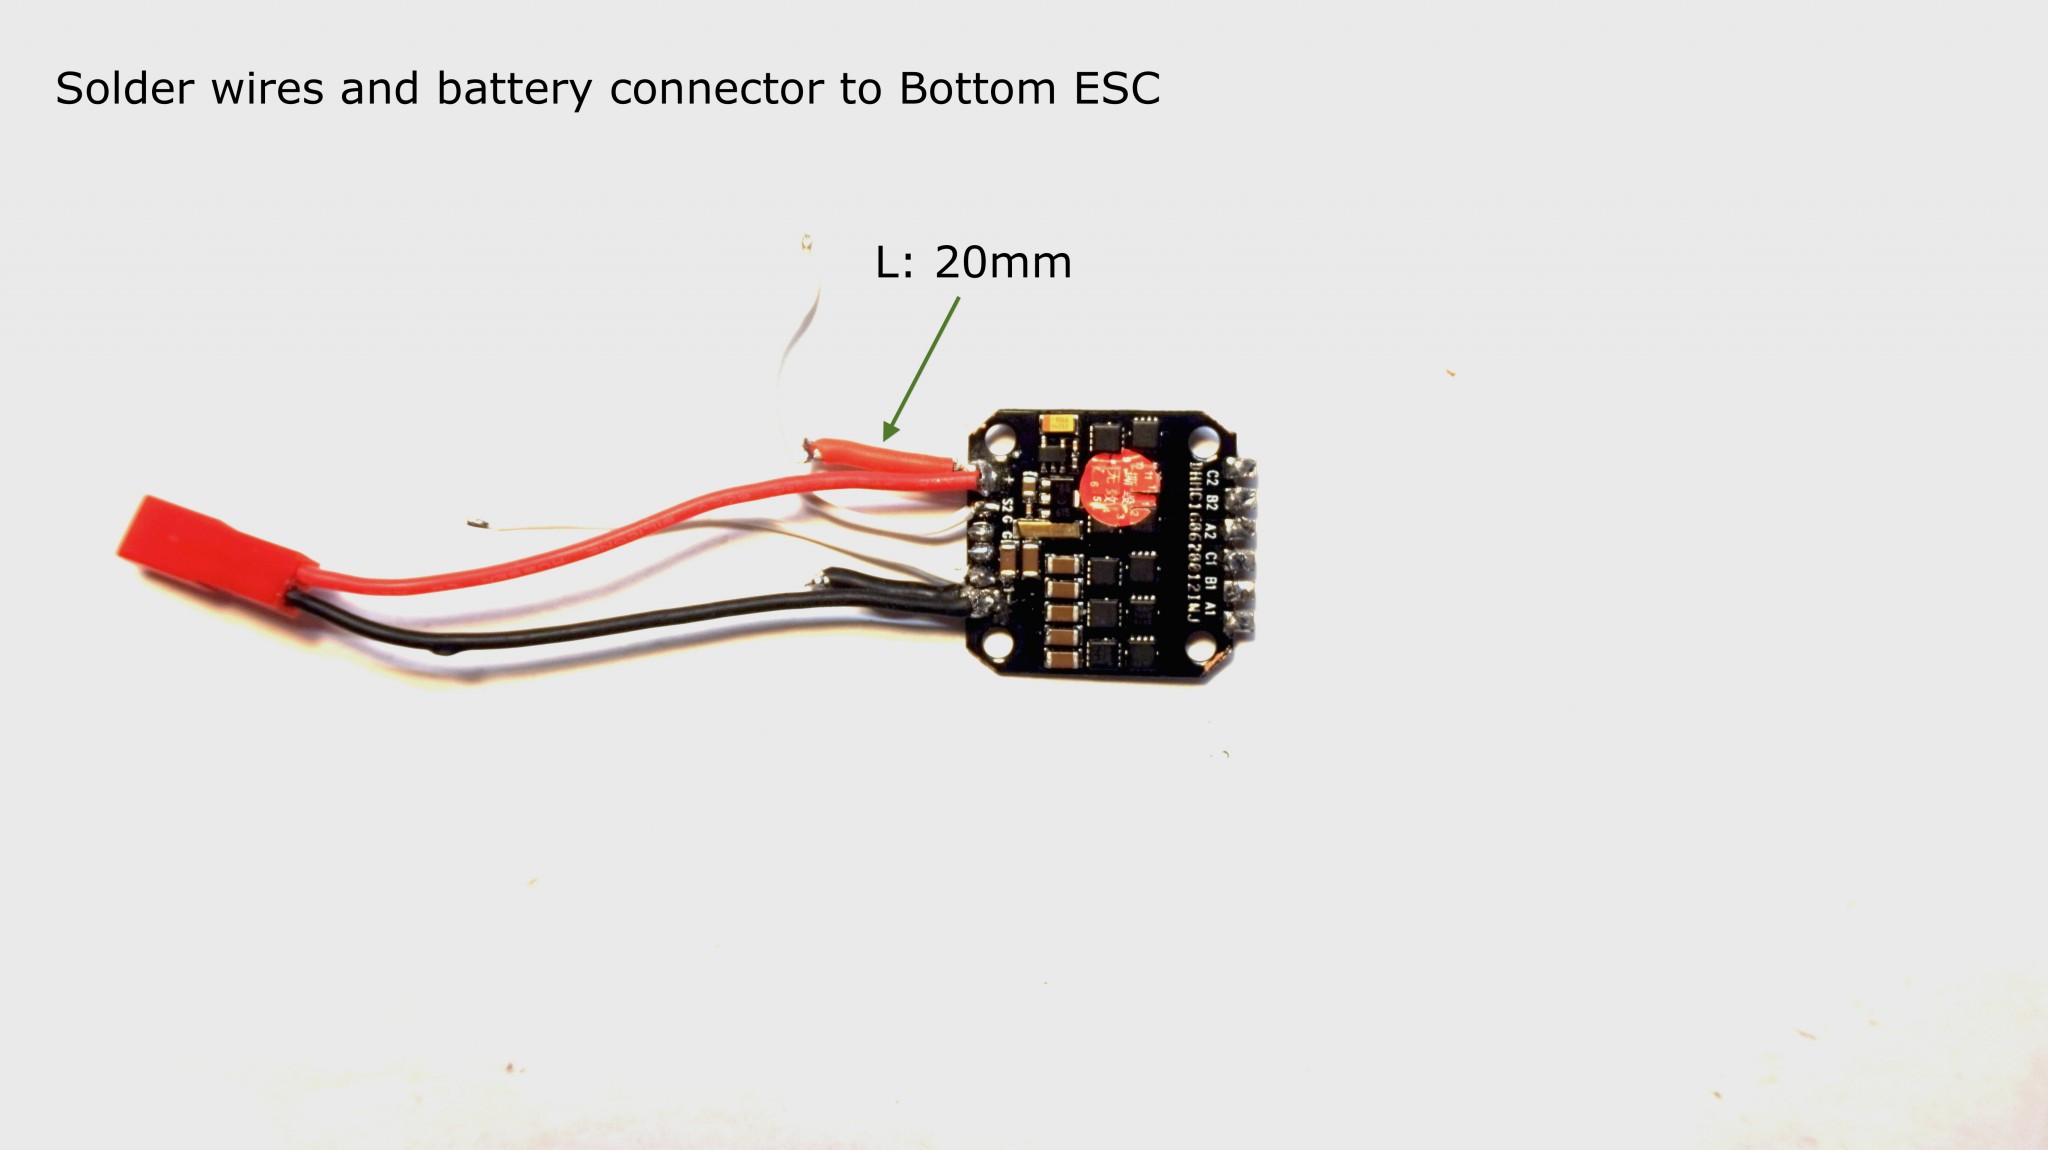
Solder 20mm wires and battery connector to Bottom ESC:
Solder 20mm wires to Top ESC:
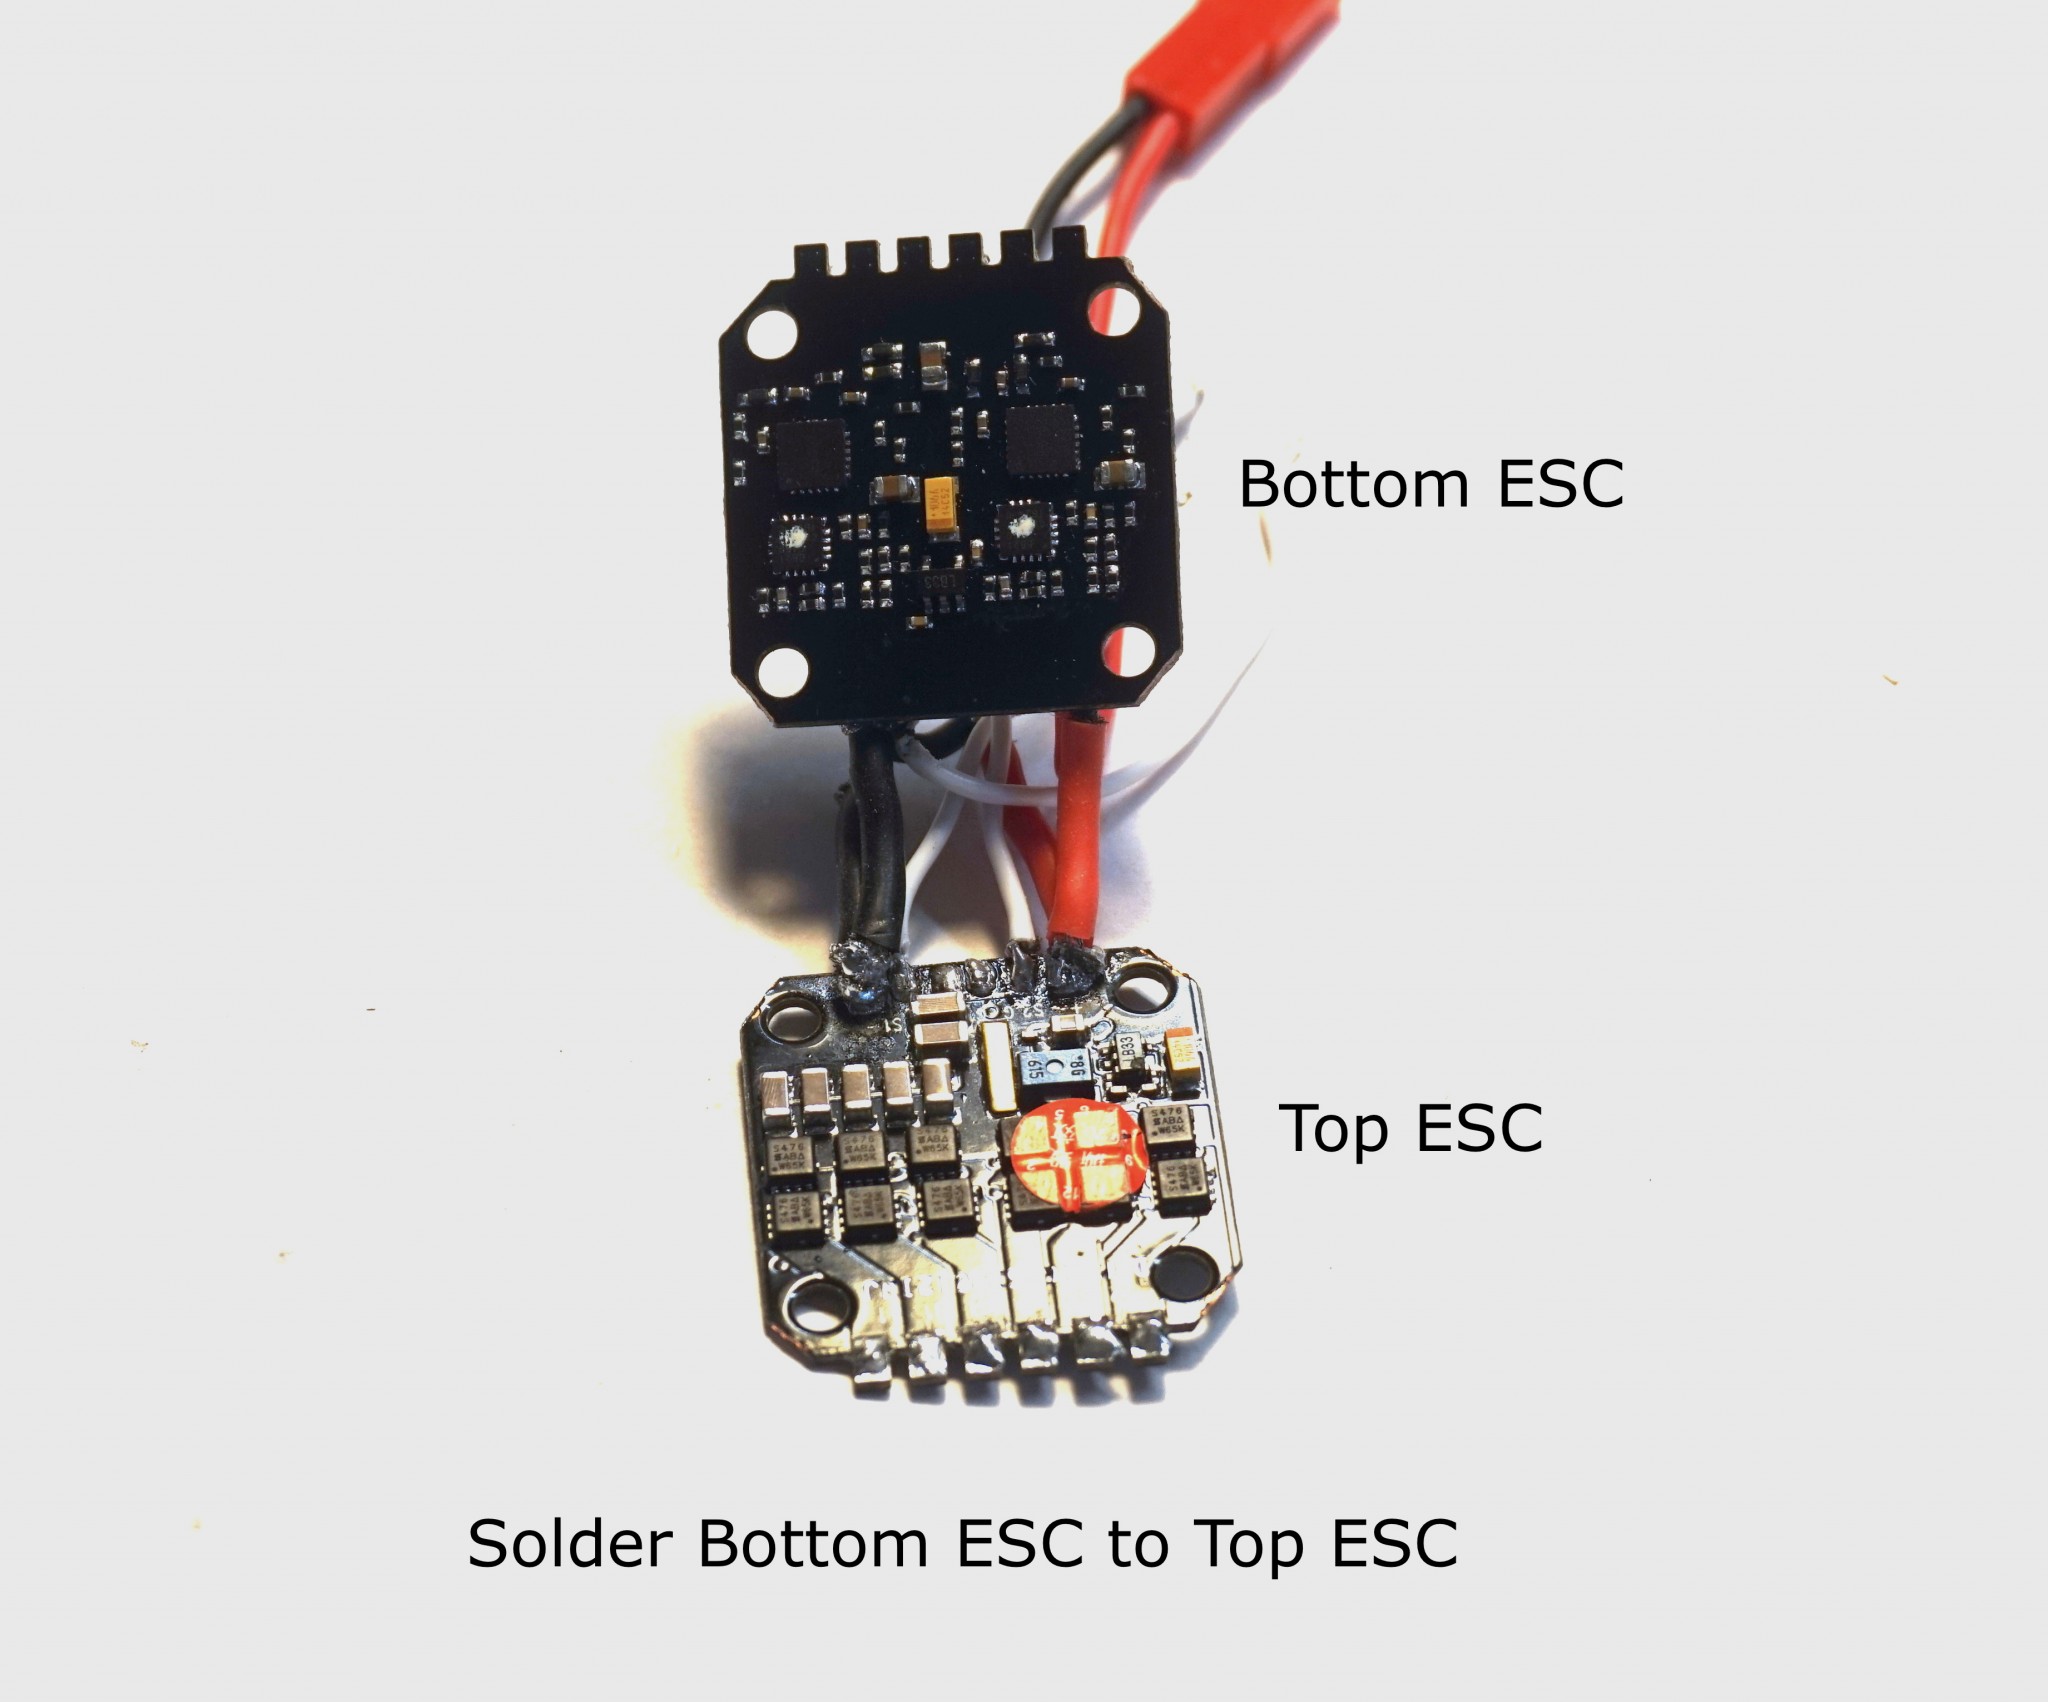
Solder Bottom ESC to Top ESC:
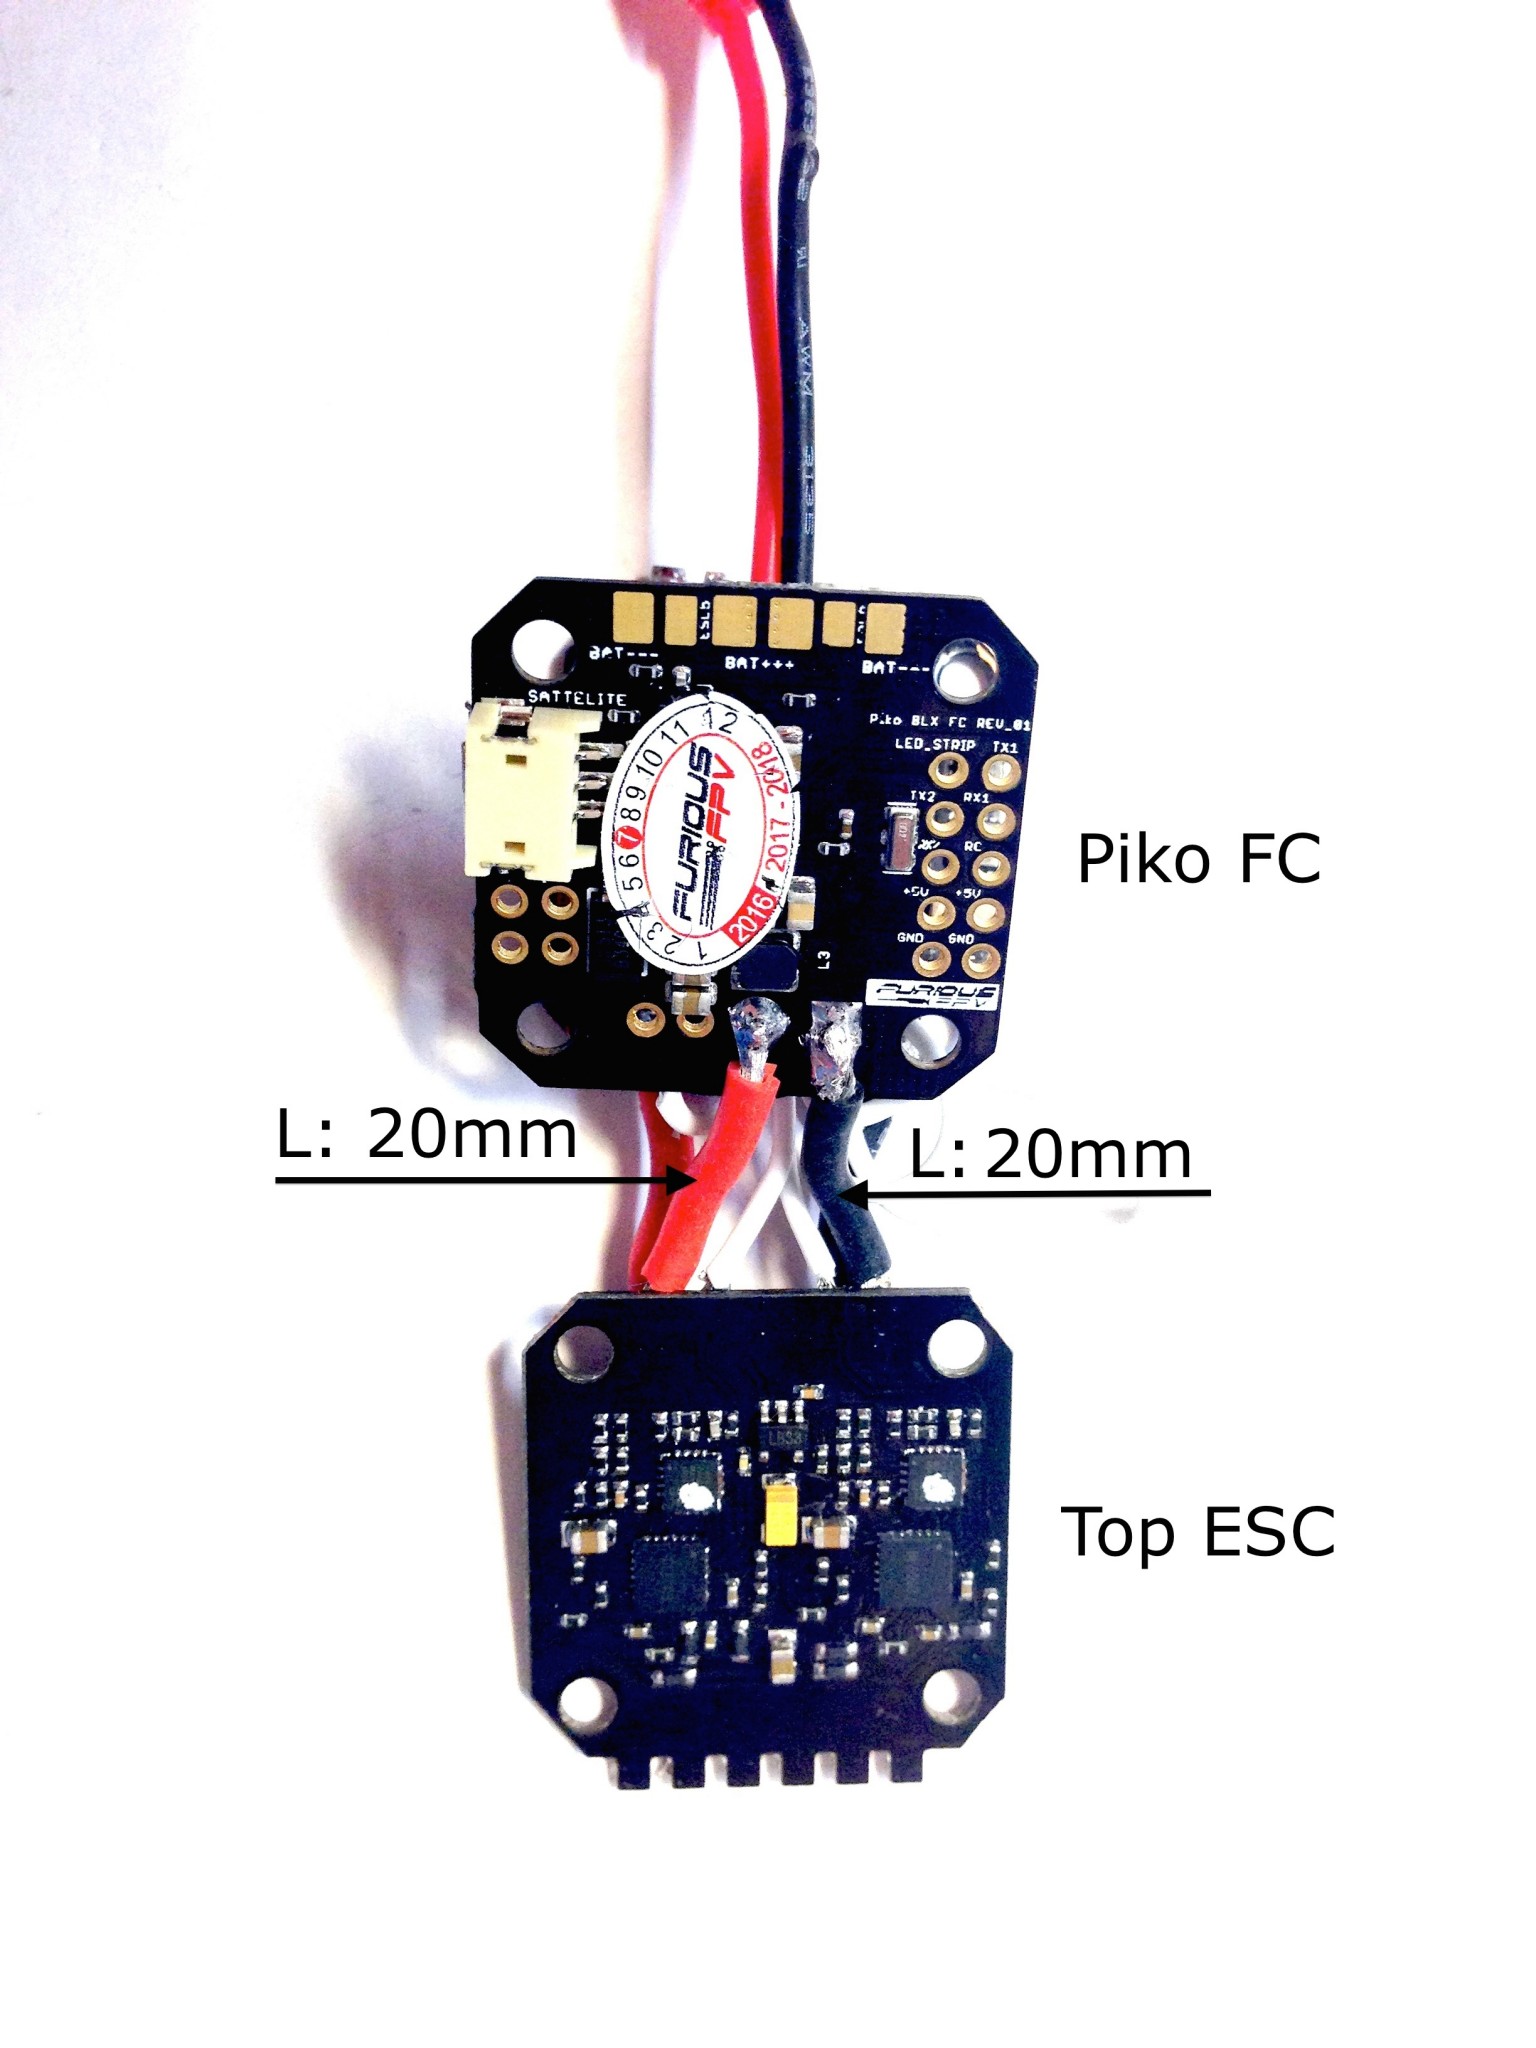
Solder 20mm wires from Top ESC to Flight Controller:
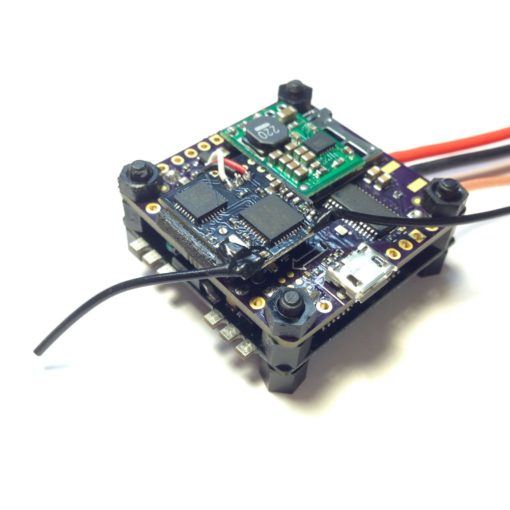
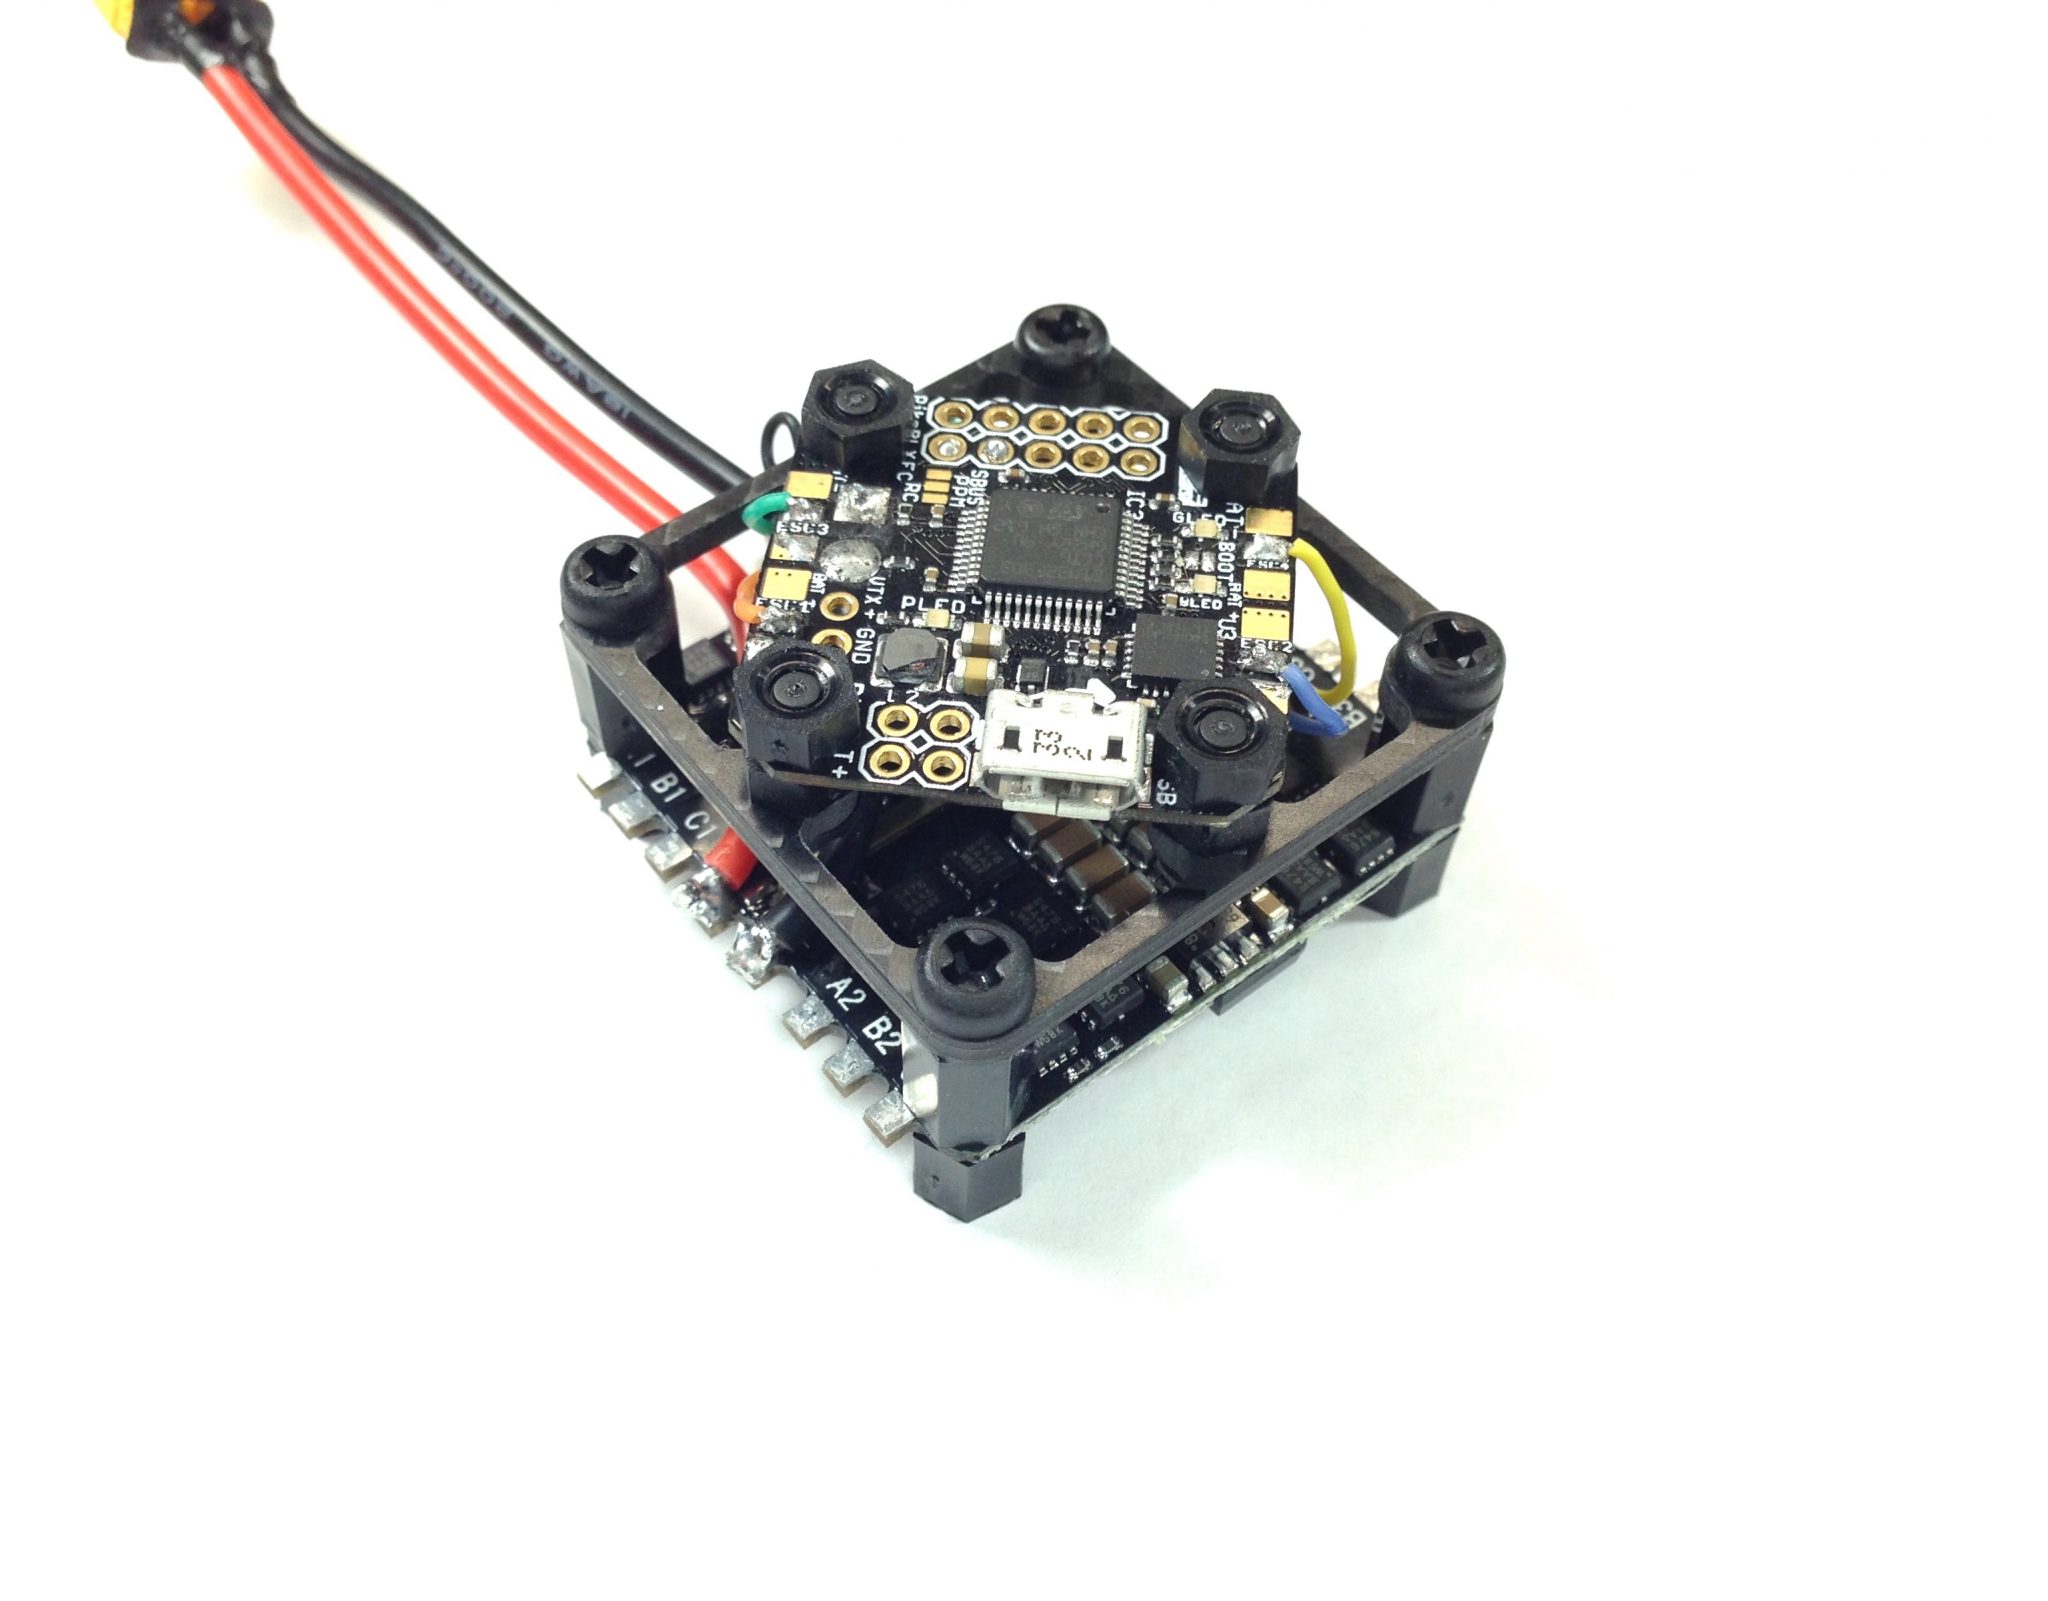
View of ESCs and Flight Controller stack:


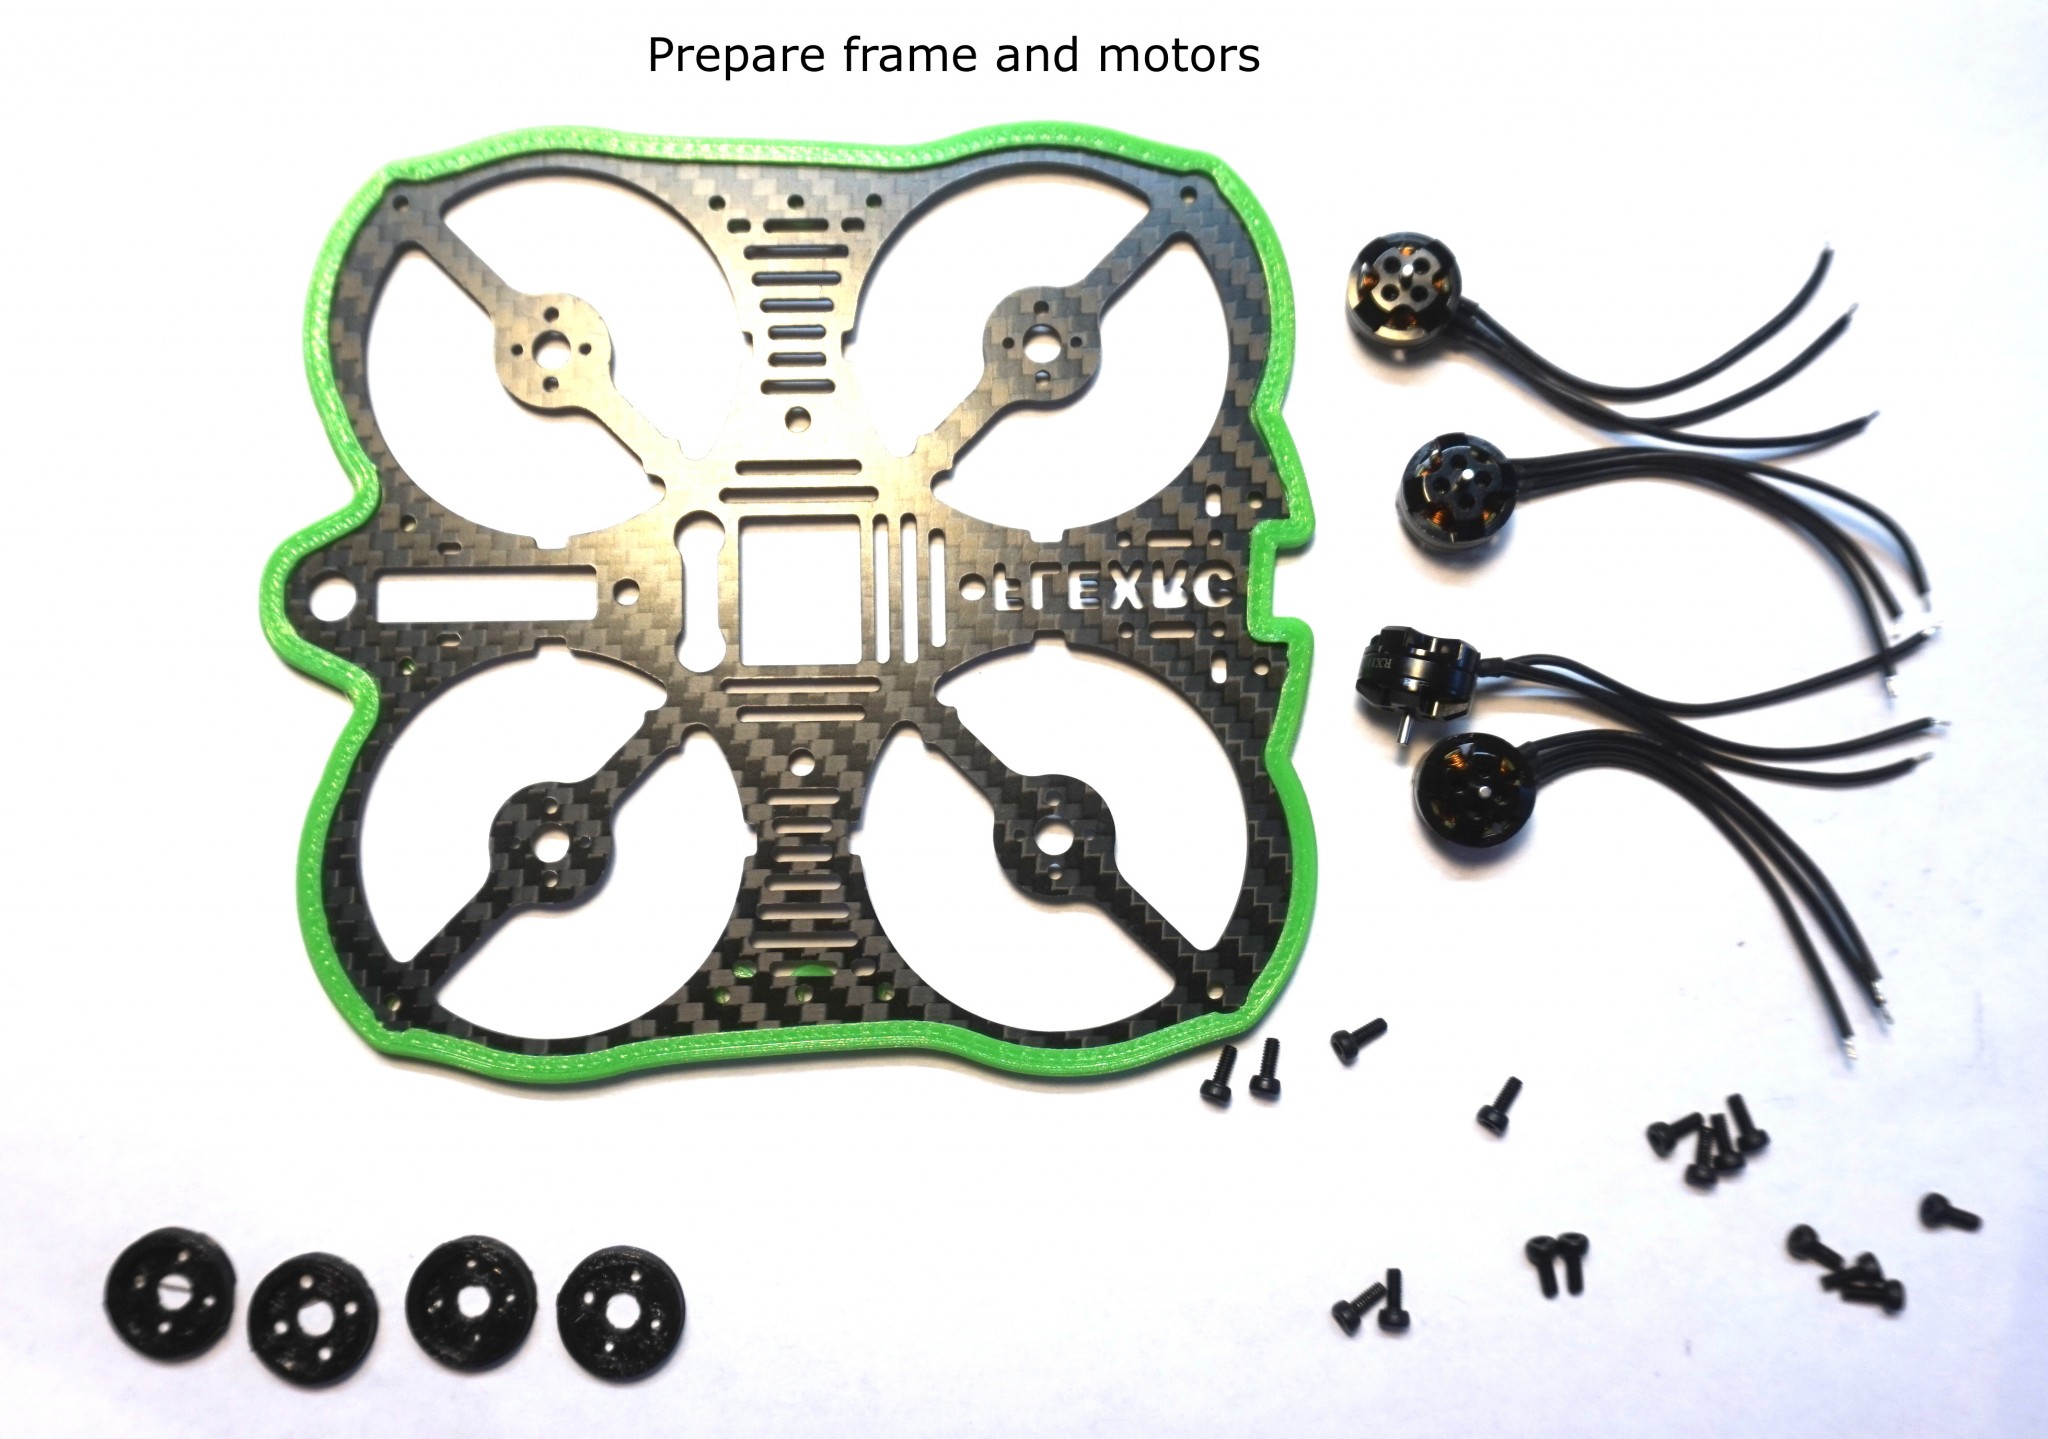
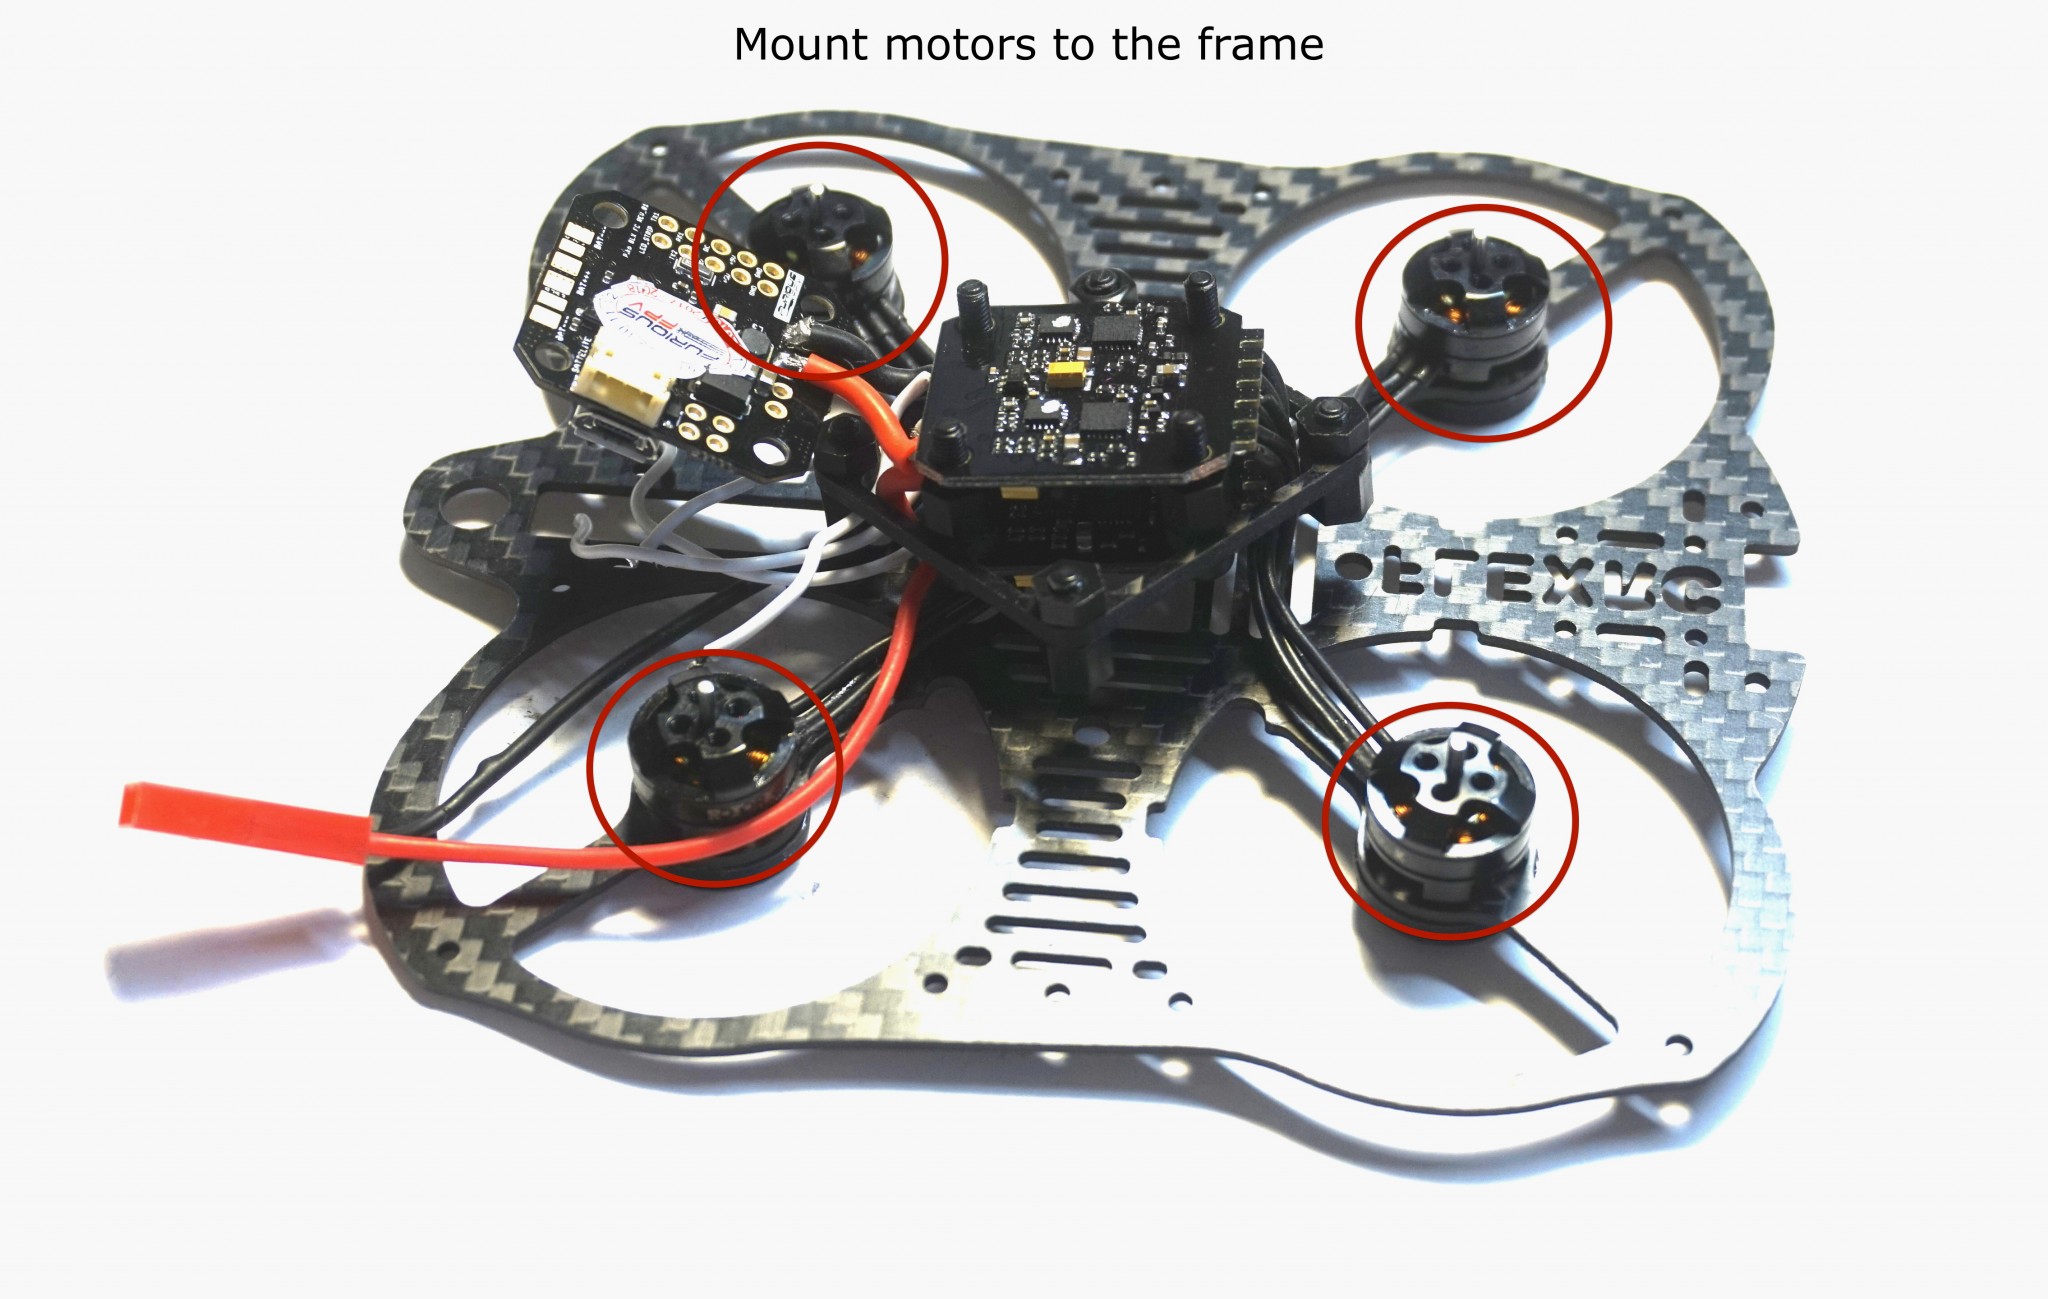
Prepare frame and motors for assembly:
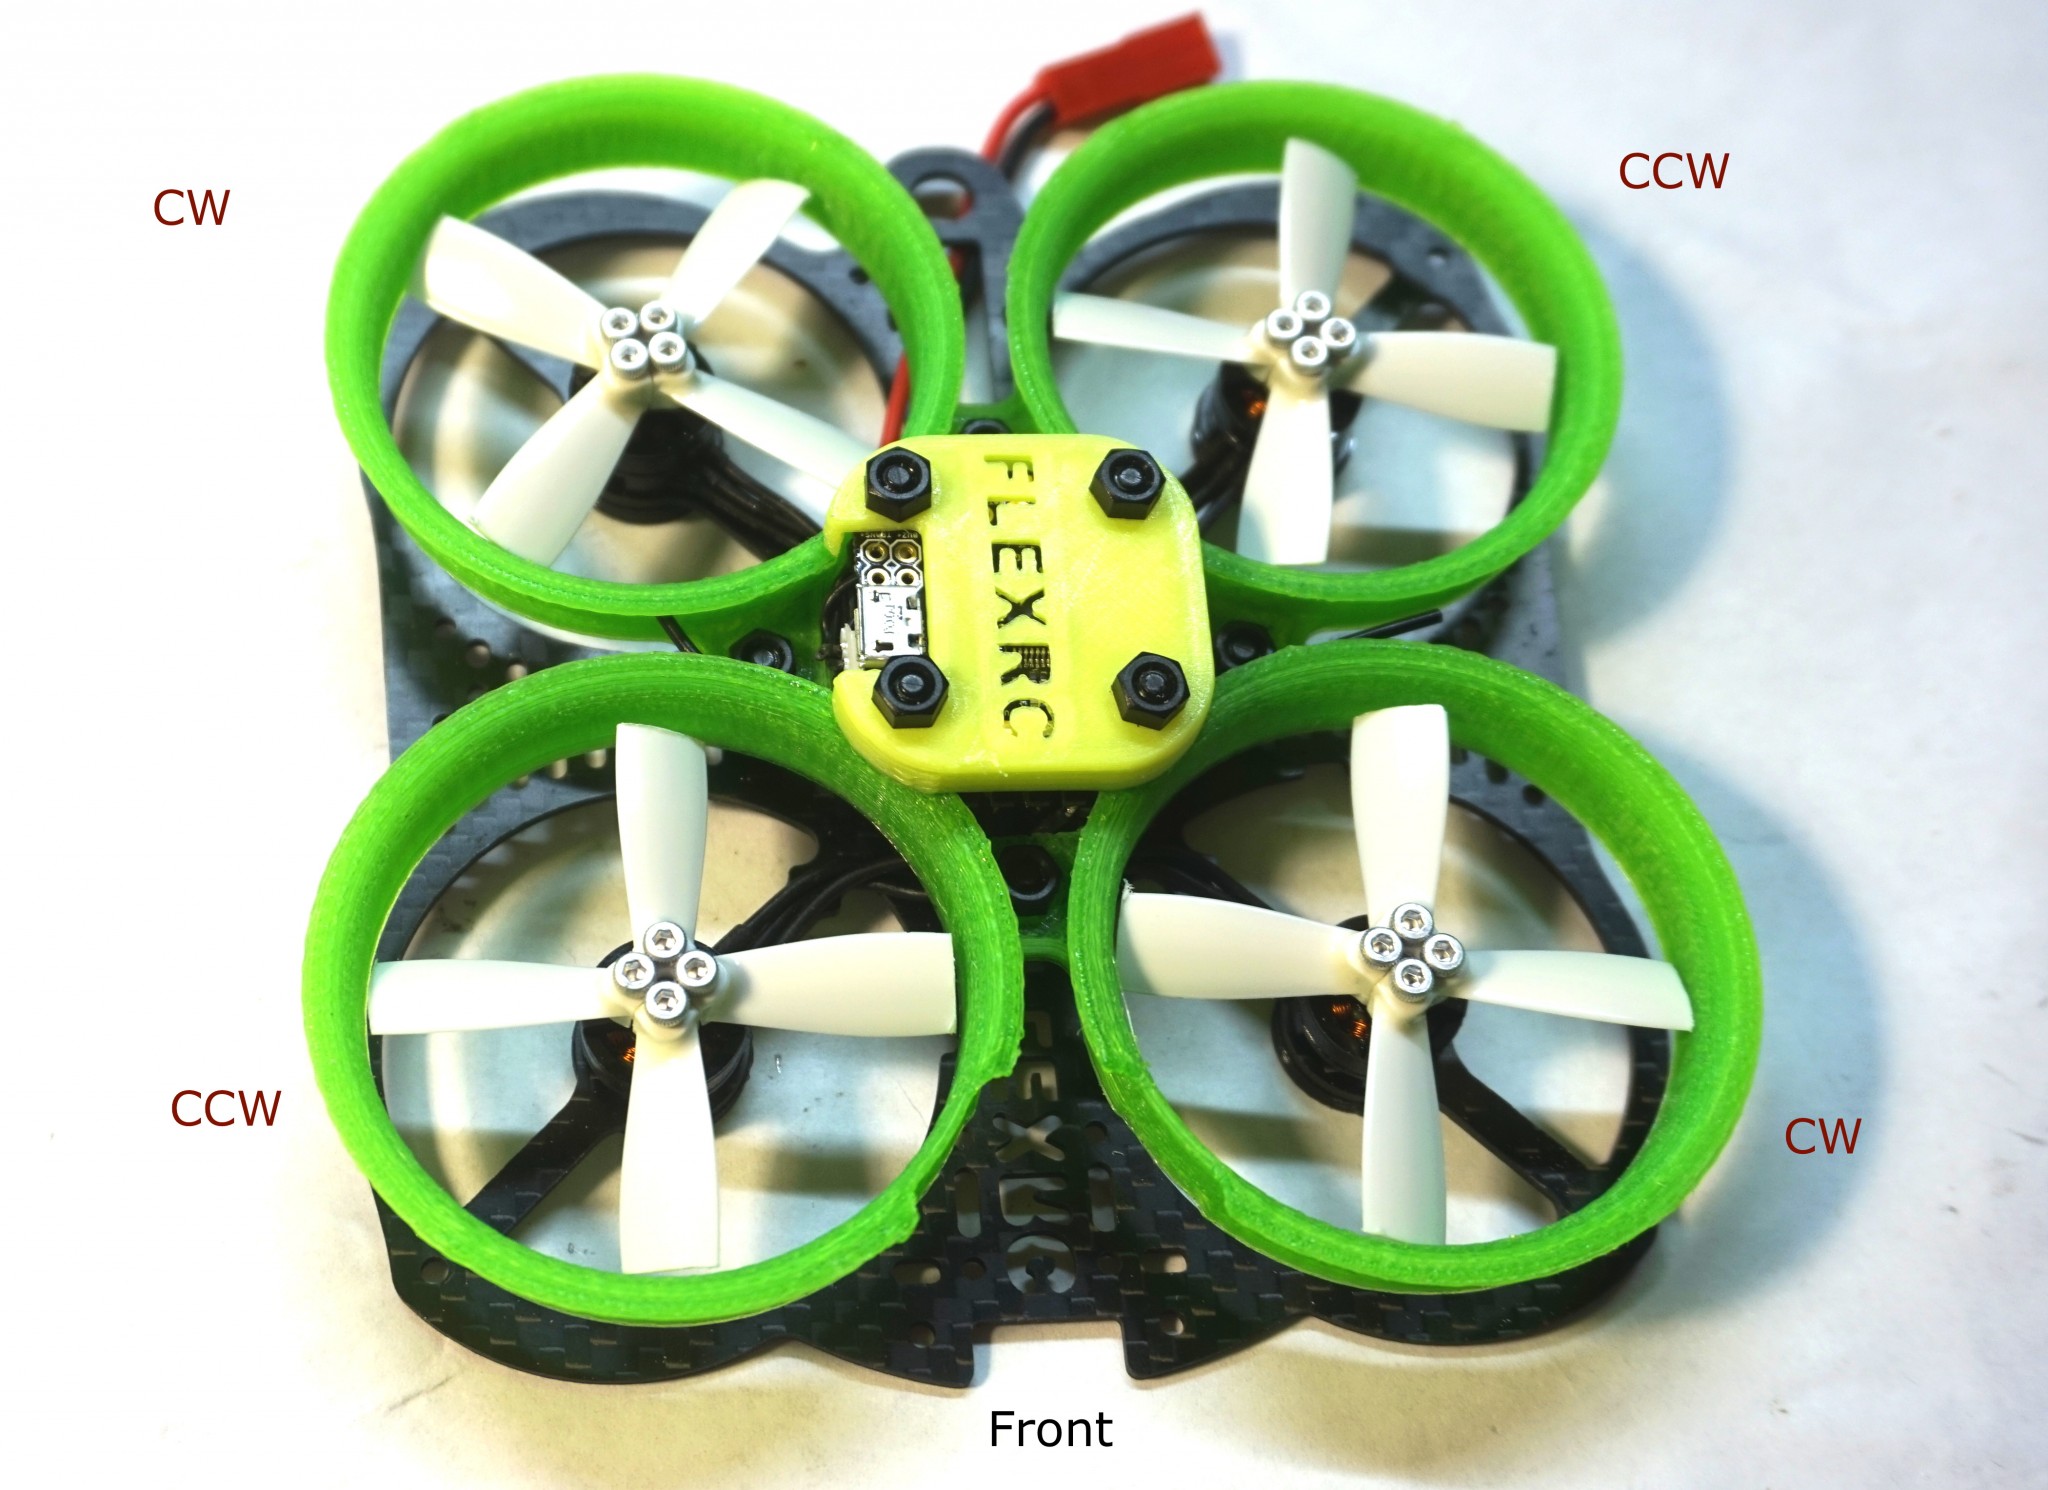
For the future reference use motor wire numbers from the following picture:
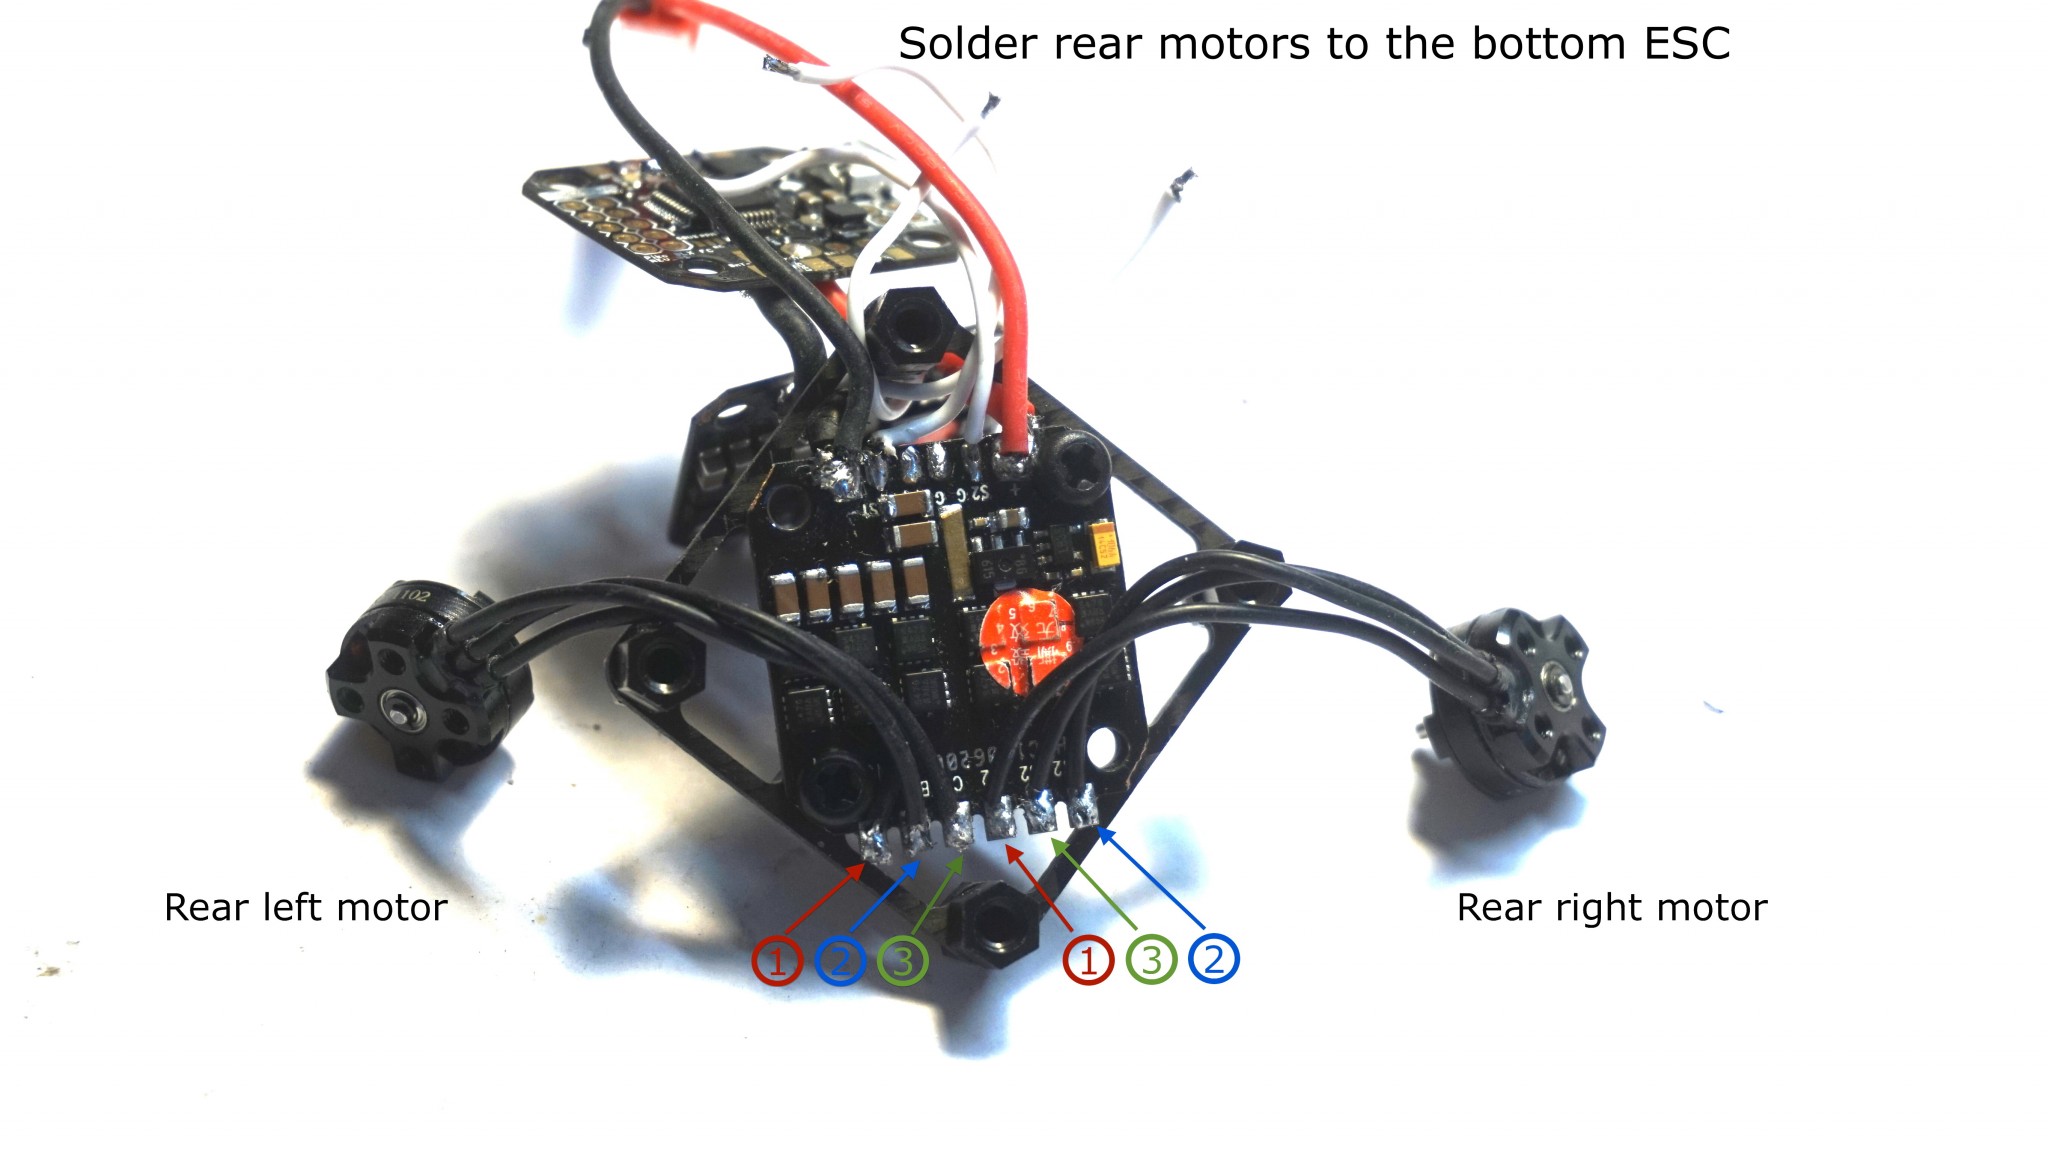
Mount Bottom ESC, facing down, at the bottom of Piko BLX mount and solder rear motors to the Bottom ESC:
Measure how much wire you will need, cut off the excess and solder front motors to the Top ESC:

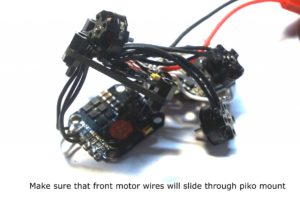
Make sure that you will motor wires will slide through Piko BLX mount:
Mount motors to the frame, make sure to use landing feet to adjust length of 5mm motor screw:
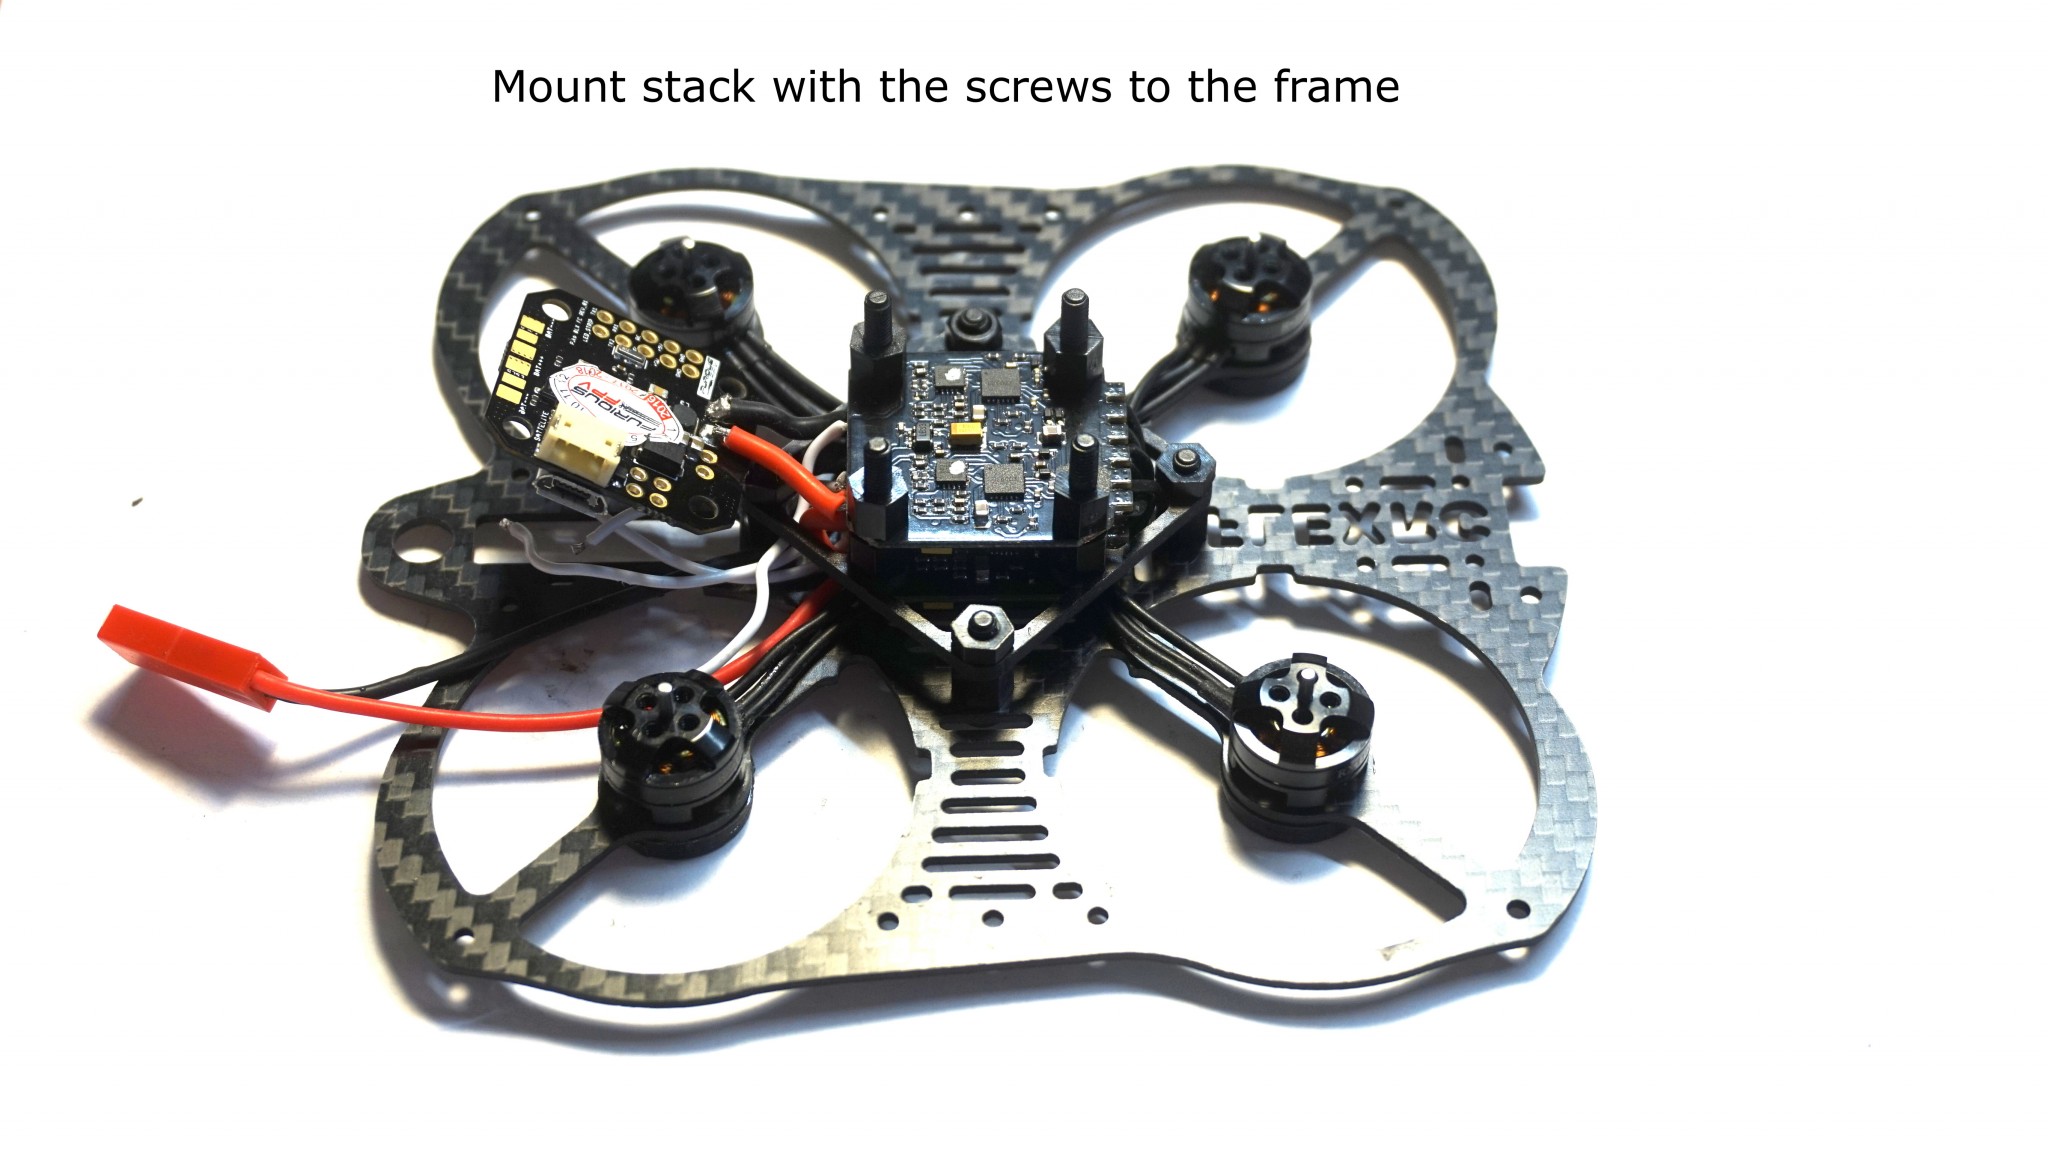
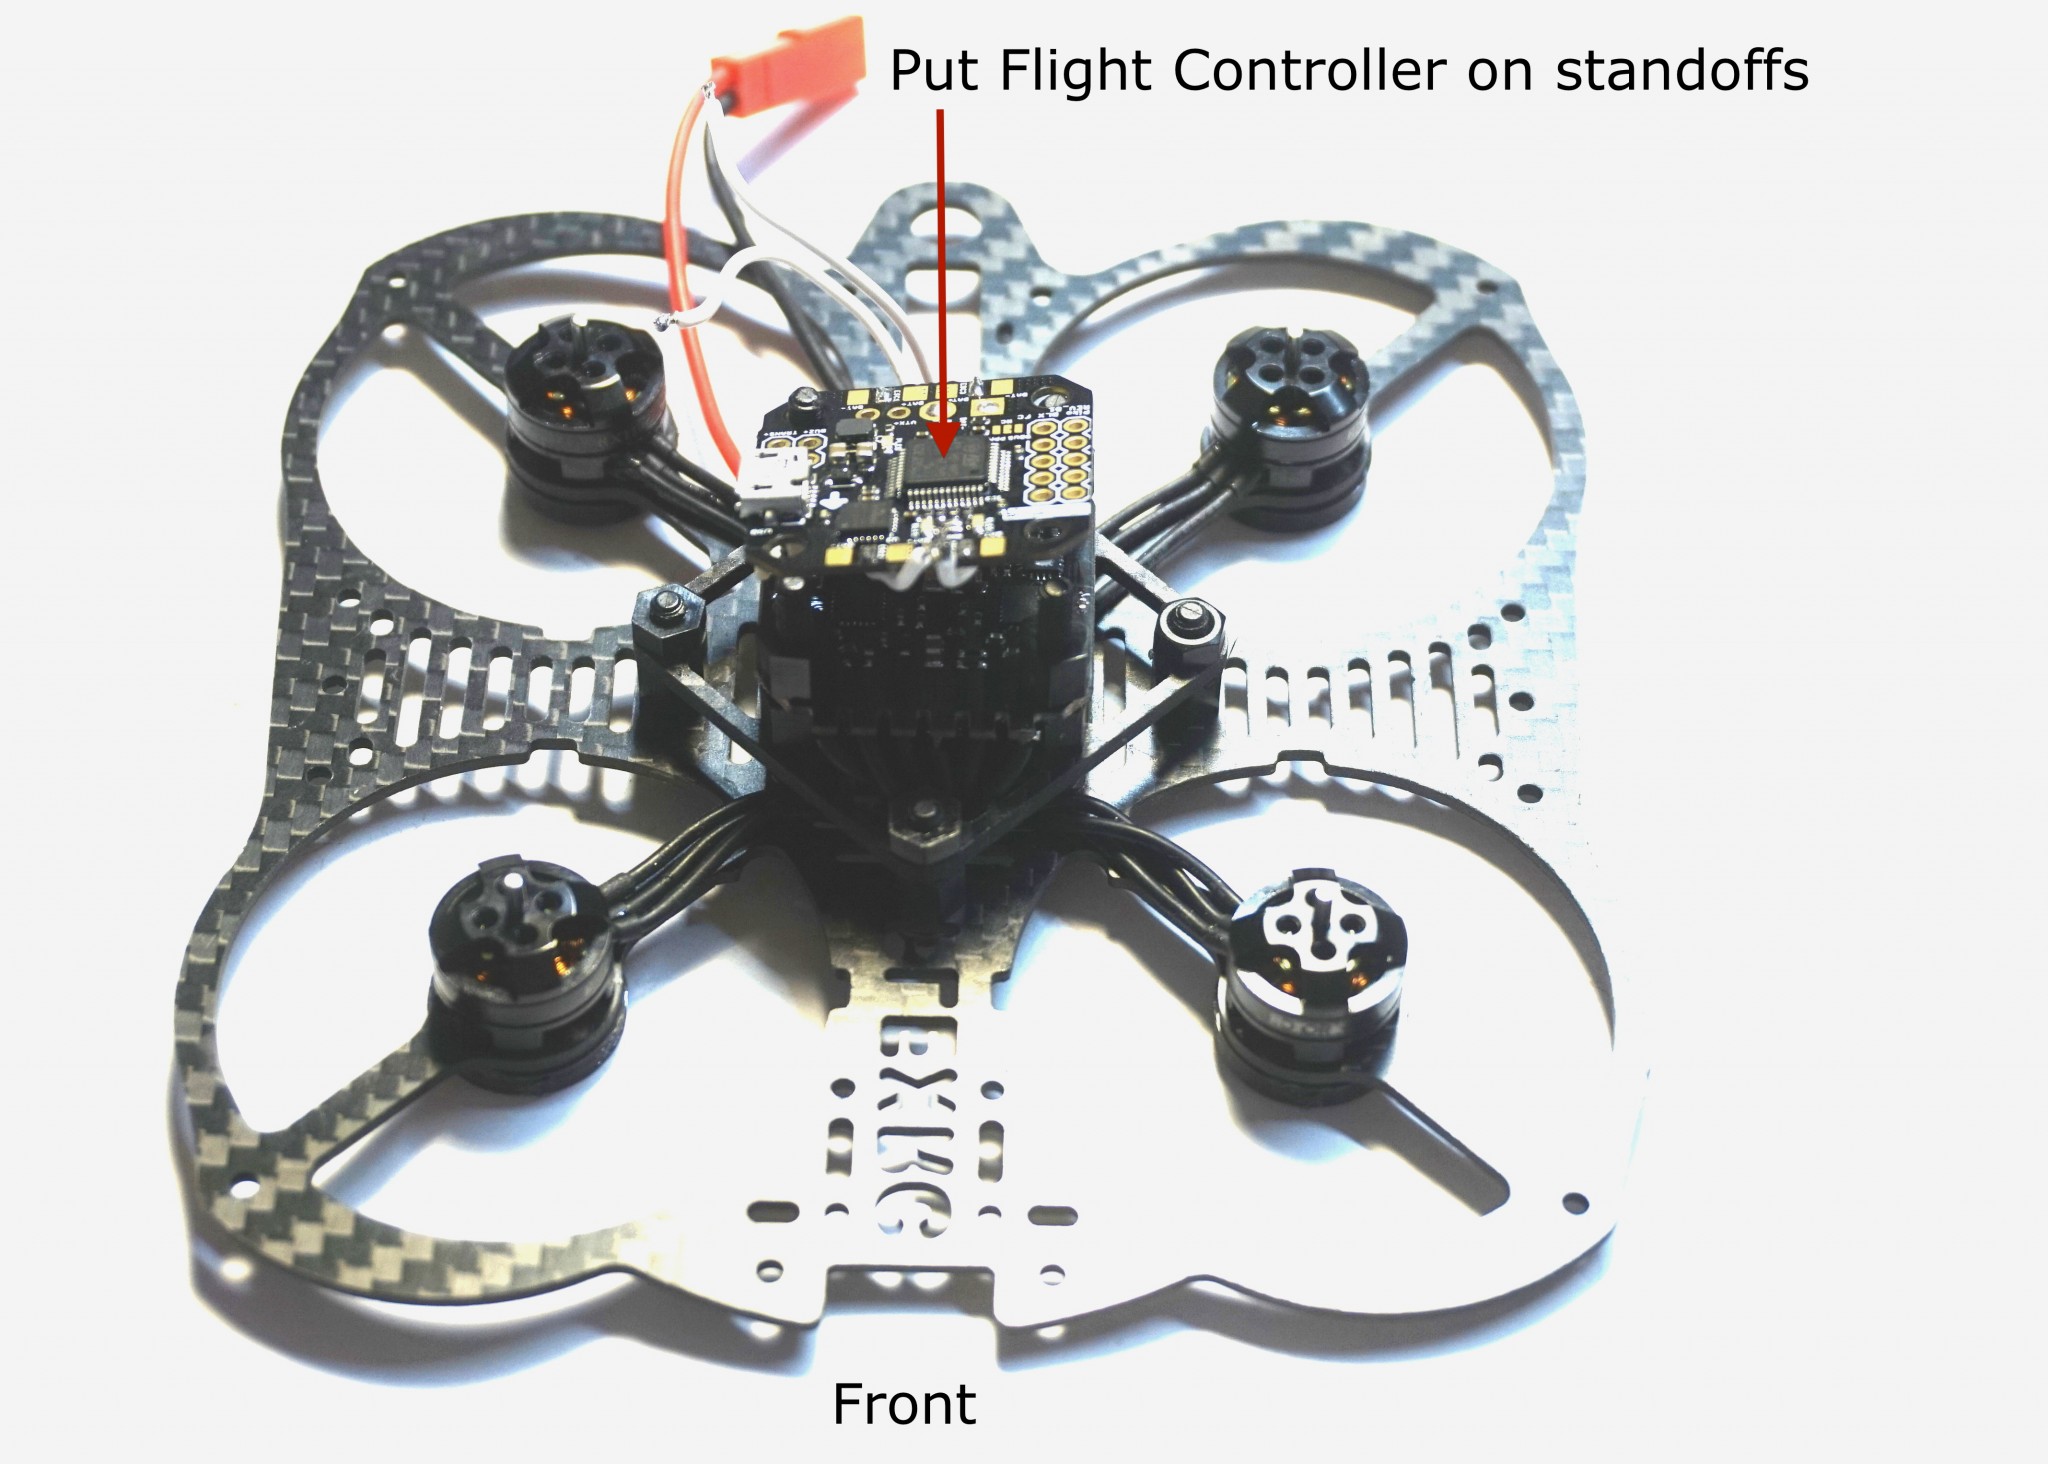
Mount Flight Controller / ESCs stack to the frame with the screws:
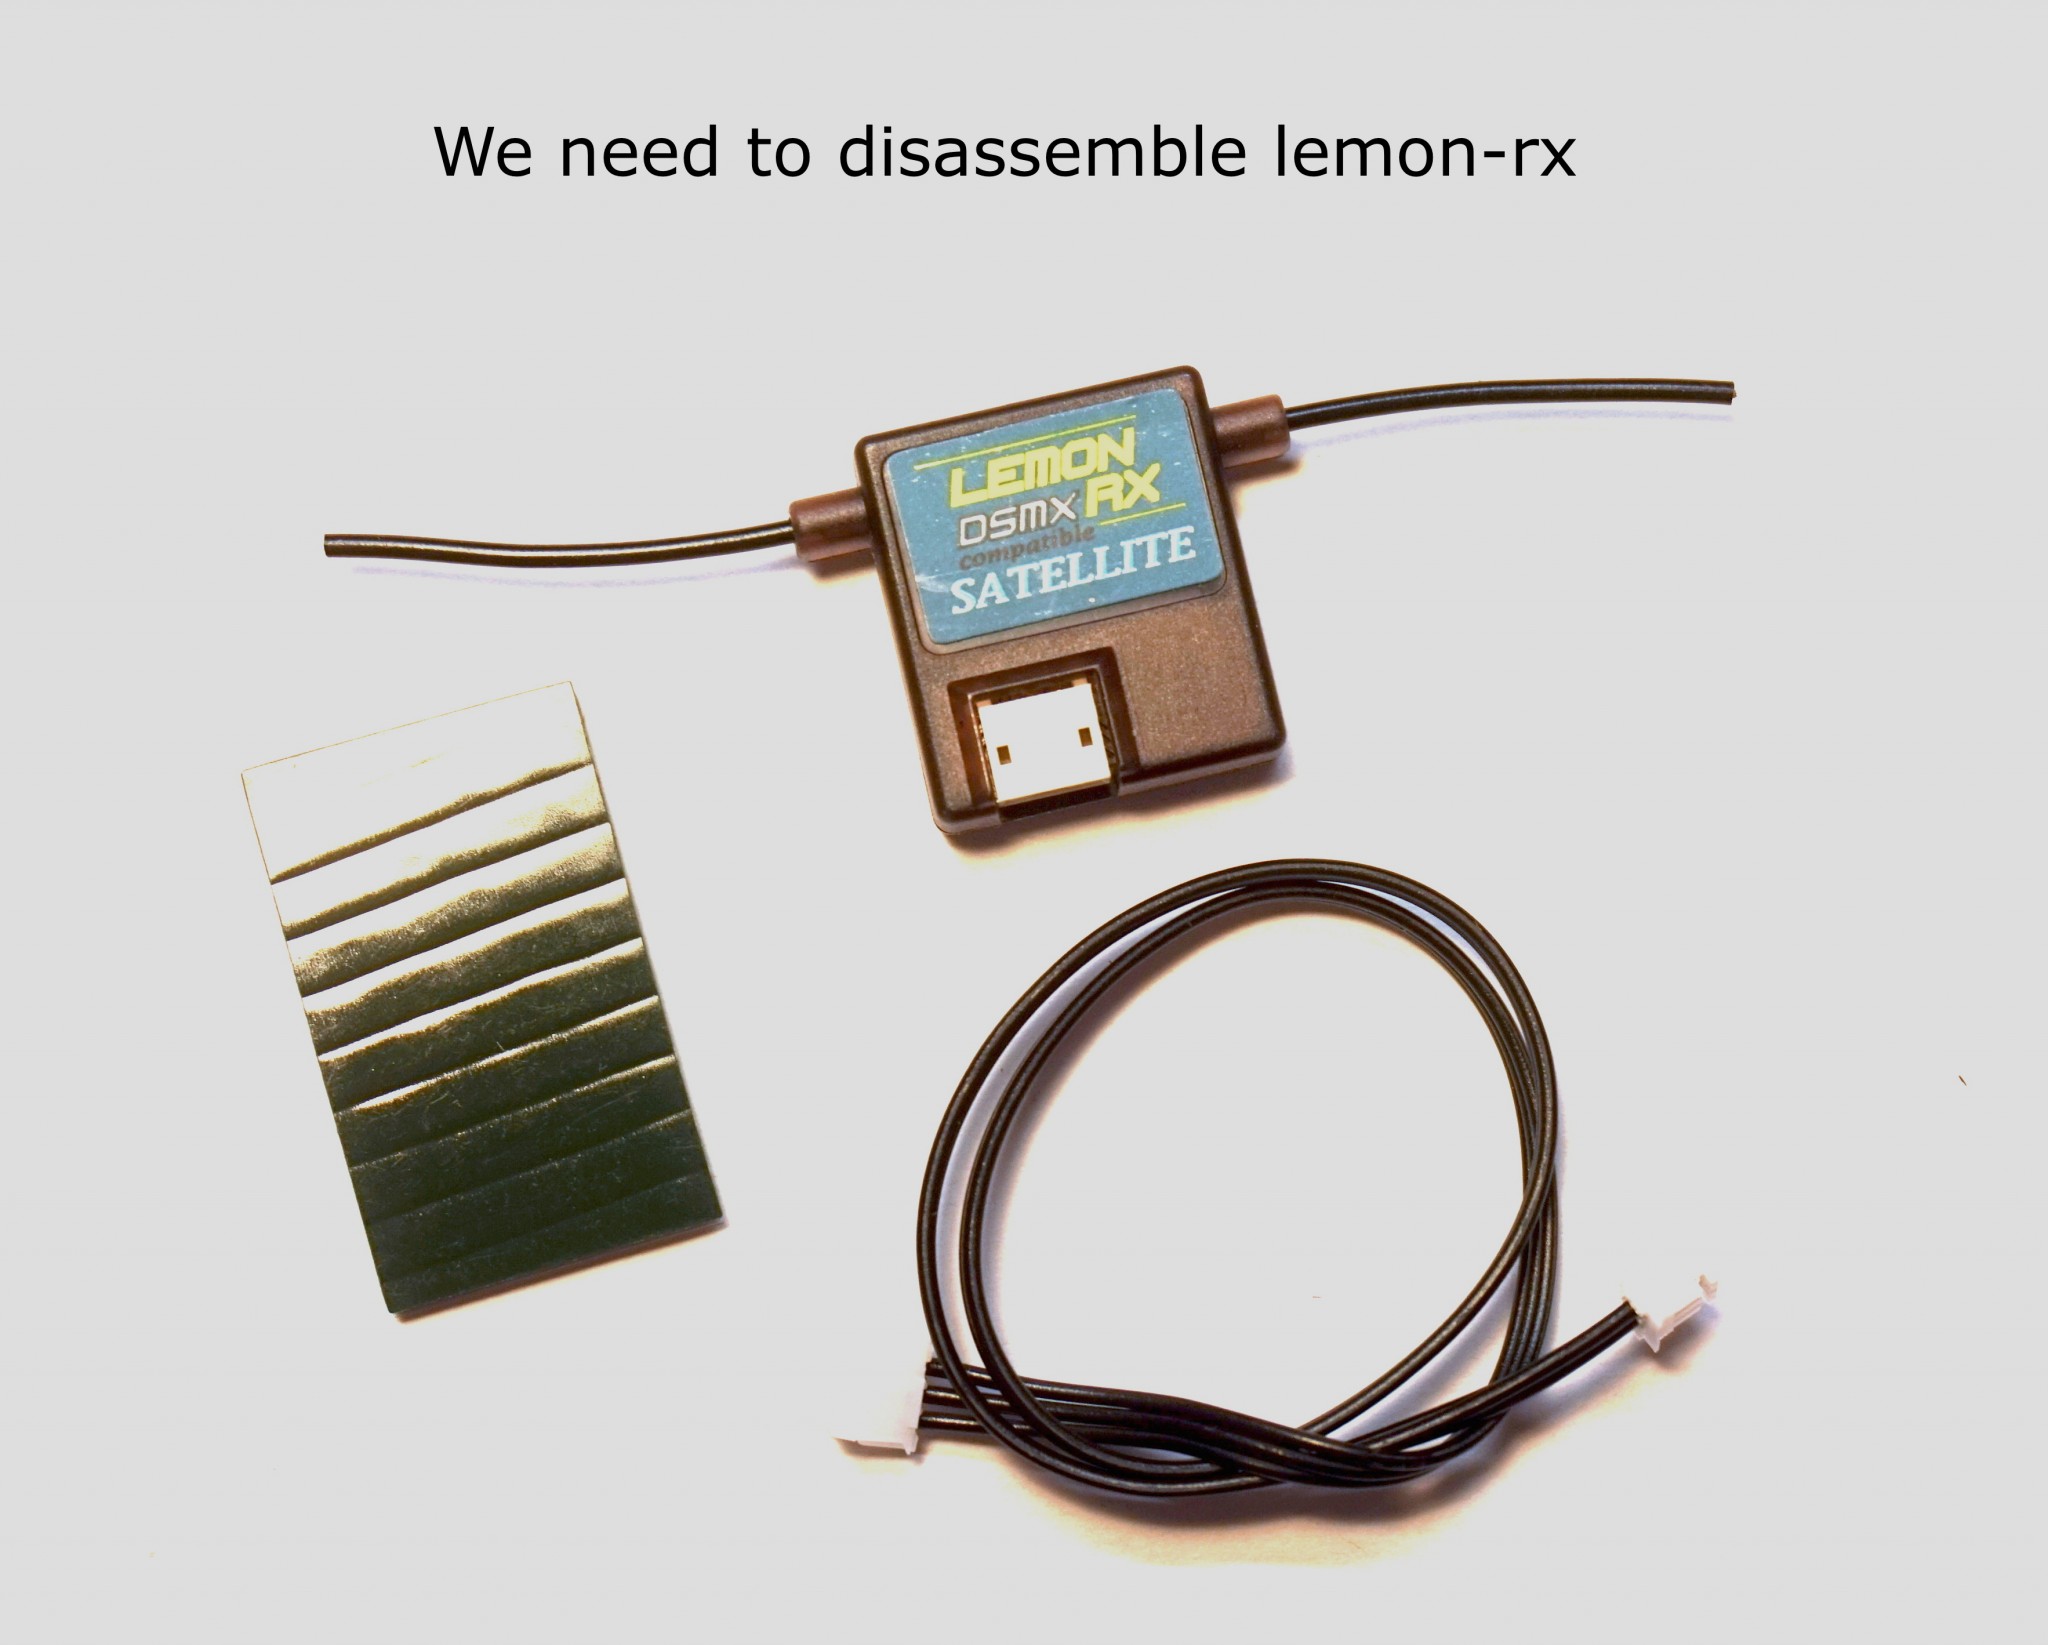
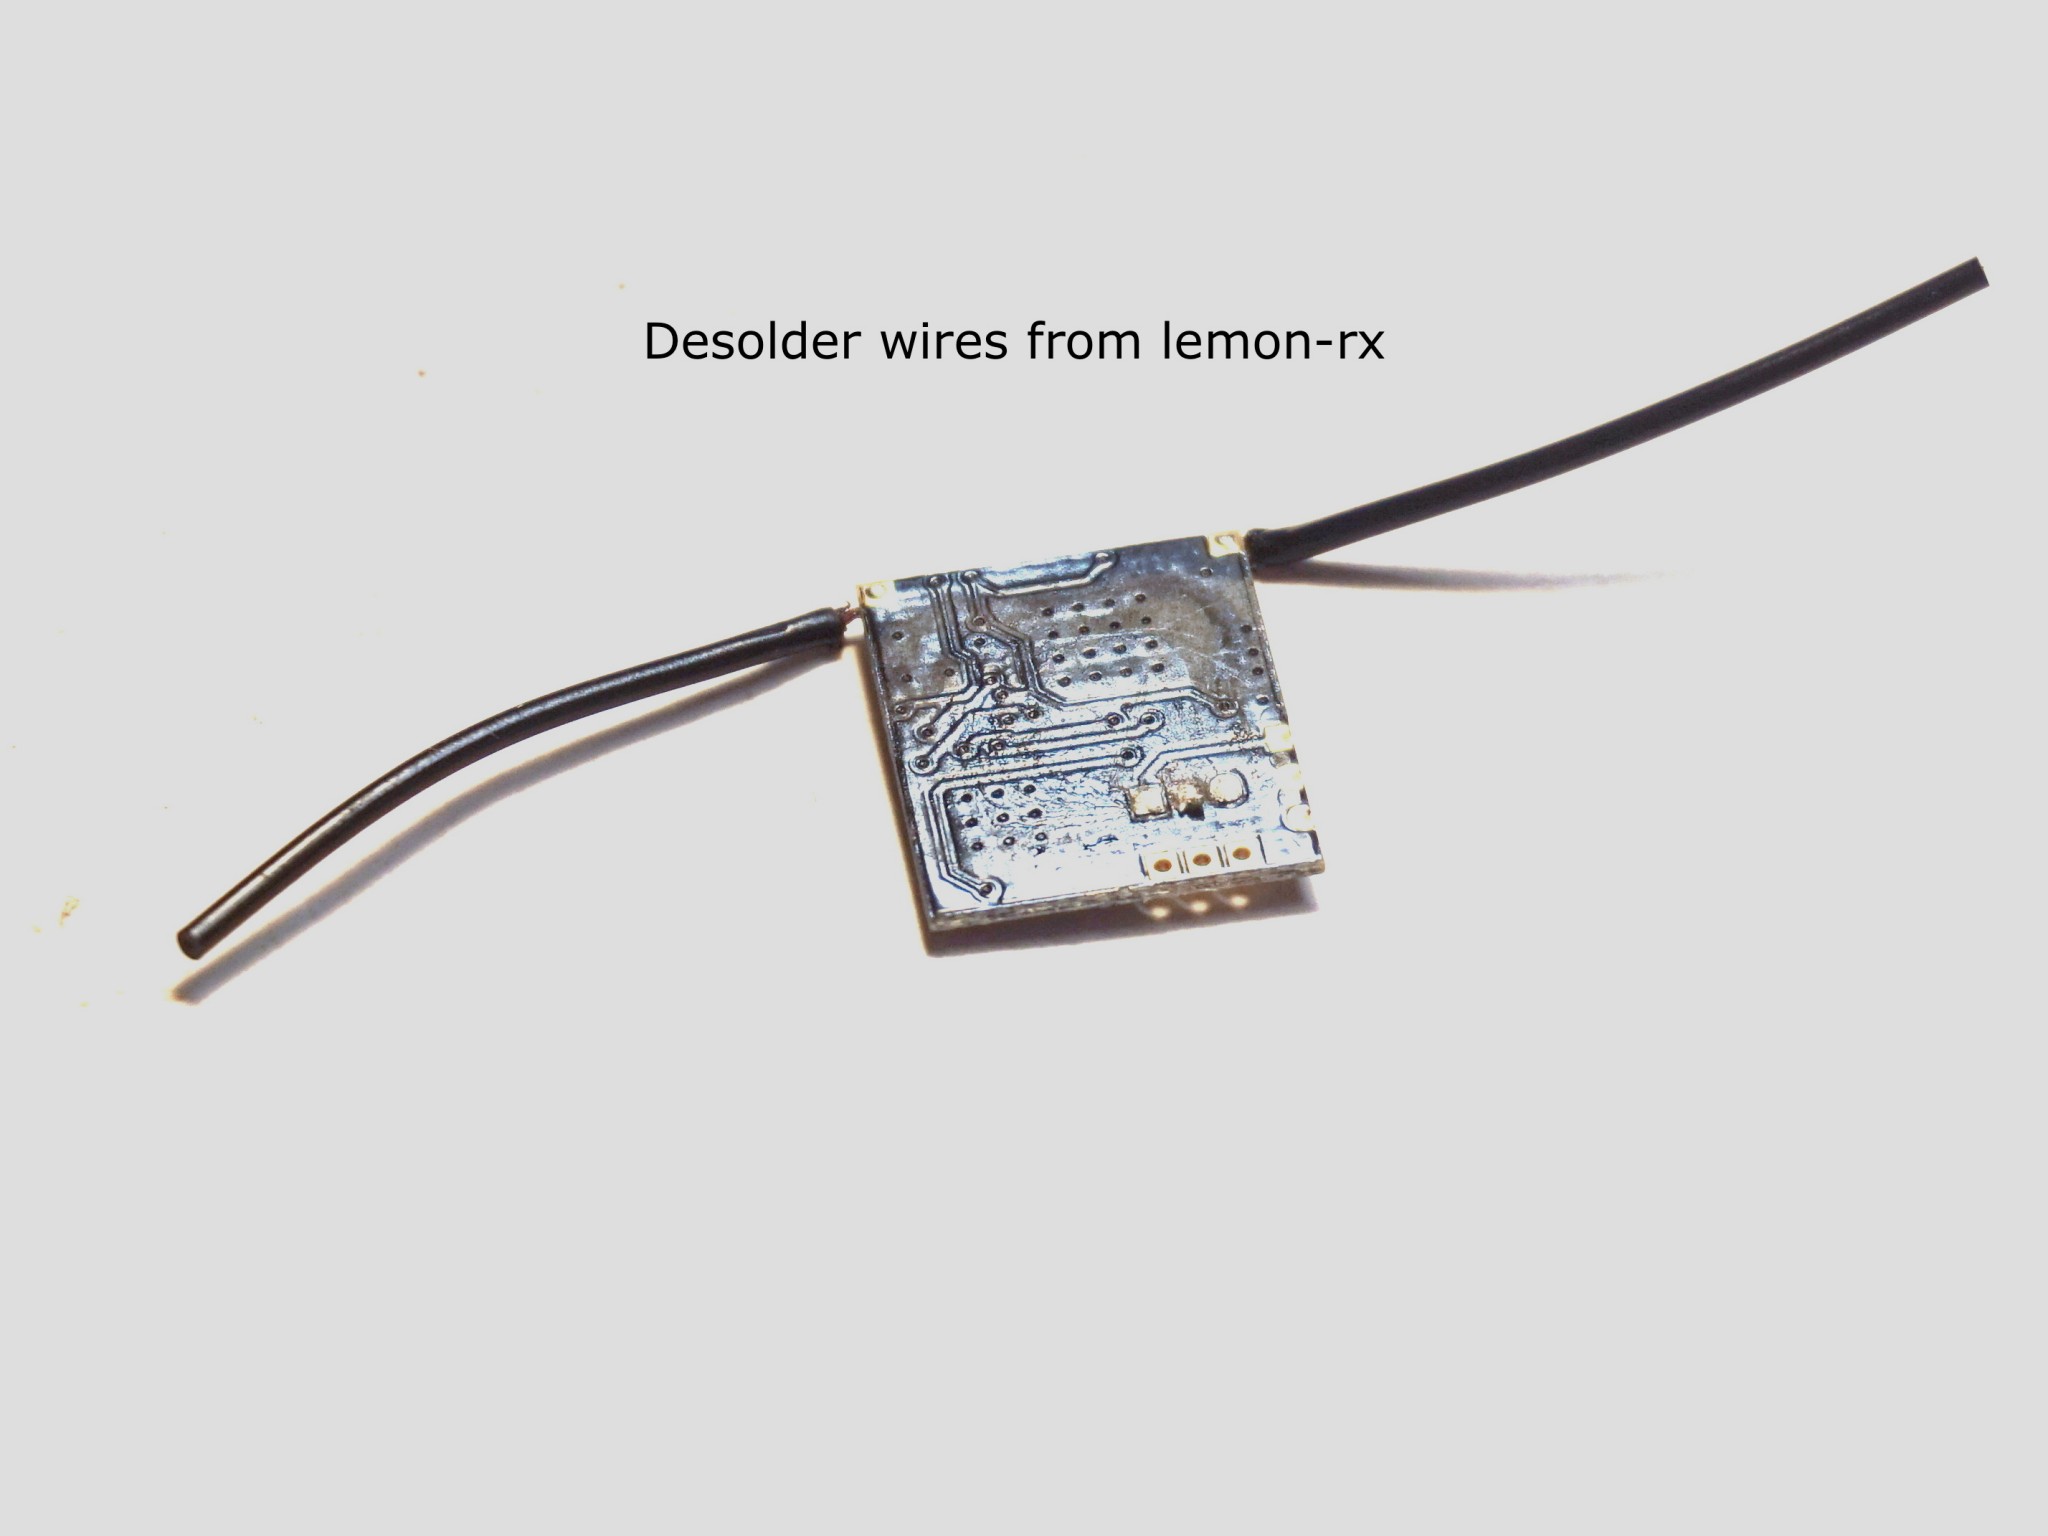
Prepare Lemon-rx DSMX receiver for installation:
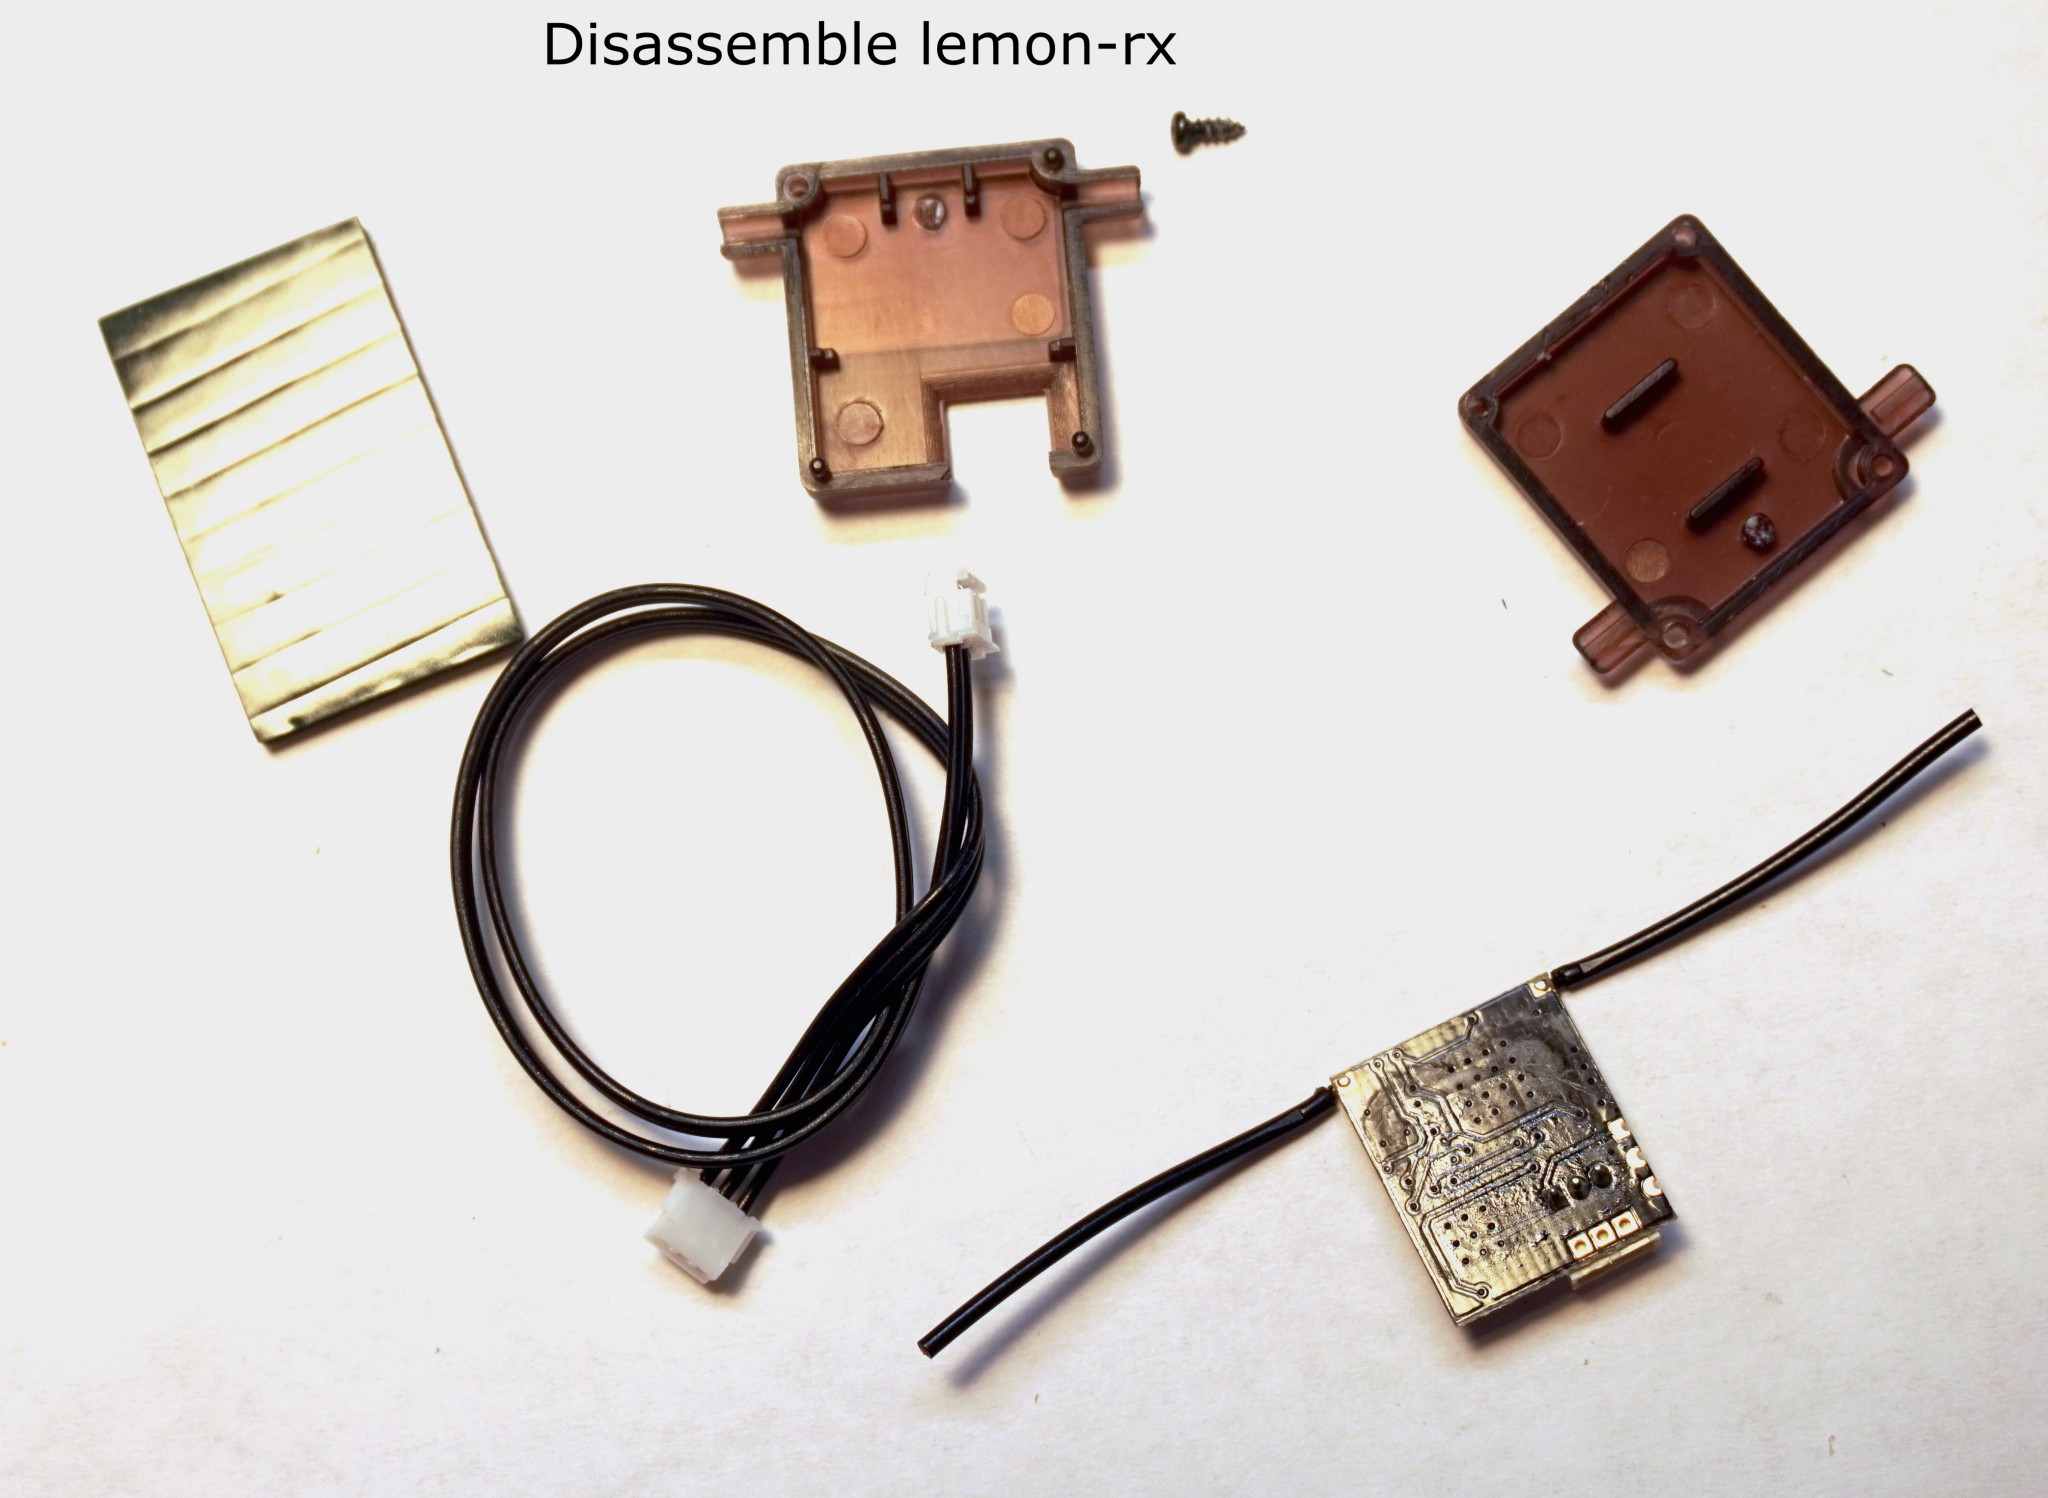
Disassemble case:
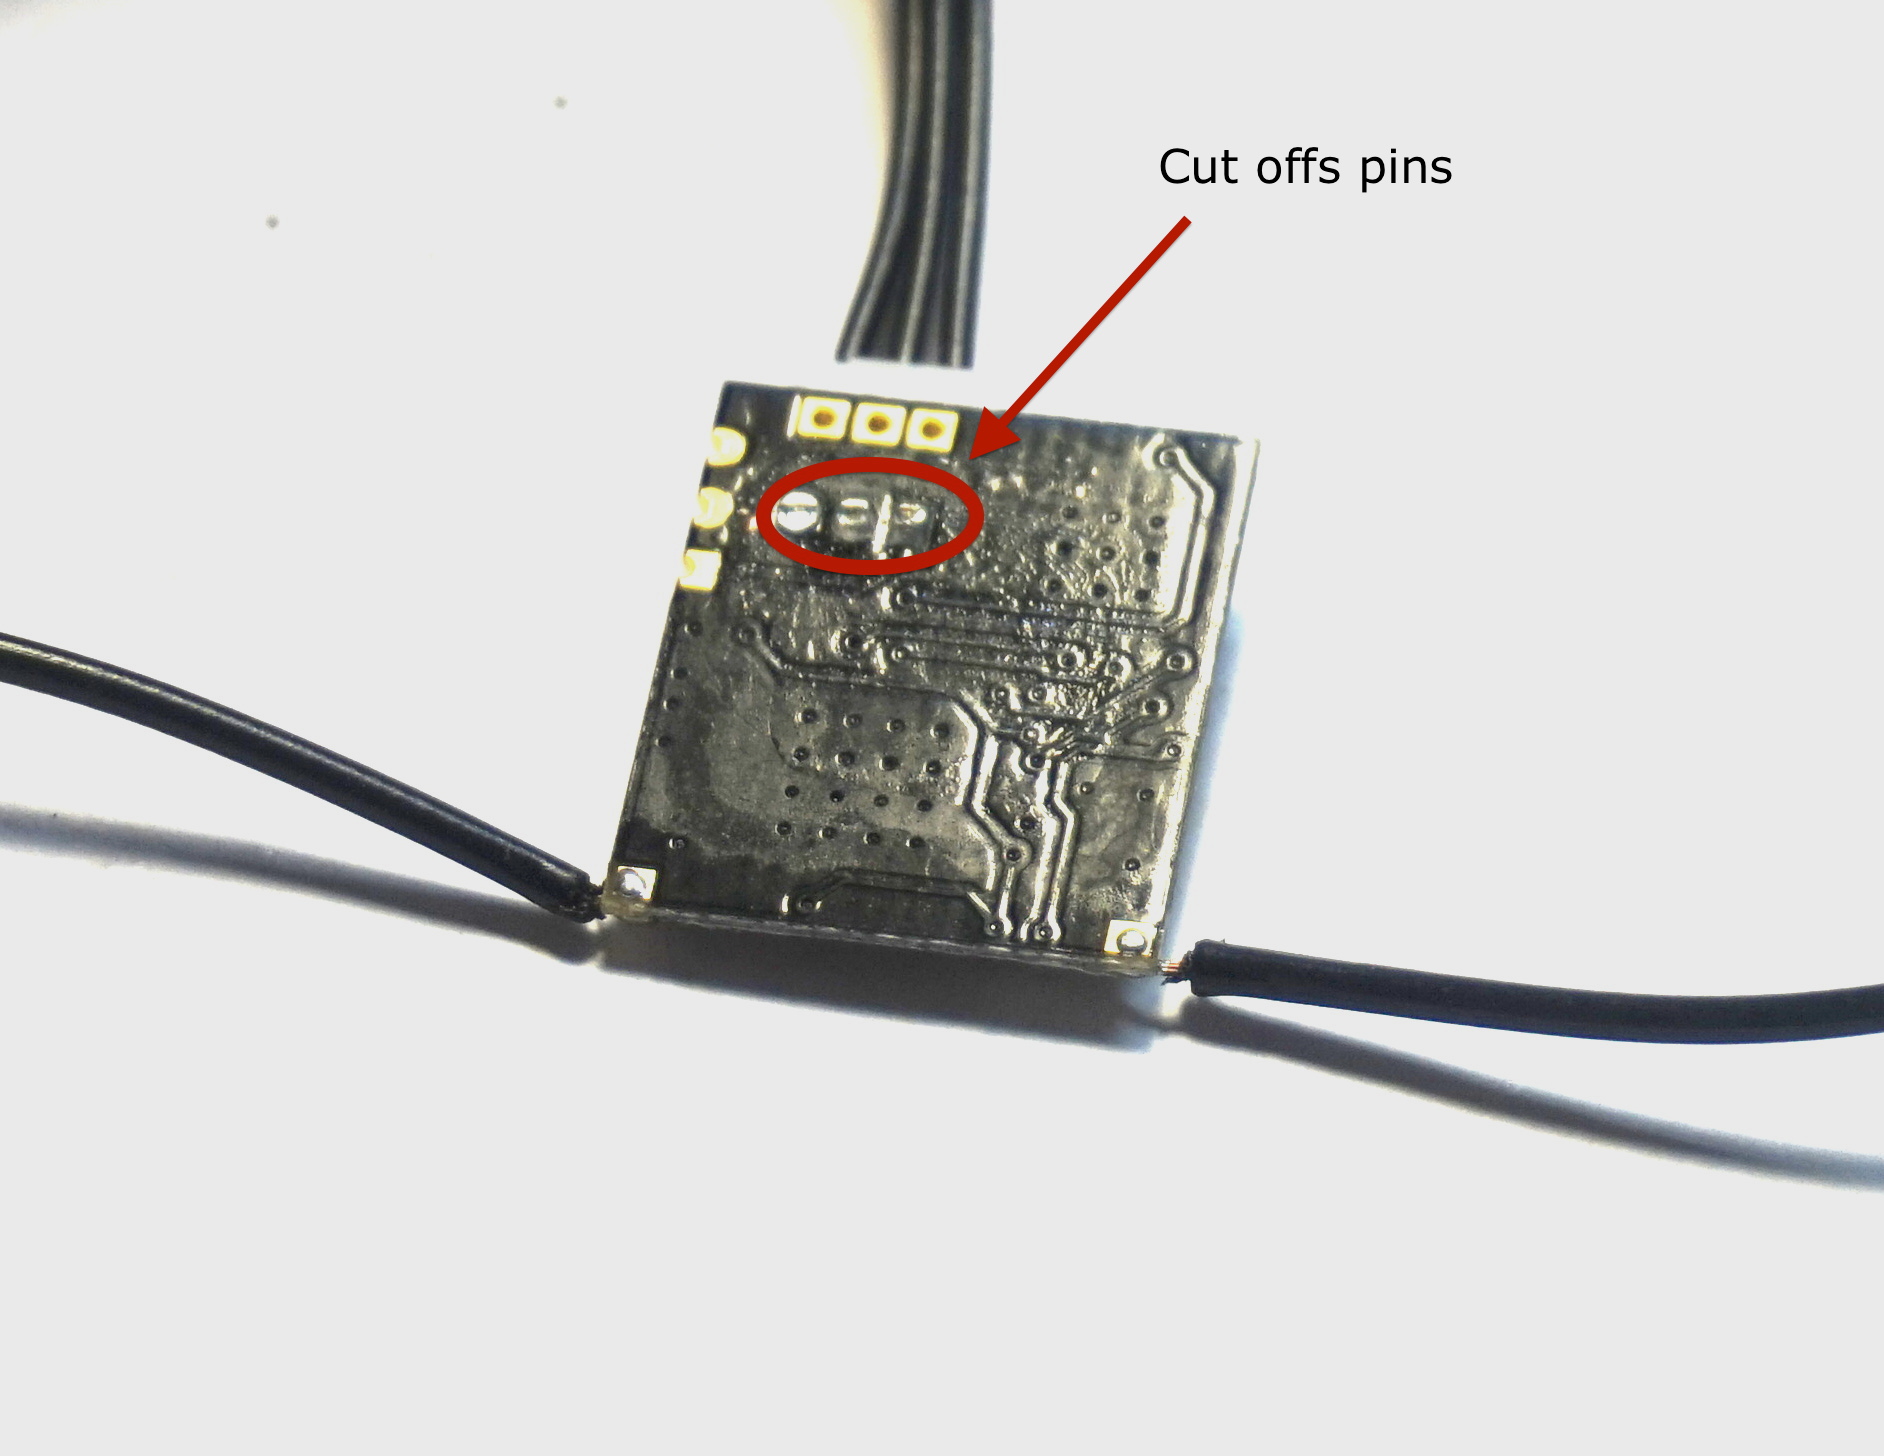
Cut off pins:
Desolder connector, because it is too tall:
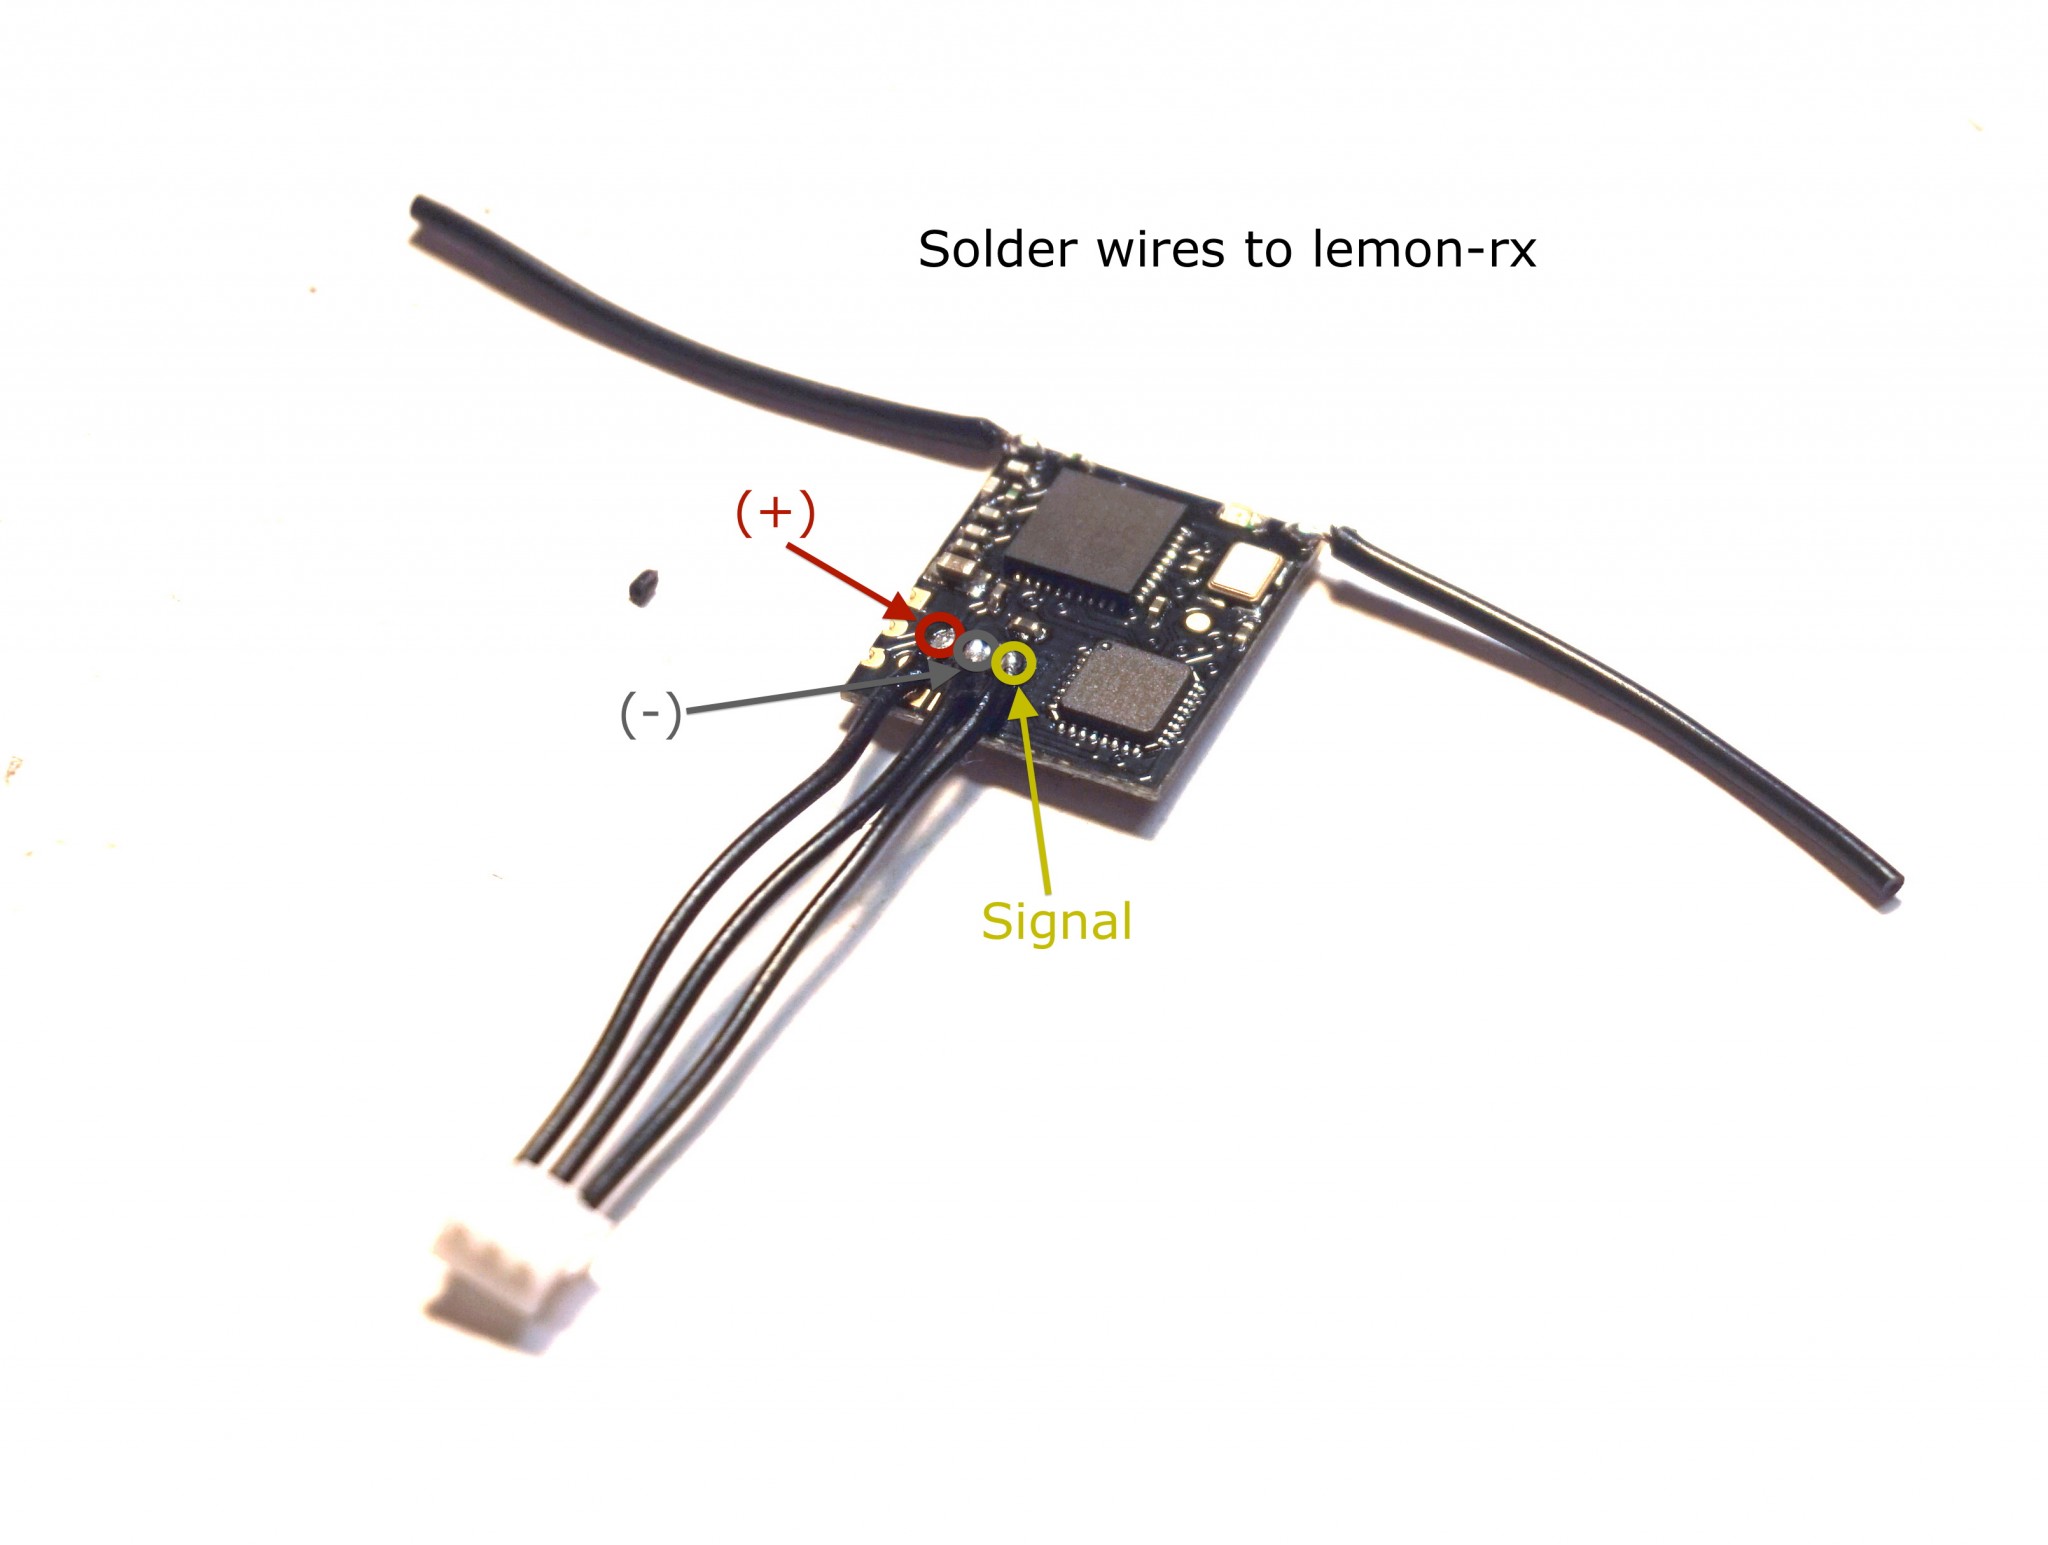
Measure required wire length, which should be around 4cm and solder to lemon-rx receiver:
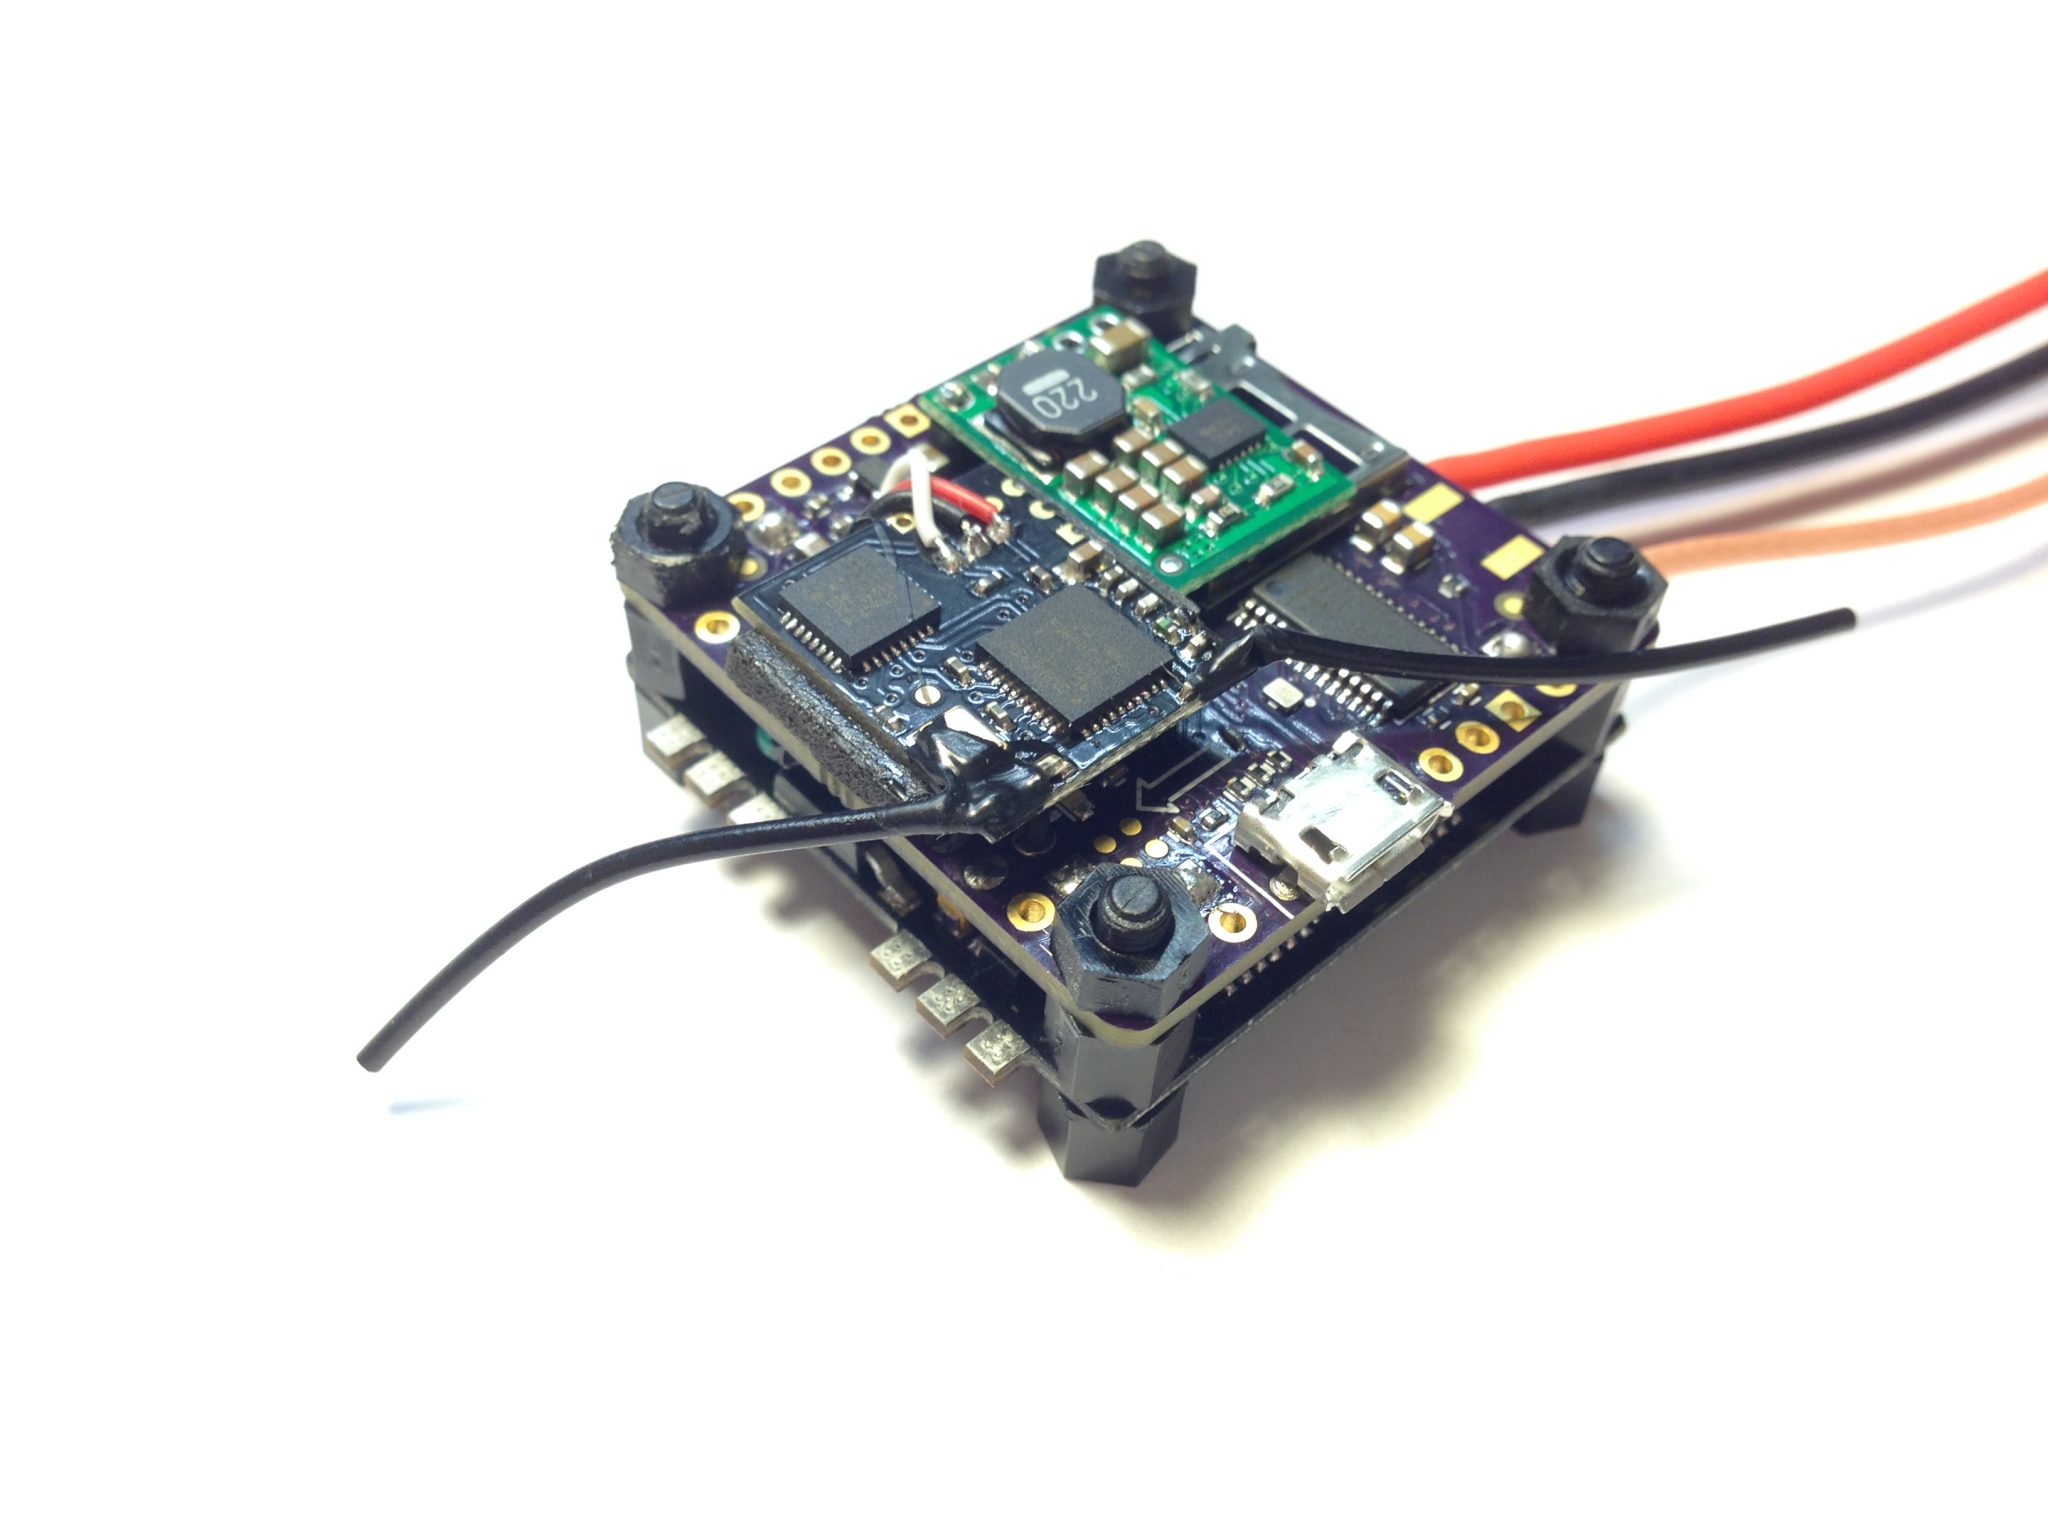
Stick electric tape from both sides of lemon-rx receiver and connect to Piko BLX:
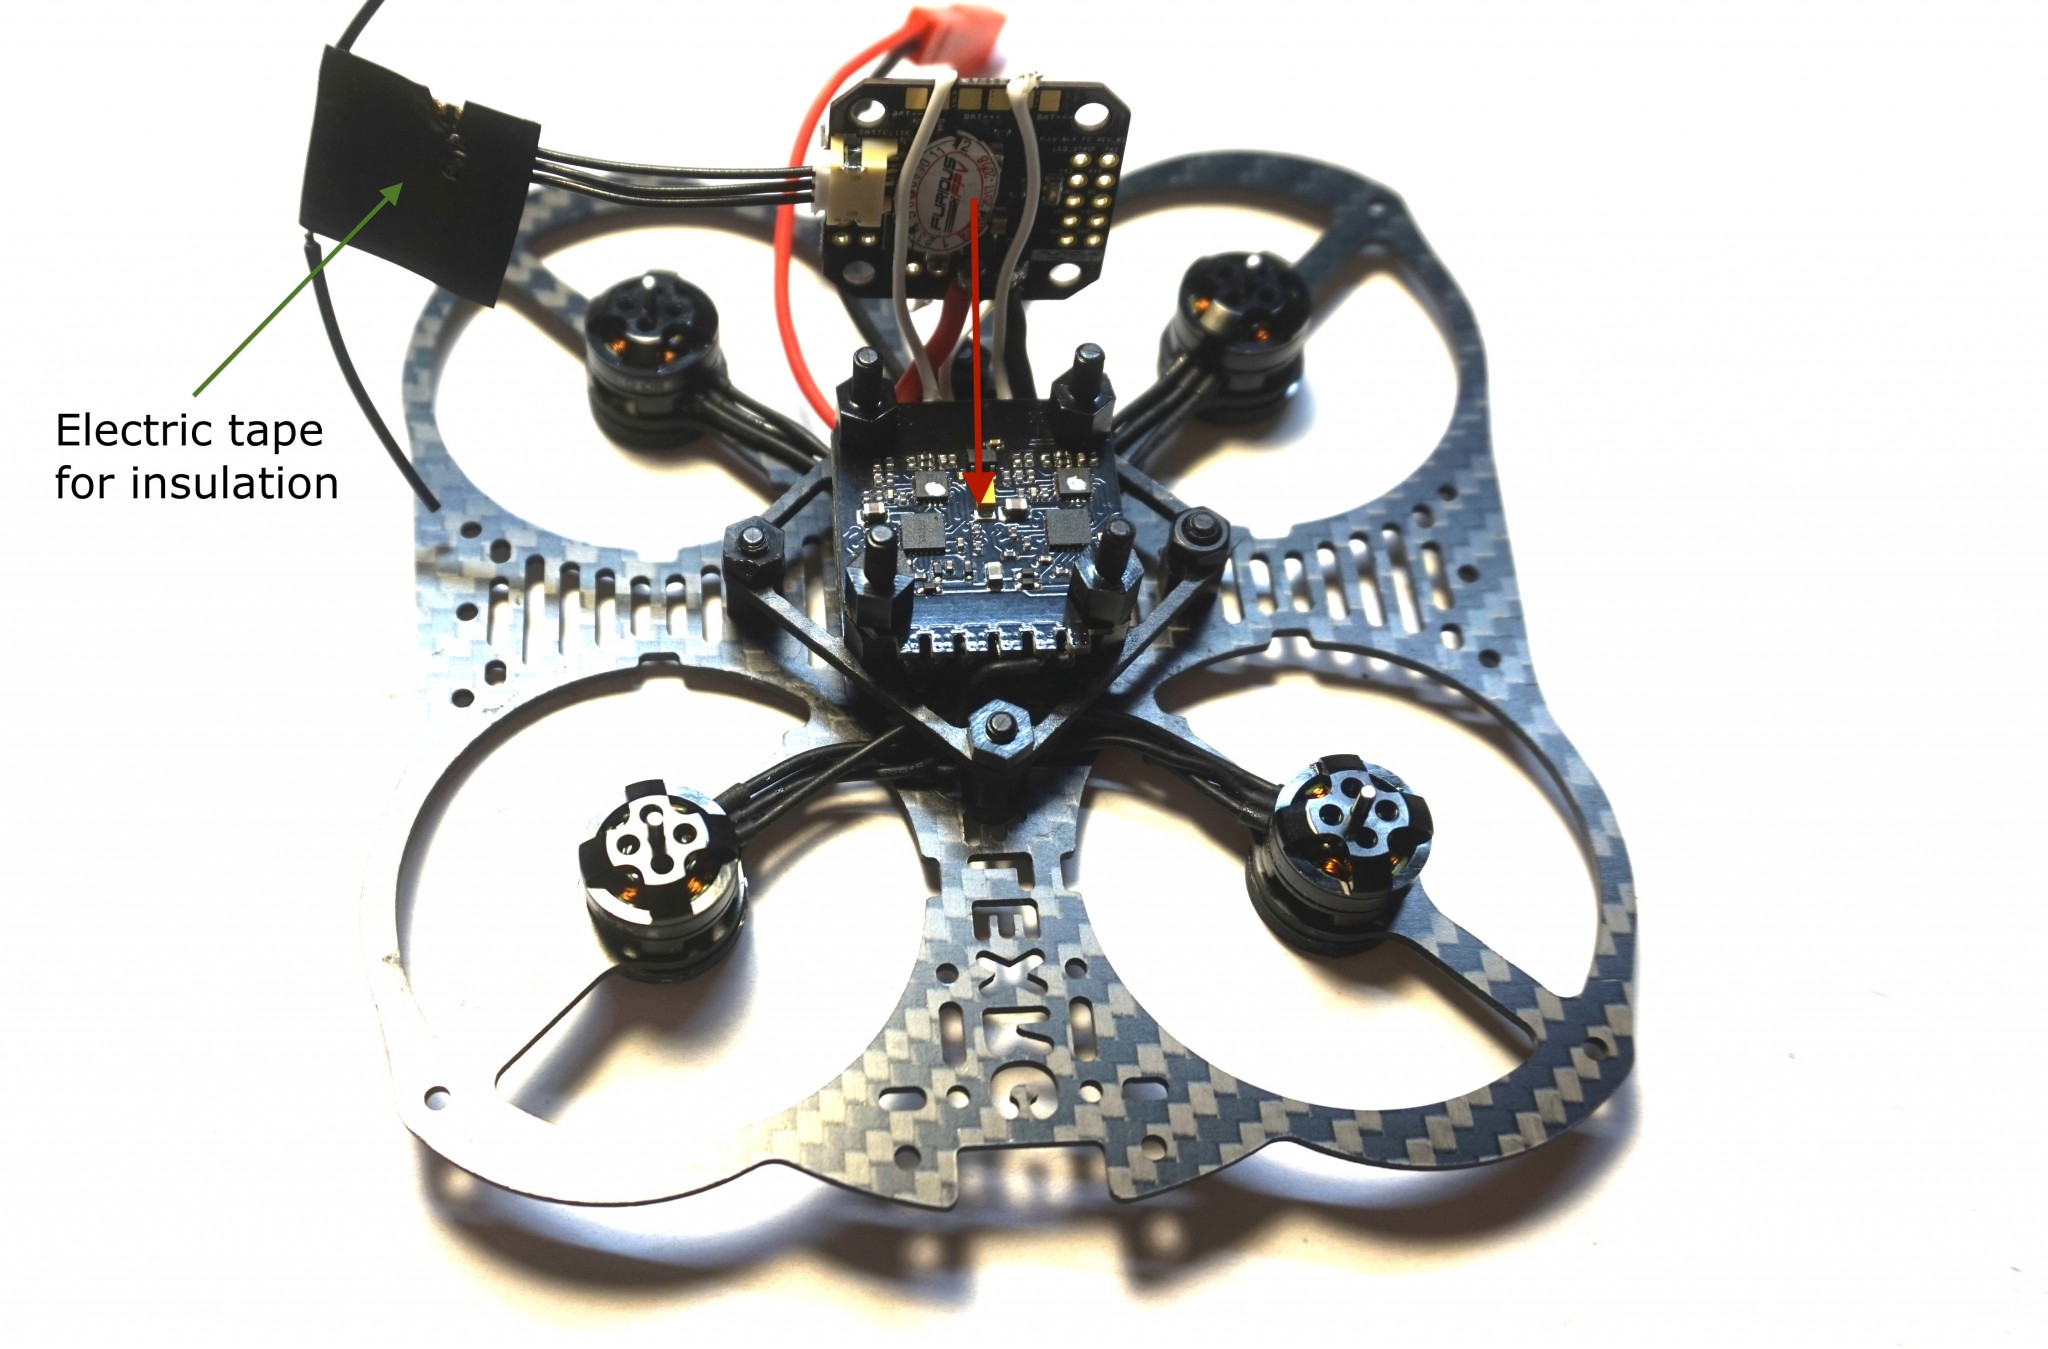
Put lemon-rx DSMX receiver between top esc and Piko BLX flight controller:
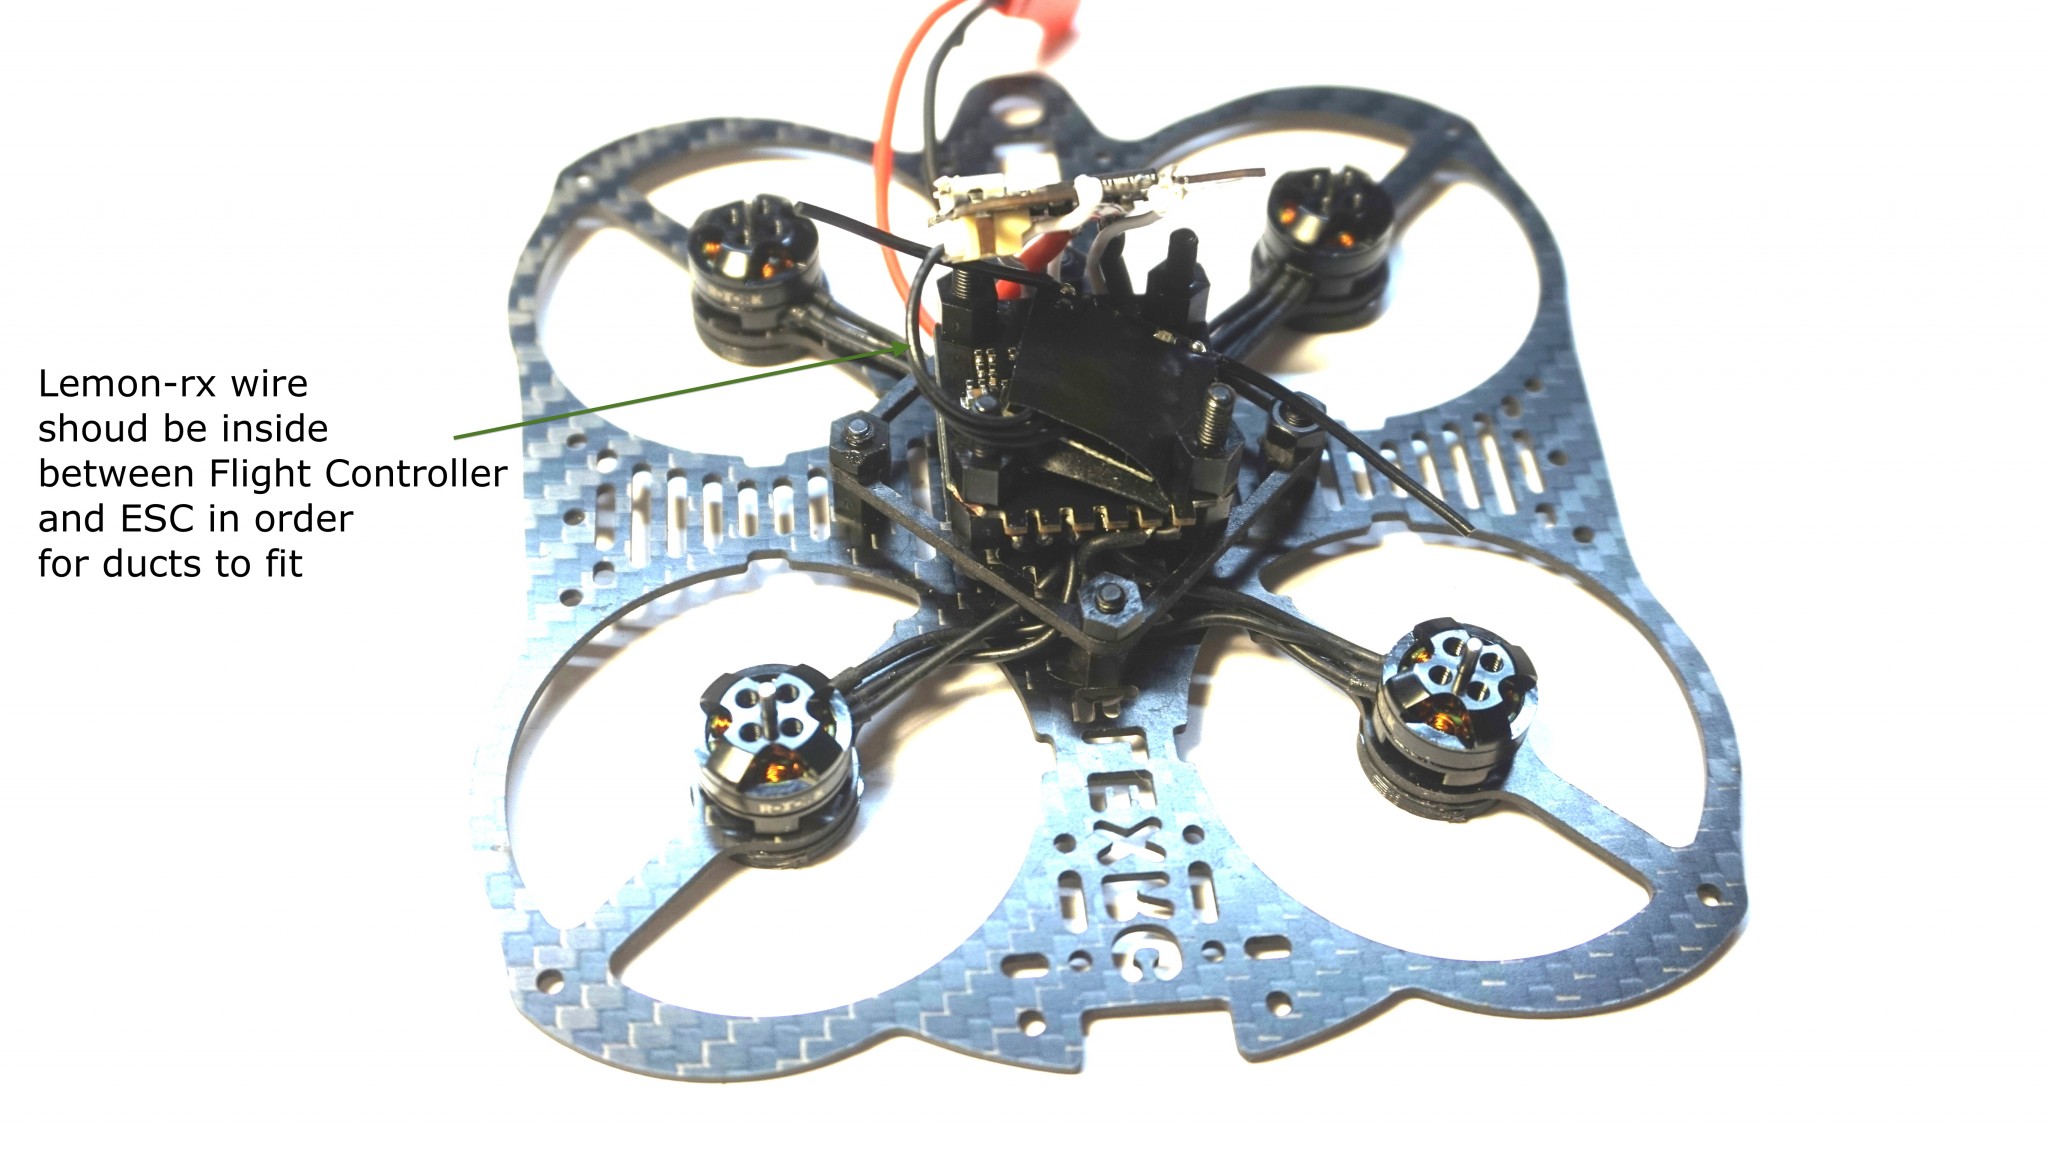
Put flight controller on standoffs, make sure that lemon-rx wires will be inside, so ducts can be installed:
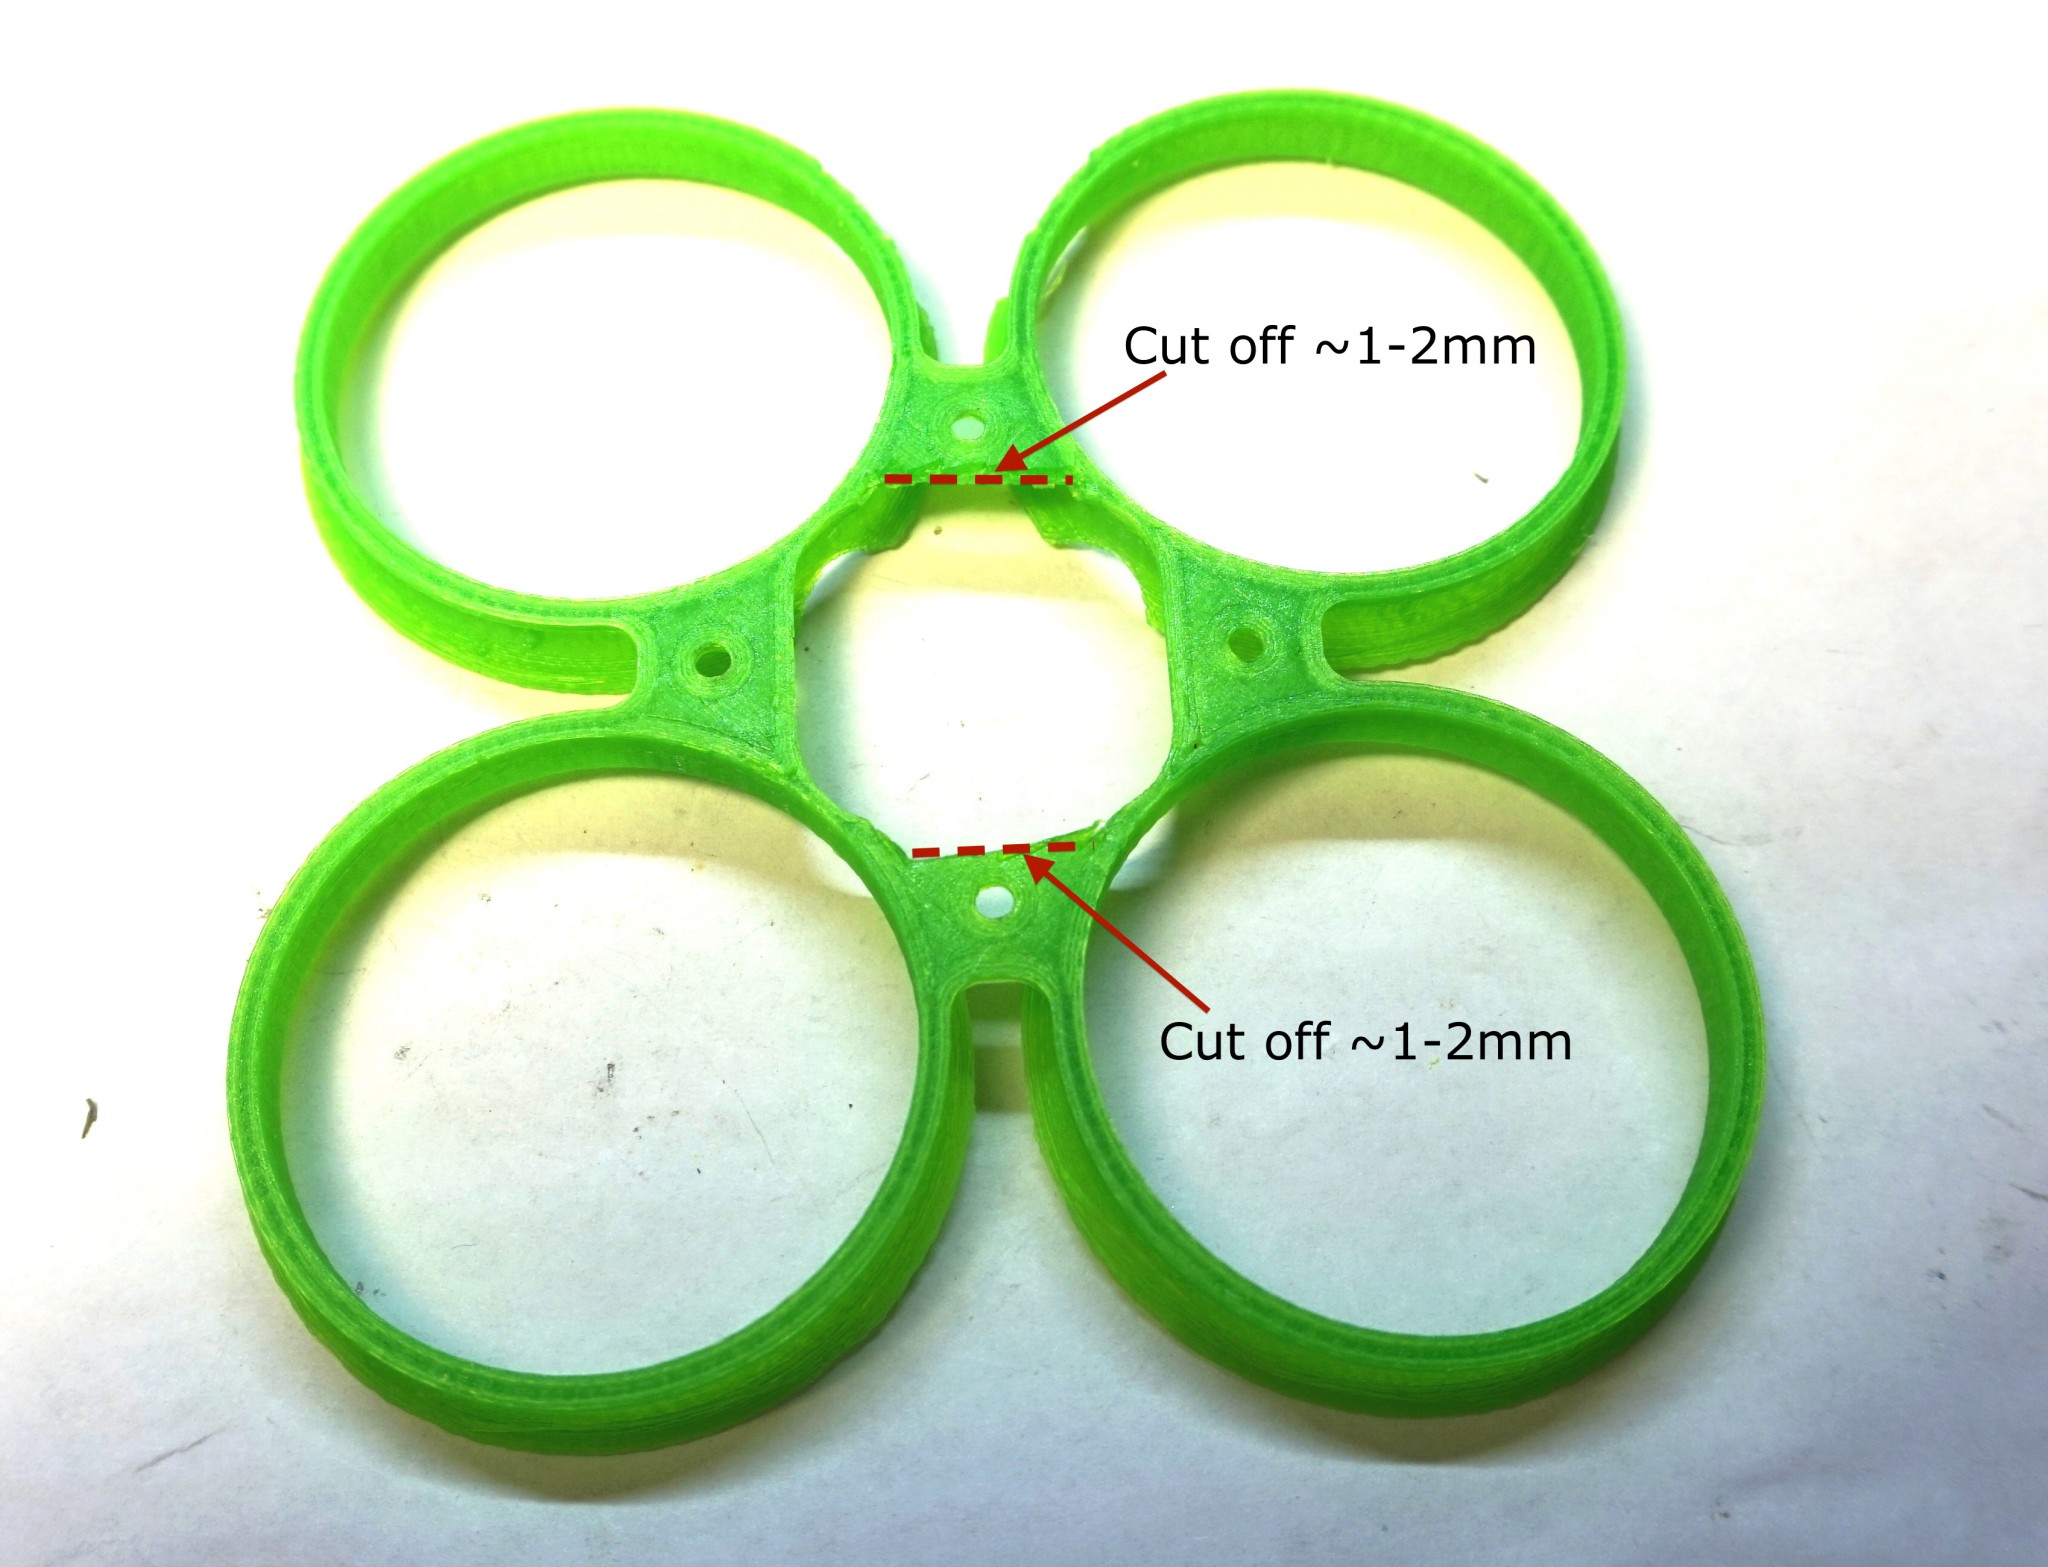
2 in 1 ESC layout has be slightly changed, so you might need to modify ducts a little bit by cutting off 1-2mm of the plastic from front and rear sides:
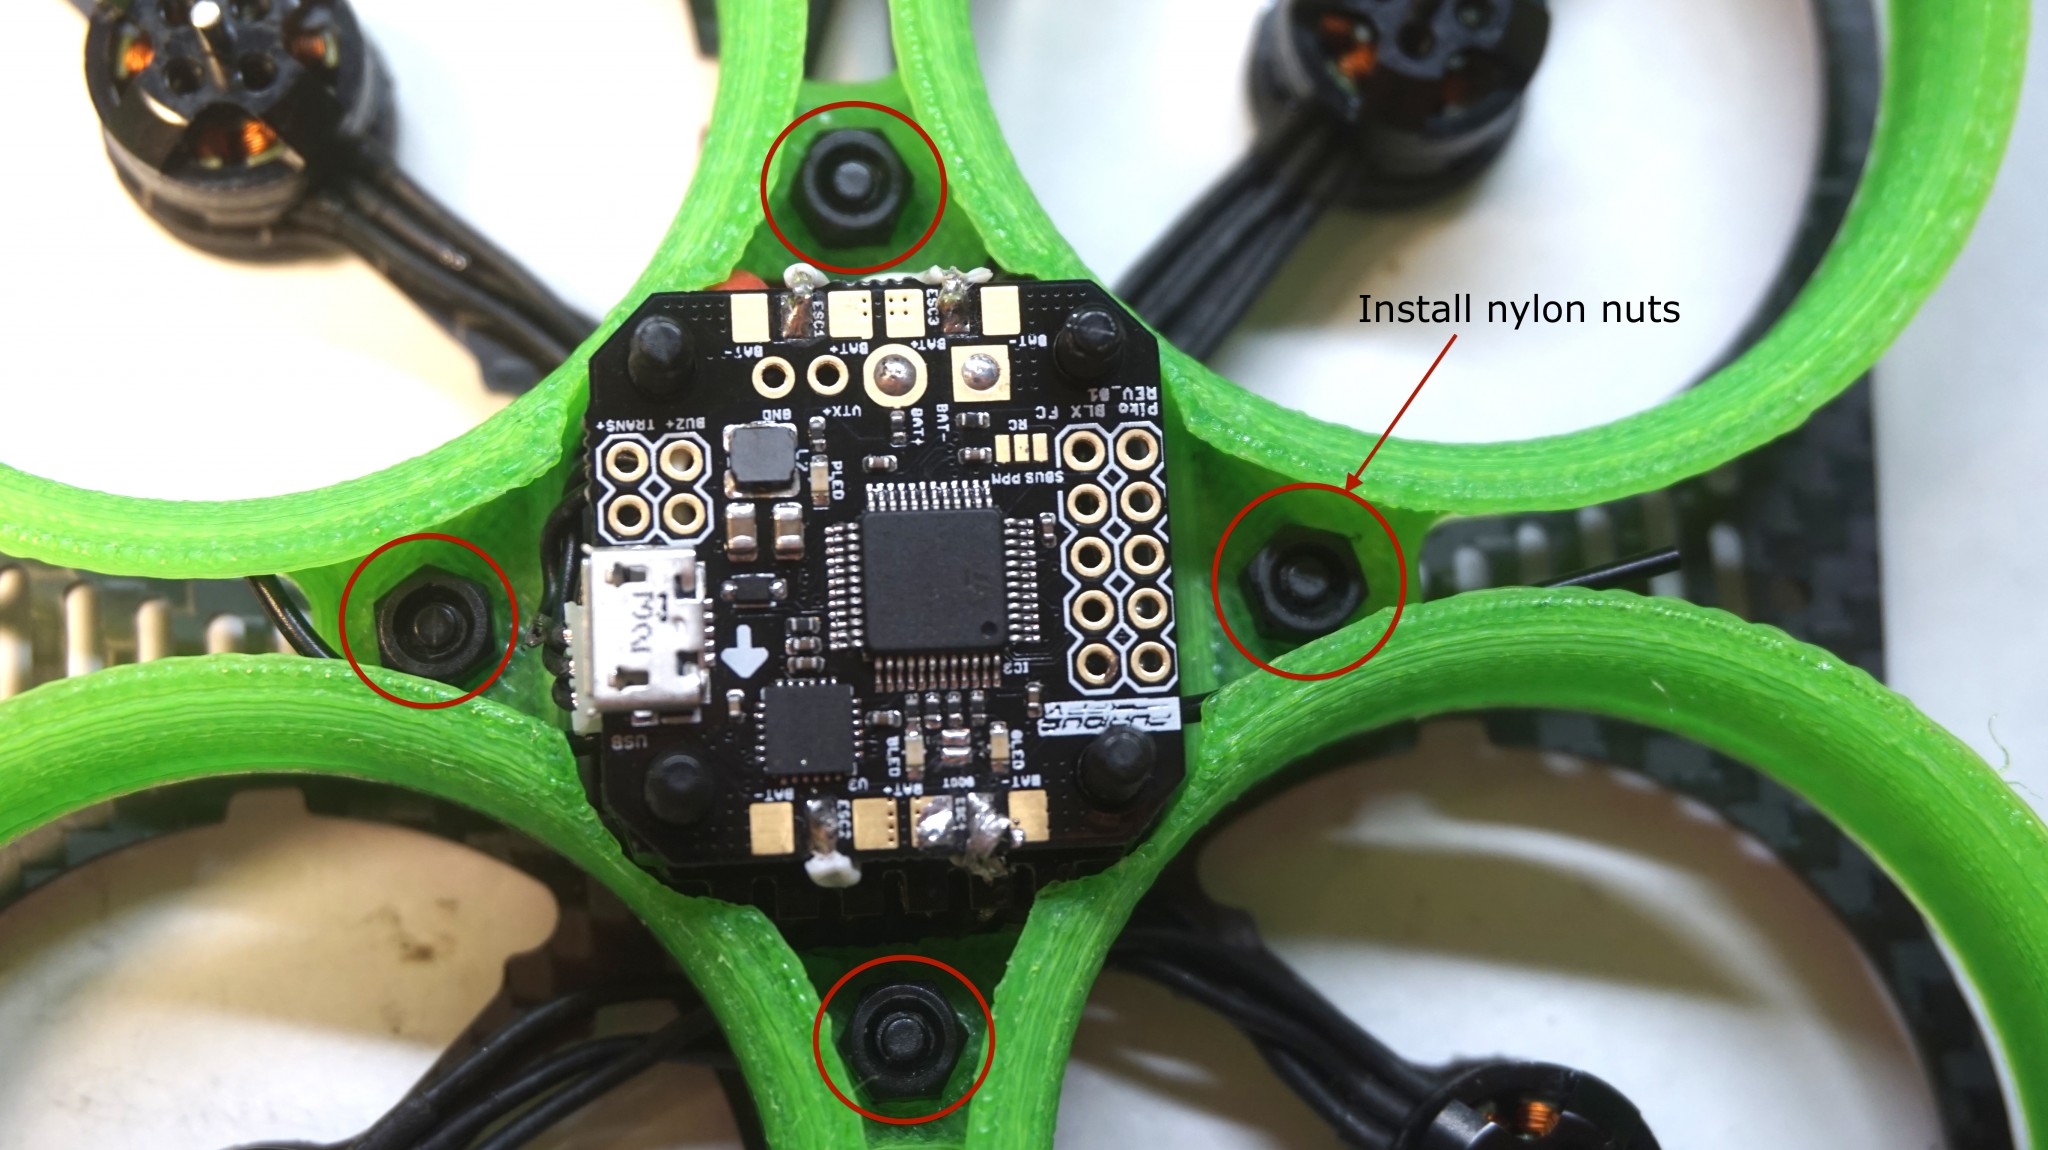
Slide of ducts, try not to apply too much pressure to avoid damaging wires, observer that wires are not stretched during installation. Then use nylon screws to secure ducts in place.
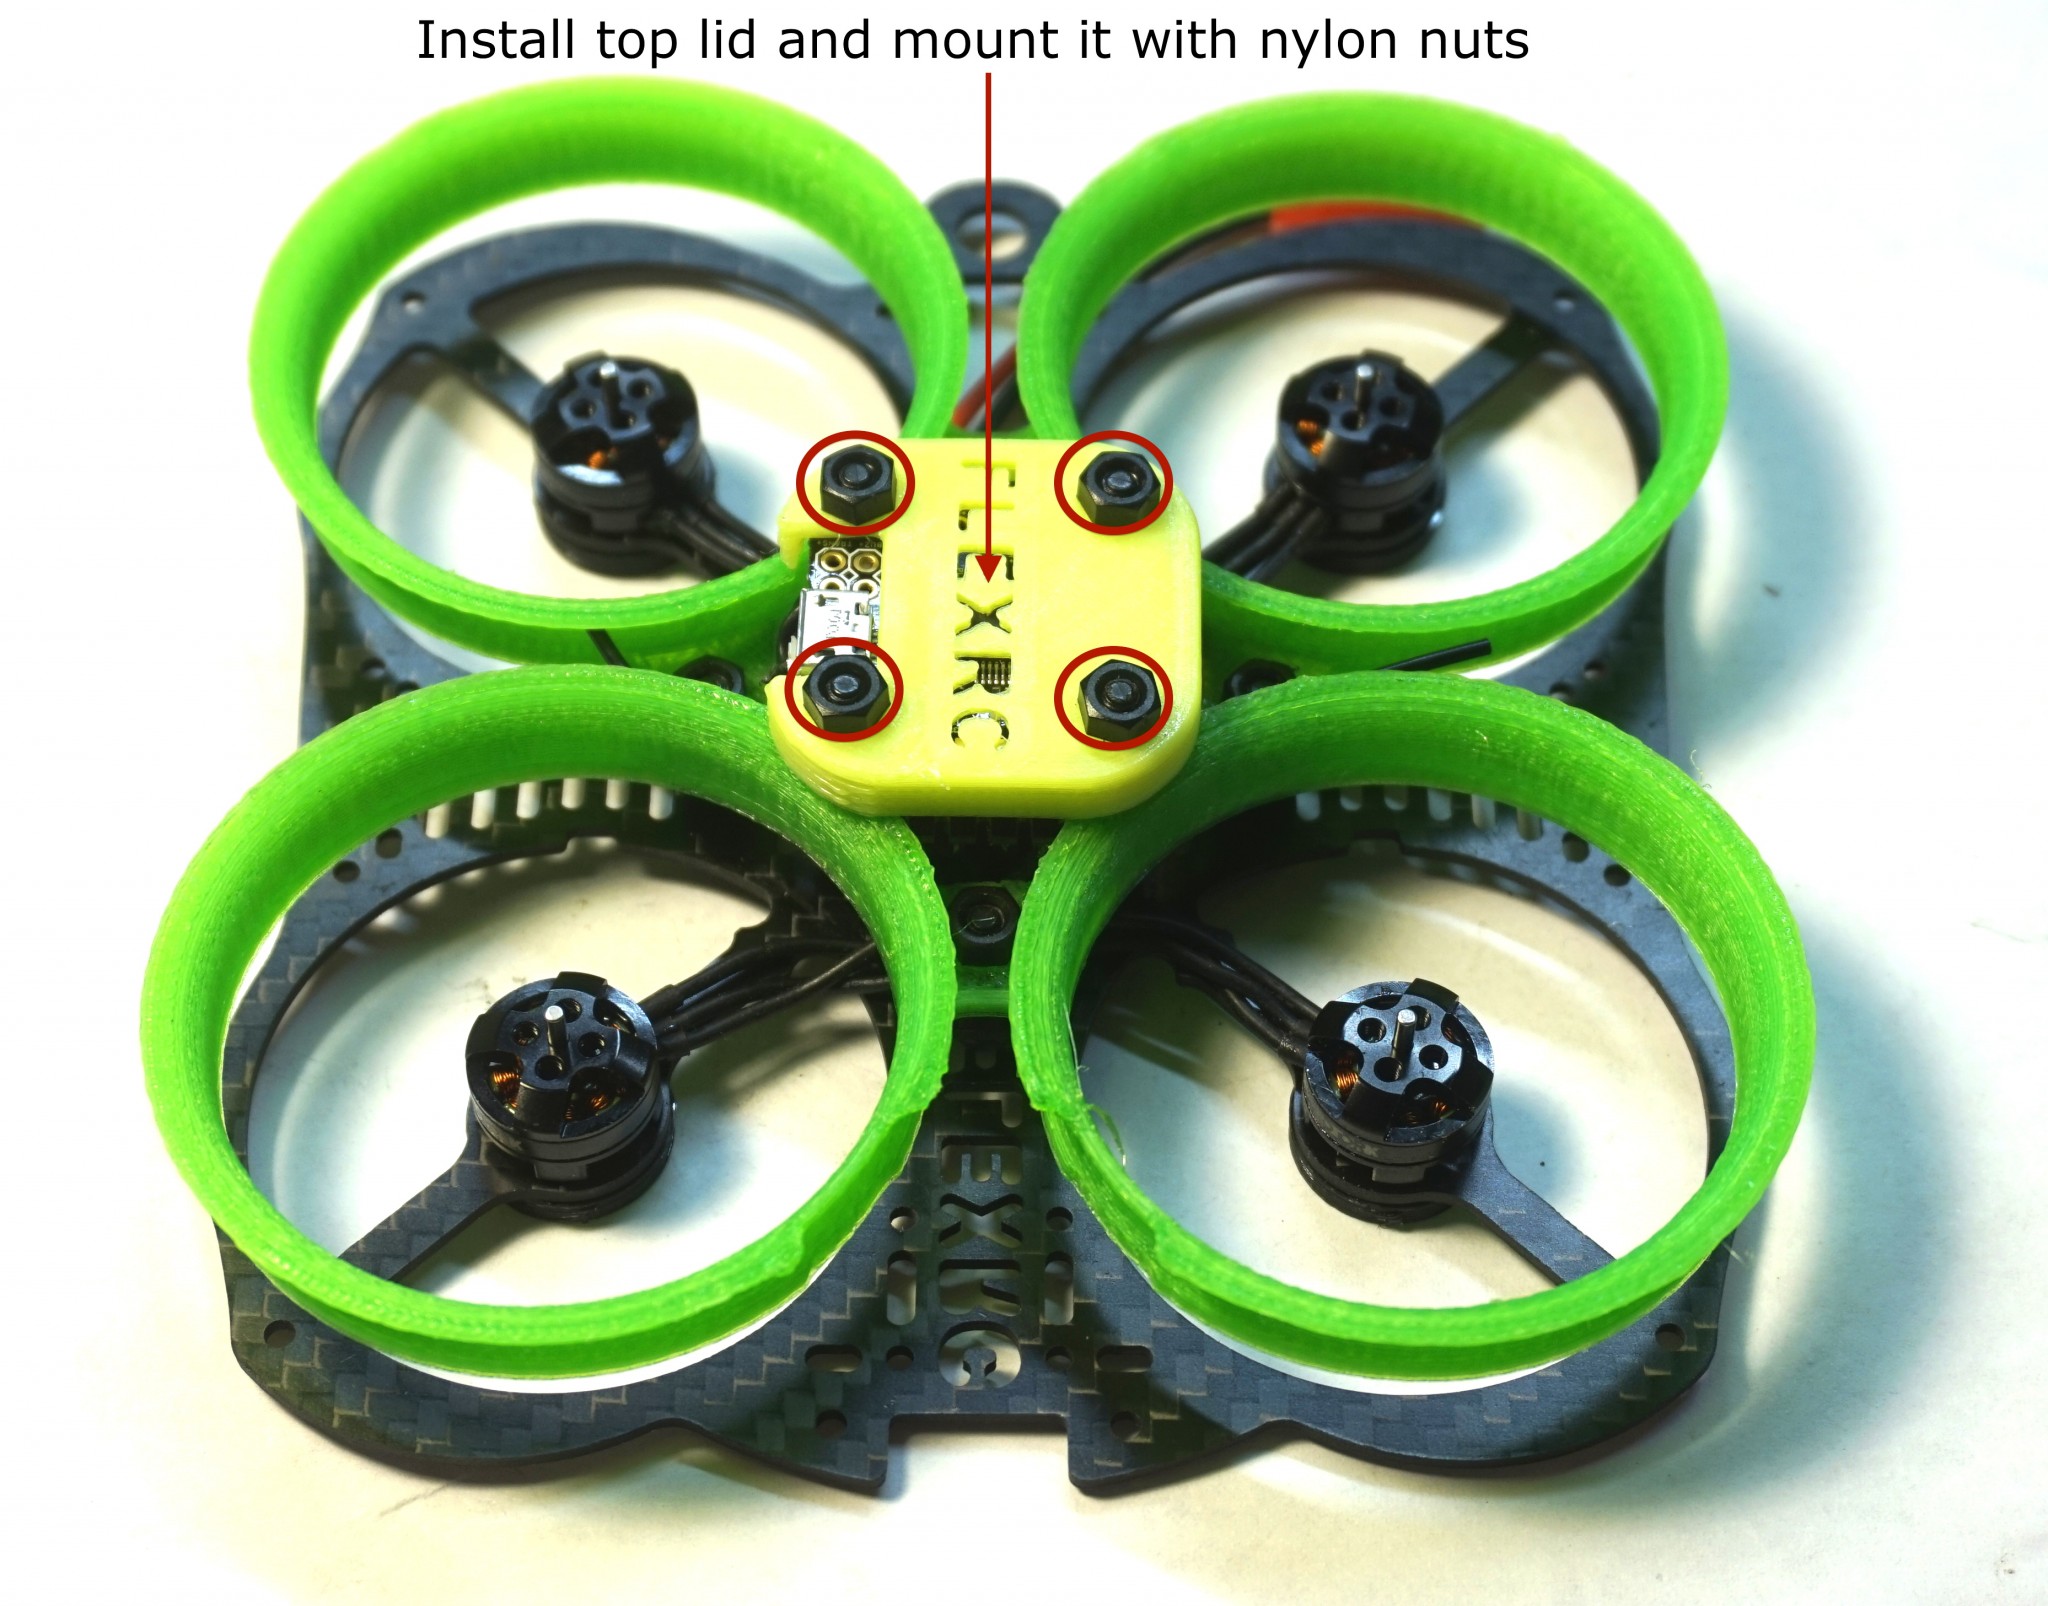
Install top lid and secure it with nylon nuts:
Install props and secure them with all 4 screws:
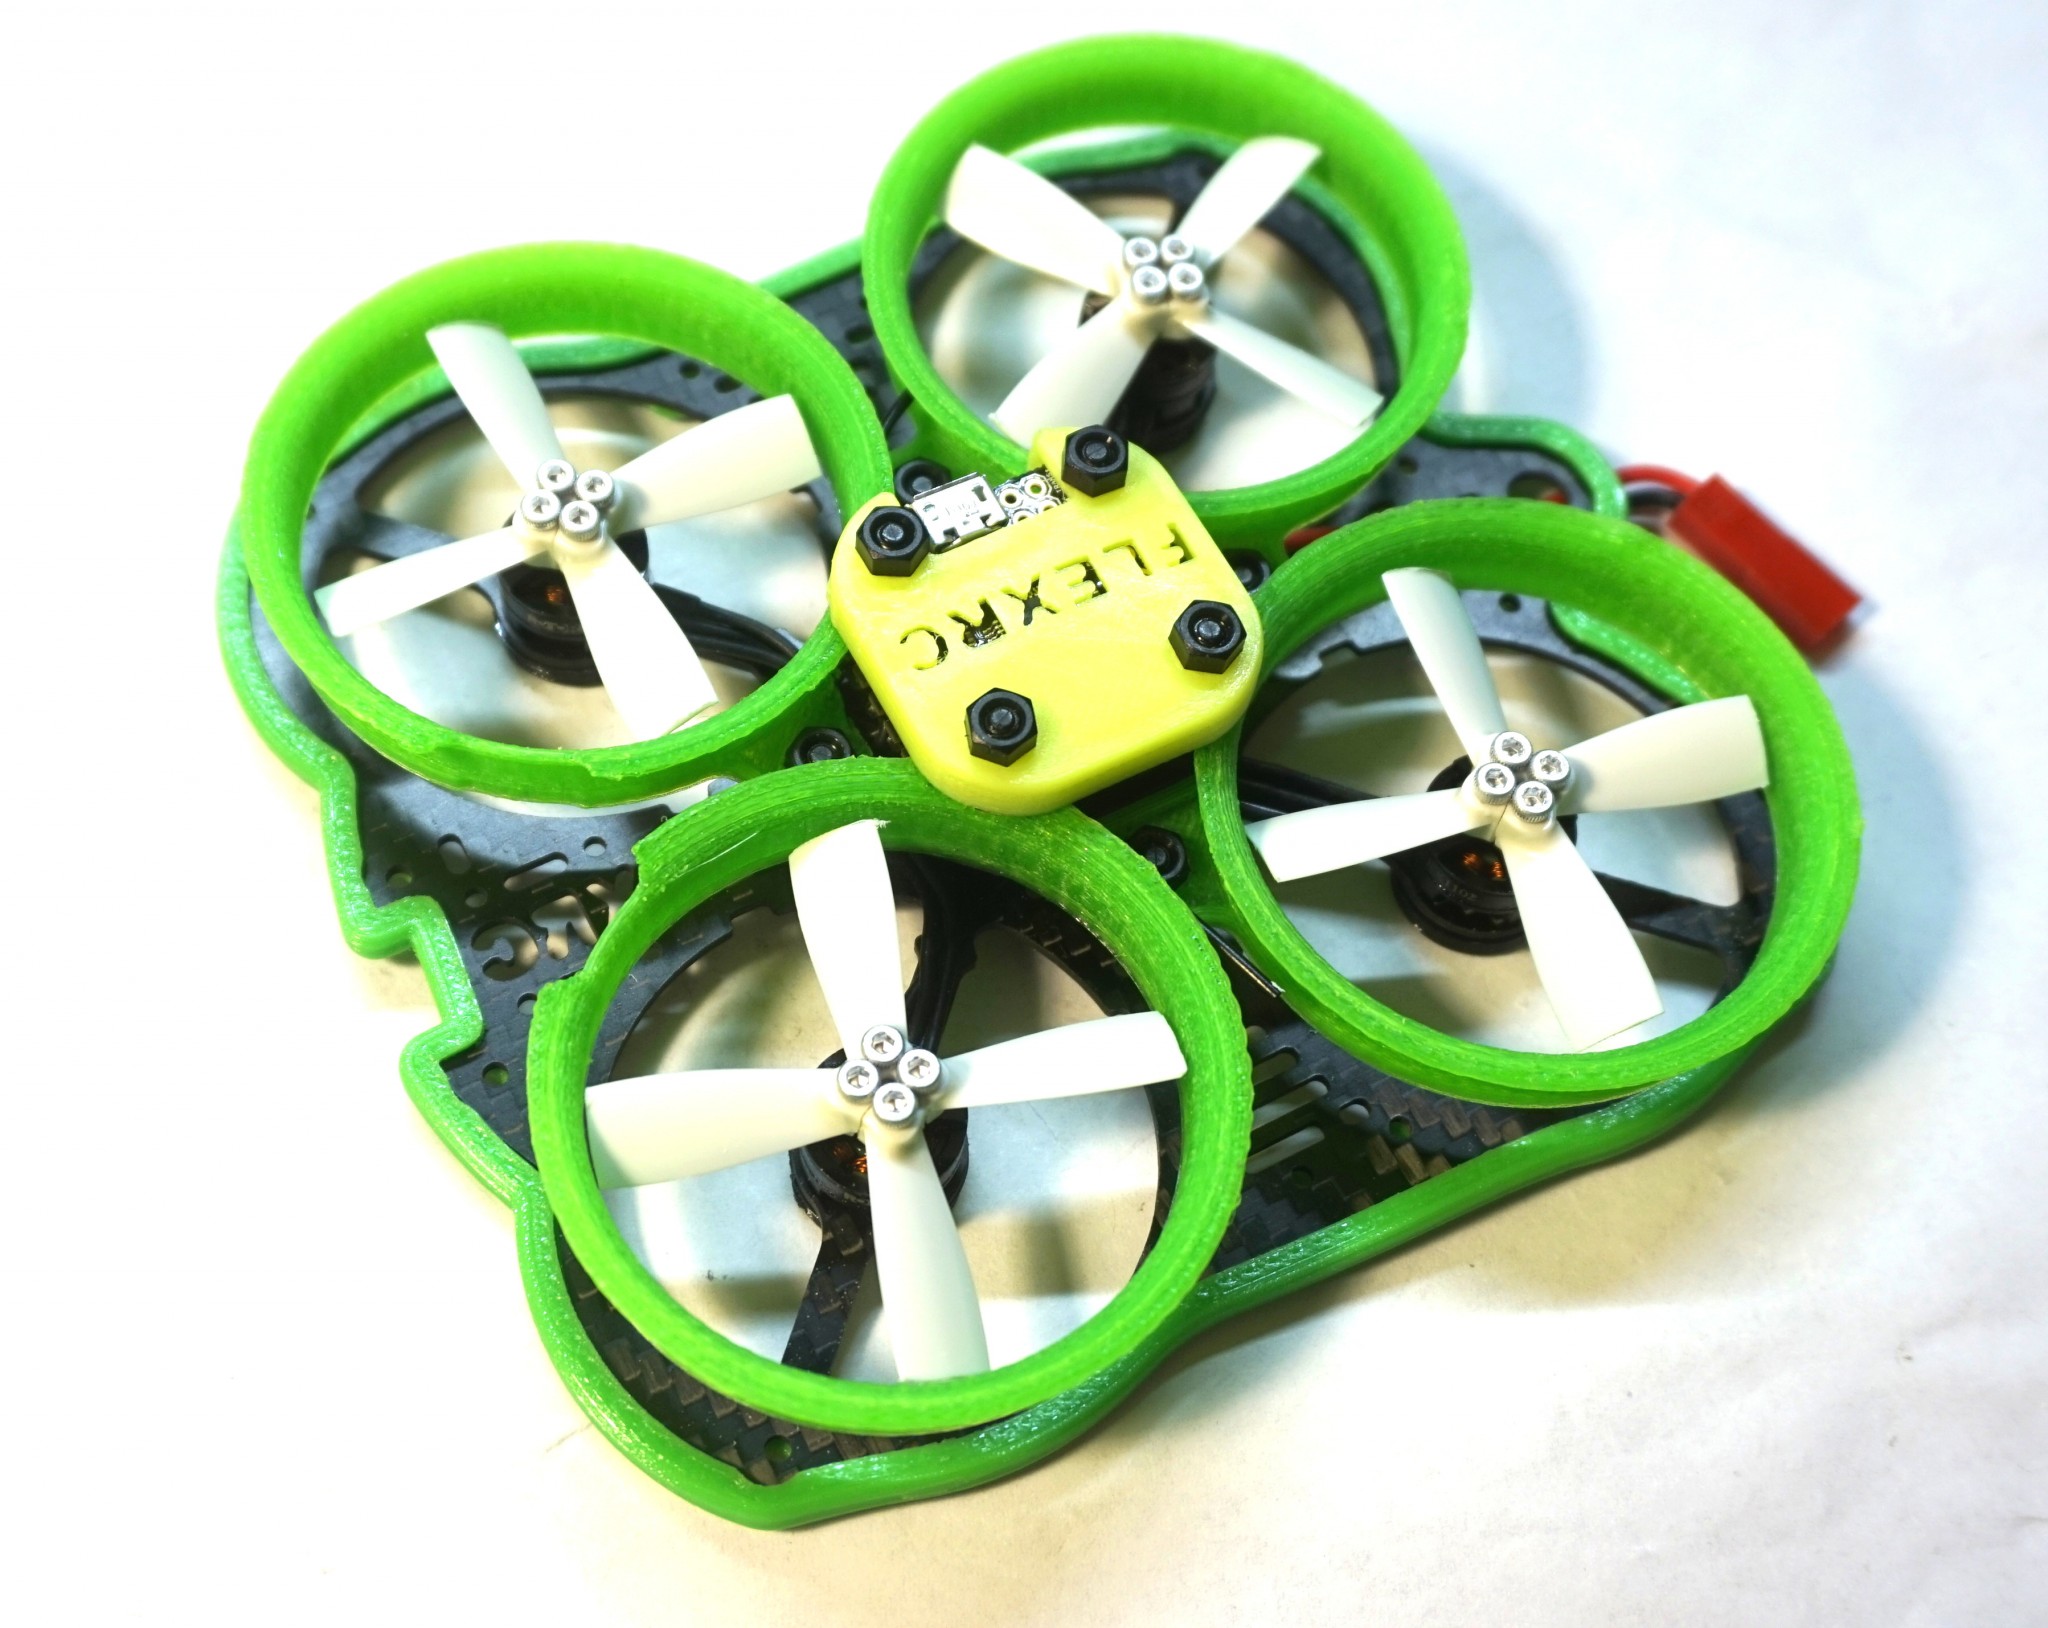
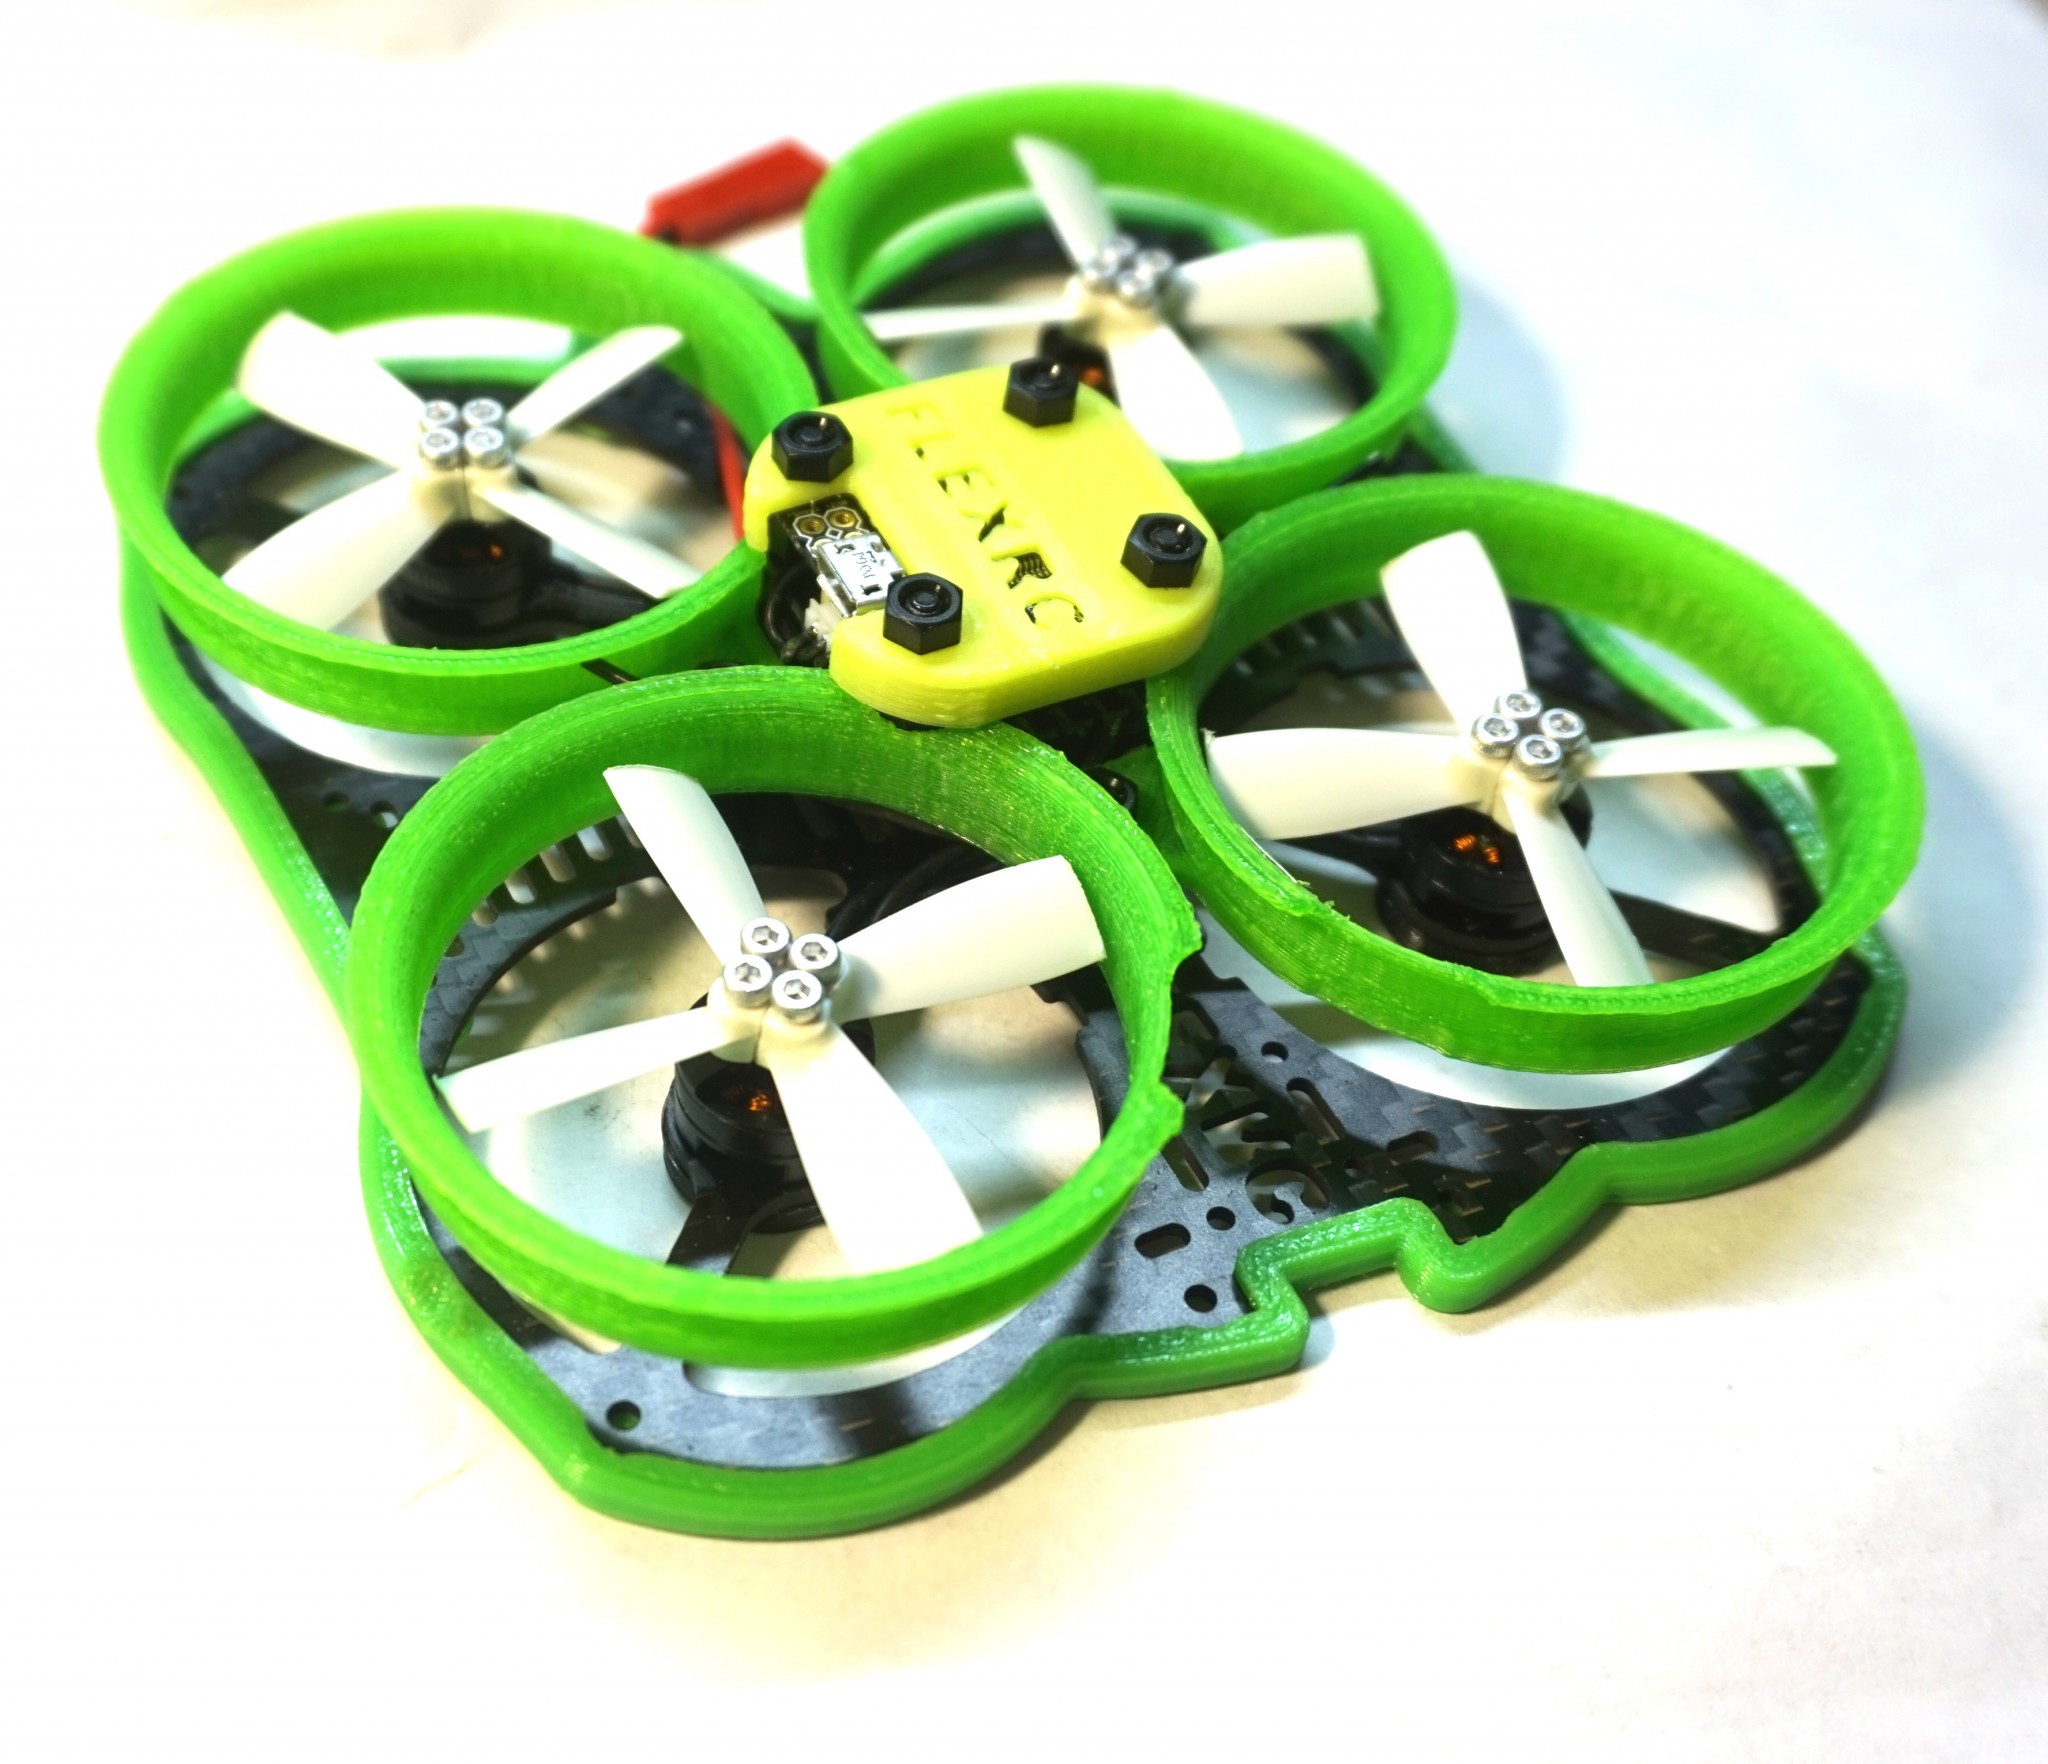
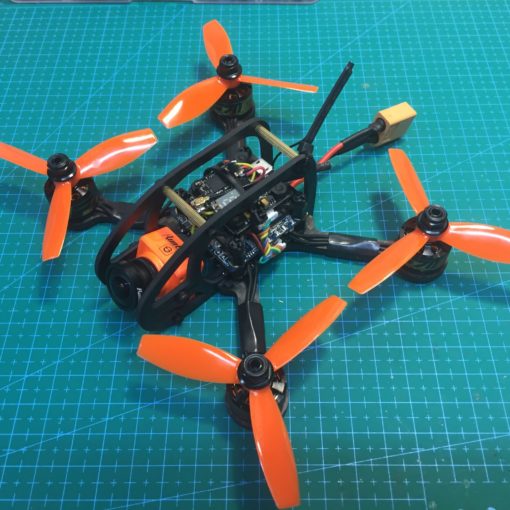
Final result:

Where to buy?
This beautiful indoor racing proximity quadcopter is available for purchase:


4 thoughts on “How to build Mini Owl Piko Edition FPV racing proximity quadcopter”
I have a couple of questions on the build.
1. why have the motor tabs on the ESCs facing the same way? Wouldn’t it be better if one ESC was rotated 180 so the motor tabs were on opposite sides?
2. Any reason why you did not use the PDB on the Pico-BLX? Ie, wire the ESCs up to the power points on the Pico-blx? Seems like if you did this the overall amount of power and signal wires would be shorter, particularly if one ESC was rotated 180 degrees.
3. Do specific motors/escs have to connect to specific ESC outputs on the Pico-BLX or can you change which motor is in which position in BetaFlight (ie: to get the right motor being front-left, front-right…etc)
1. I’ve found that this way it the easier way to build it, because you need less wires to connect one ESC to another.
2. Hard to say, PDB is usually useful when you use individual ESCs placed on arm to reduce wiring, but in this case it is stack, so I doubt that it will make things easier.
3. Guide shows specific connections to get correct motor direction and to avoid the need to change any blheli settings, but even if you connect motor wires randomly you can change the direction in blheli.
Before I saw the build guide I was thinking about wiring the stack up like in this photo with one ESC rotated 180 degrees.
http://www.rcgroups.com/forums/showpost.php?p=35318019&postcount=564
RE: #3 question, I wasn’t asking about motor direction (CC vs CCW). I meant can you set the motor position too, ie: which ESC goes to right front or left rear motor.
After more experiments I’ve changed preferred approach to build.
Oh, for #3:
Both rear motors connect to the bottom ESC
Both front motors connect to the top ESC
and left/right sides match