
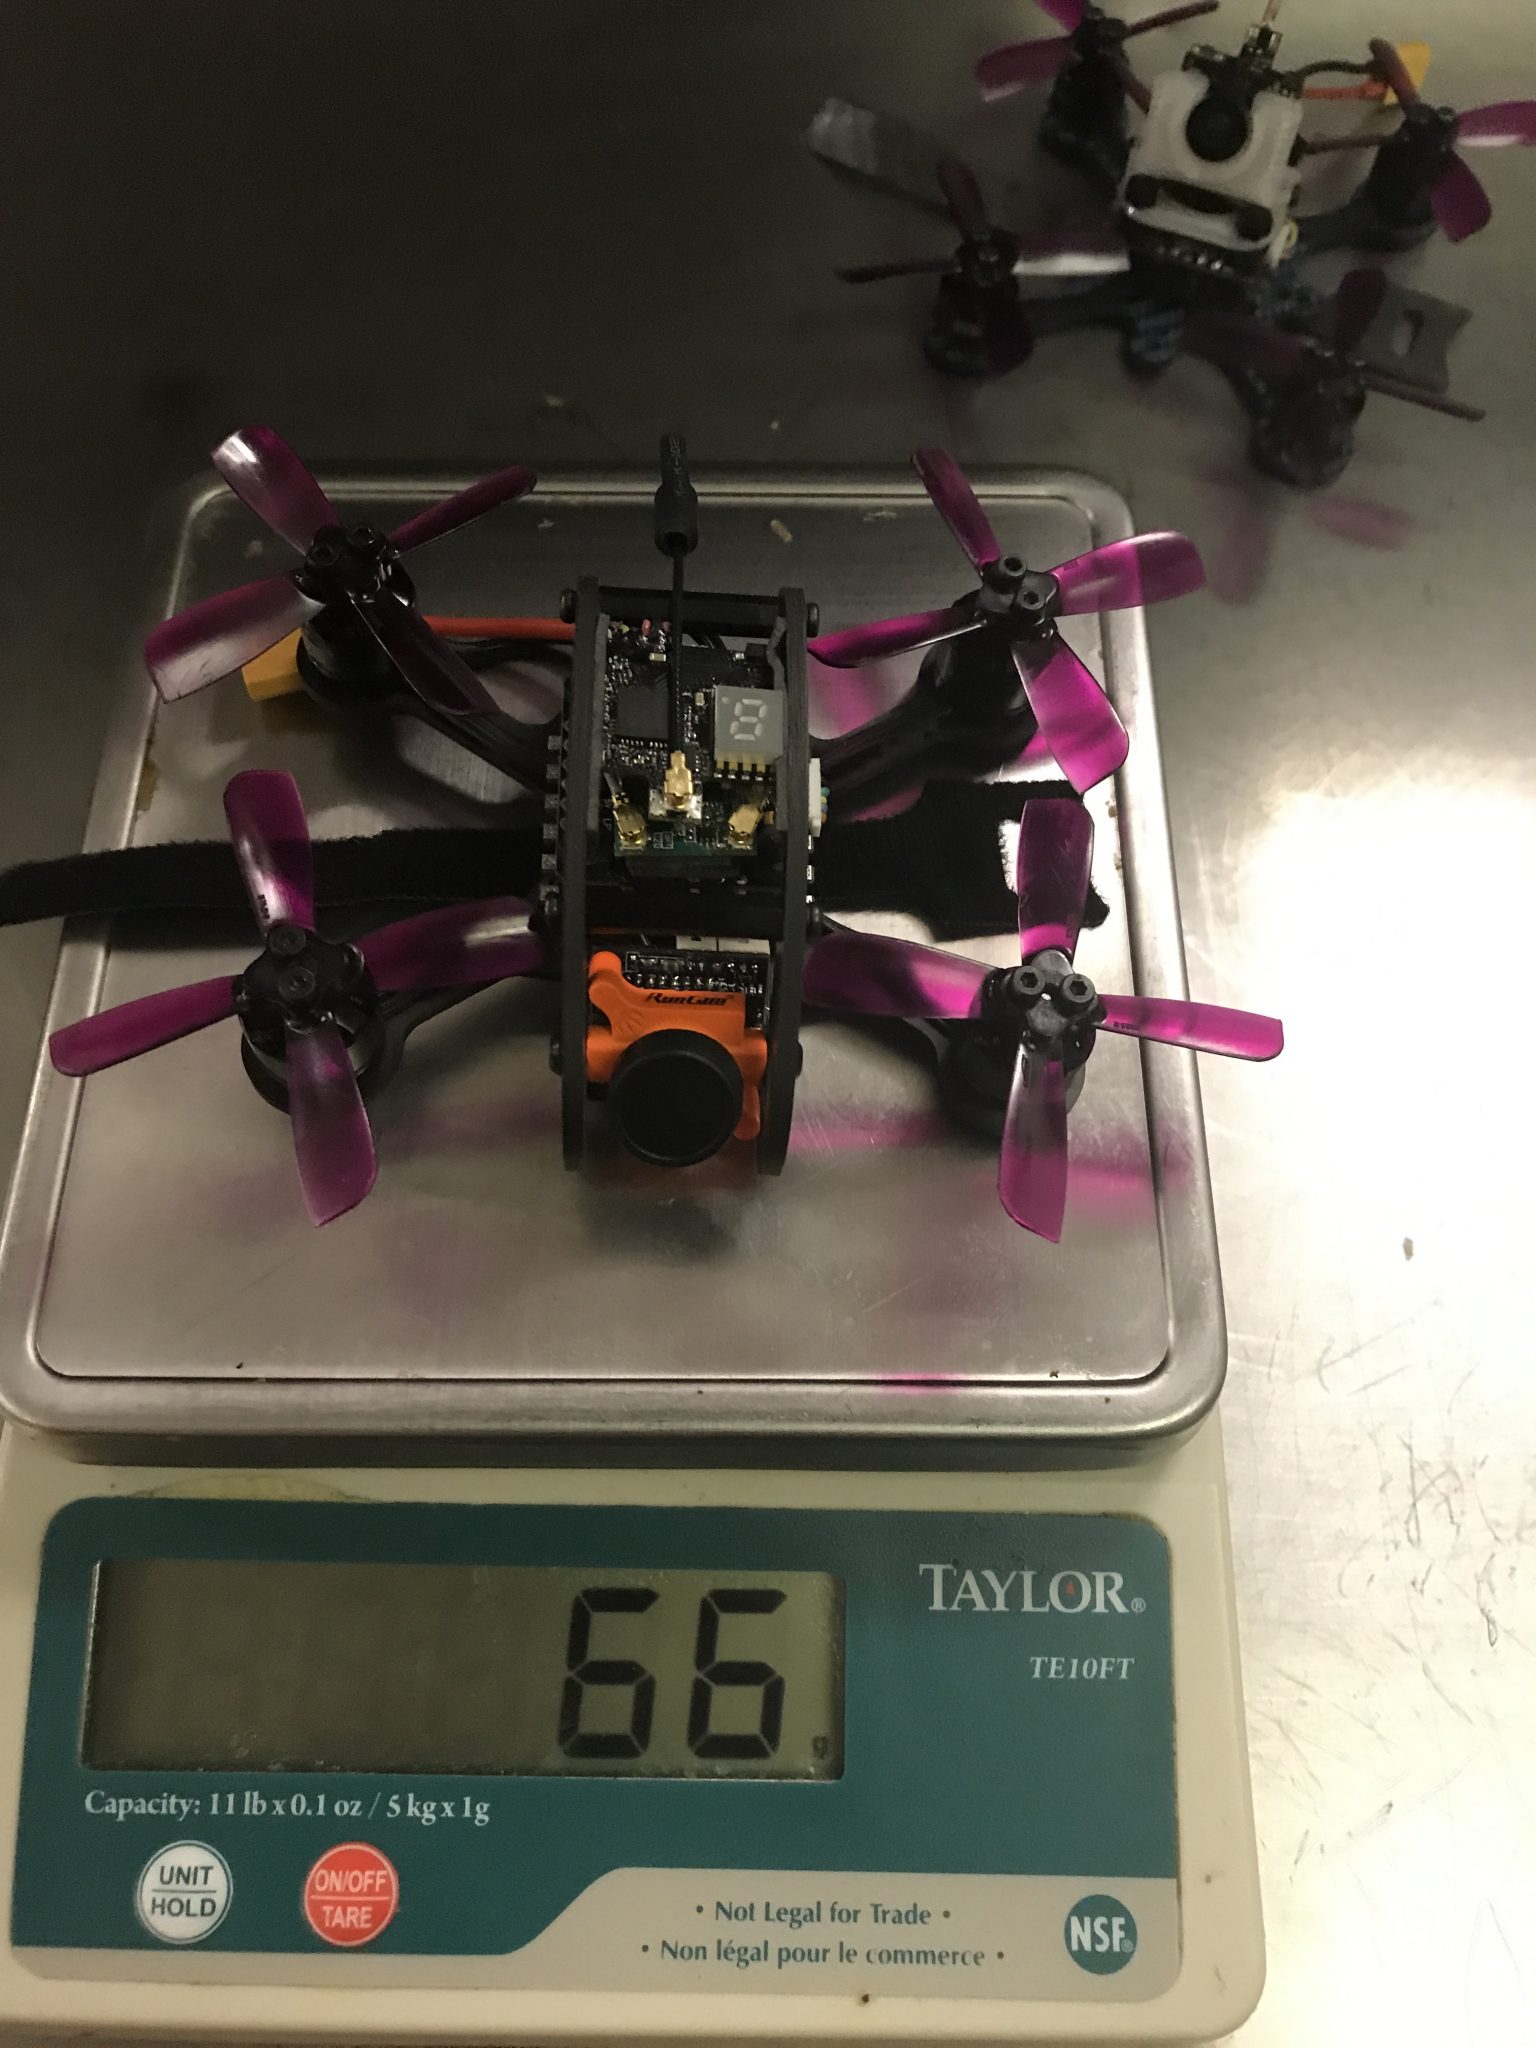
Here is my tutorial for building the FlexRC Ascent With a Spektrum/Lemon Rx.
Please read through the whole thing before you get started to make sure you understand the order you would like to build in.
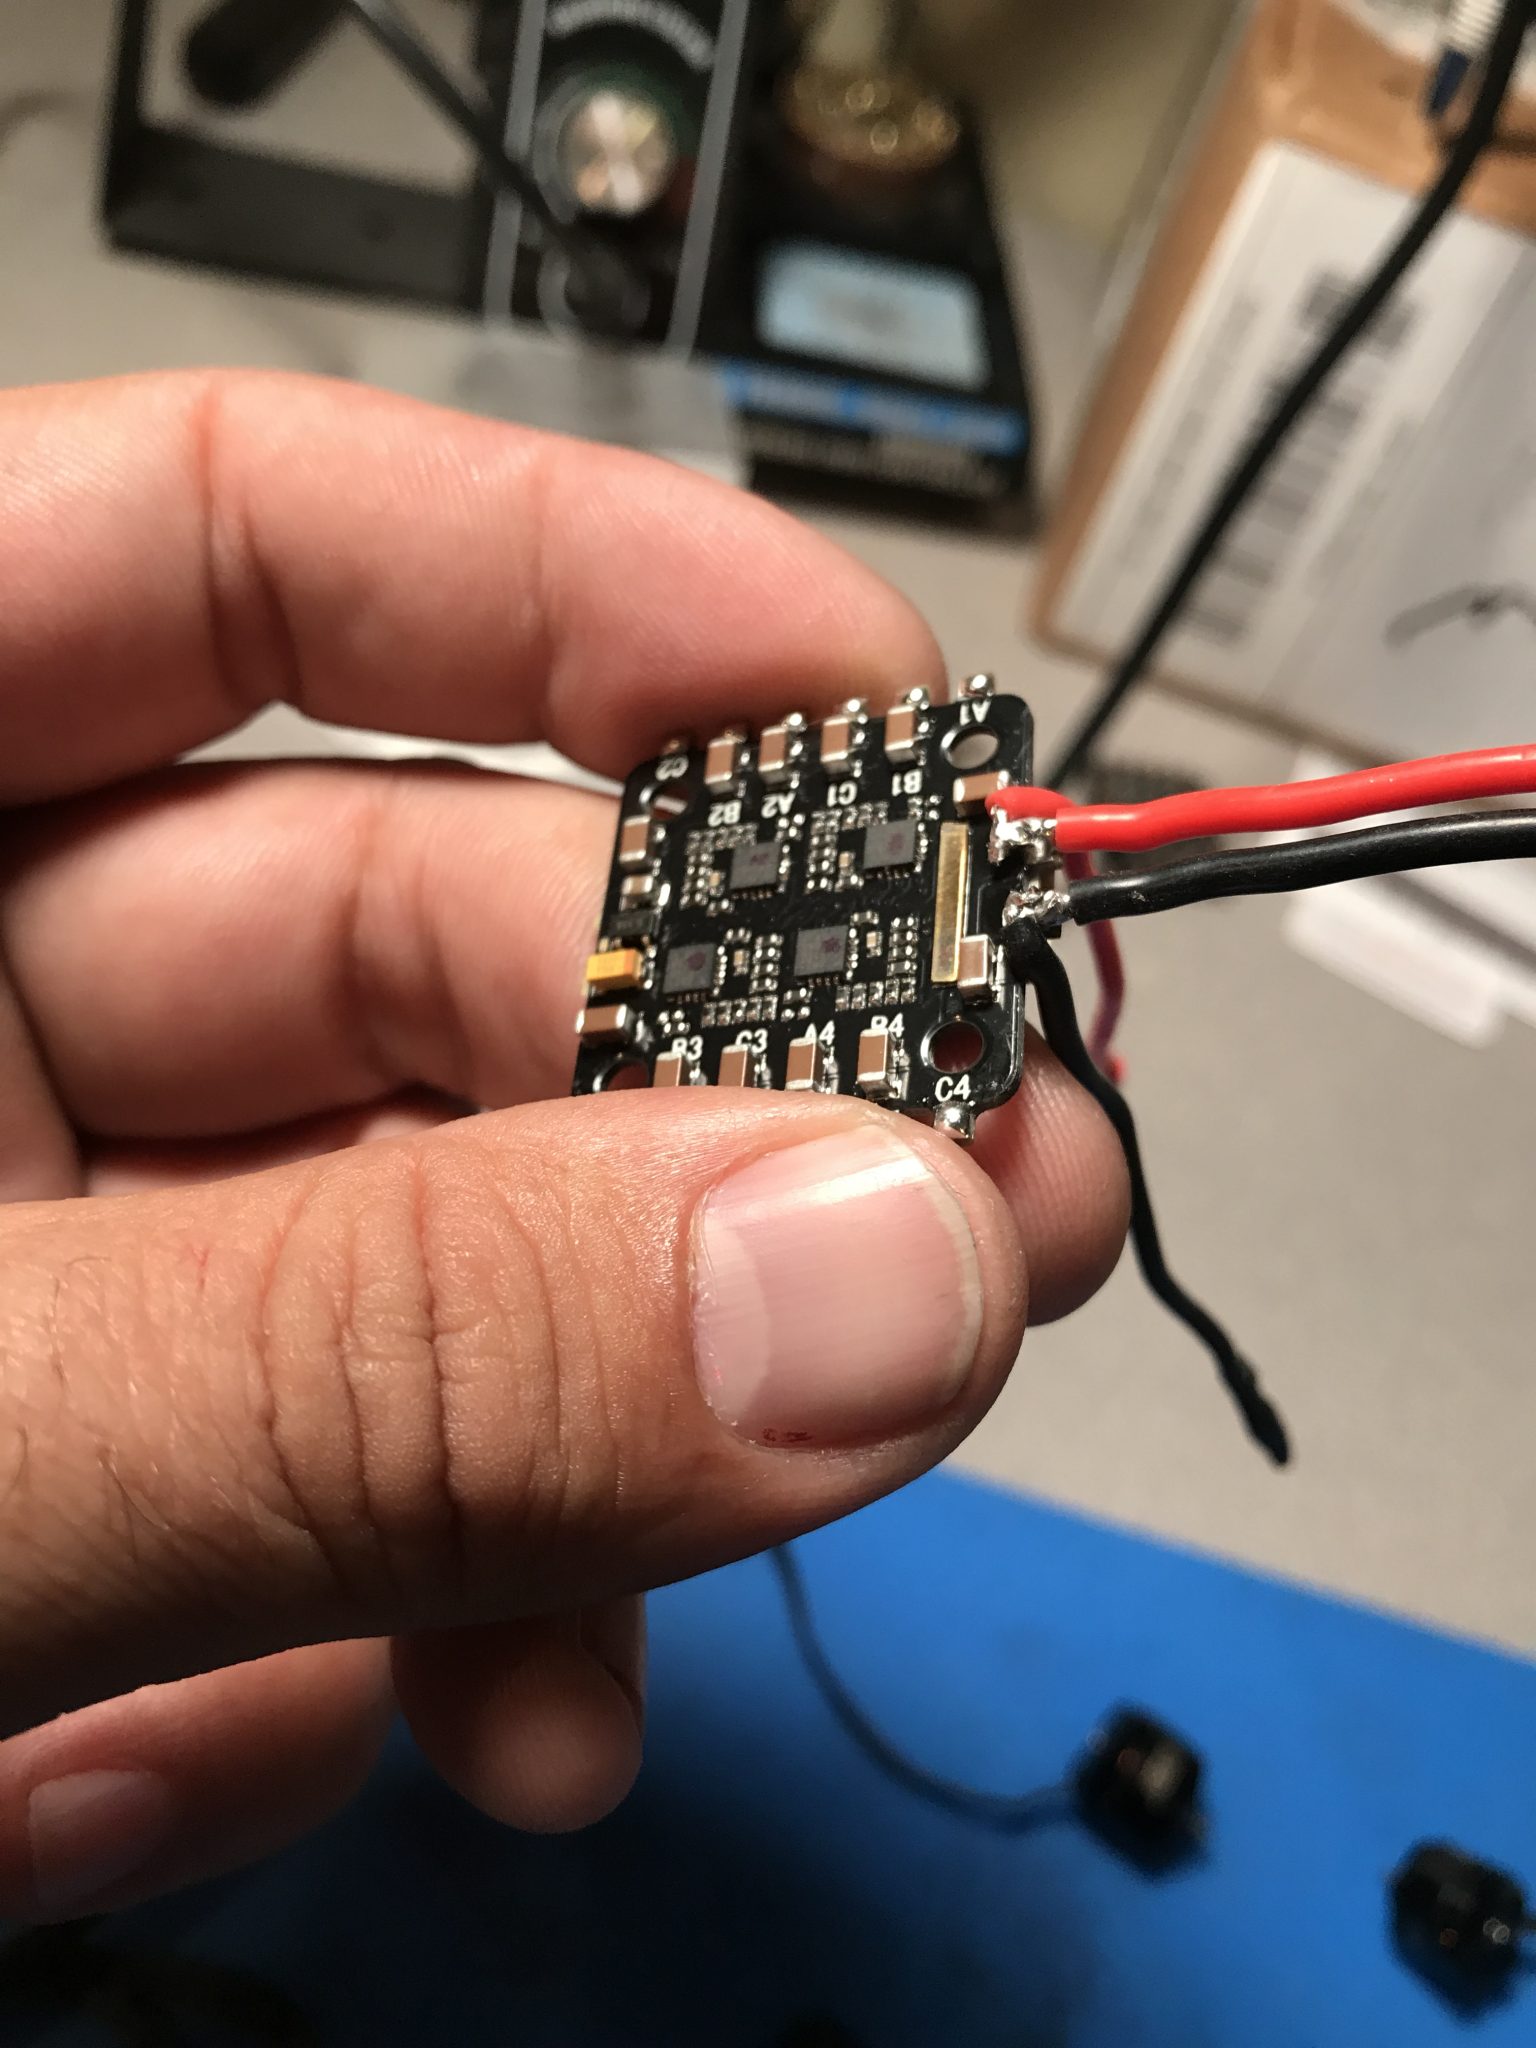
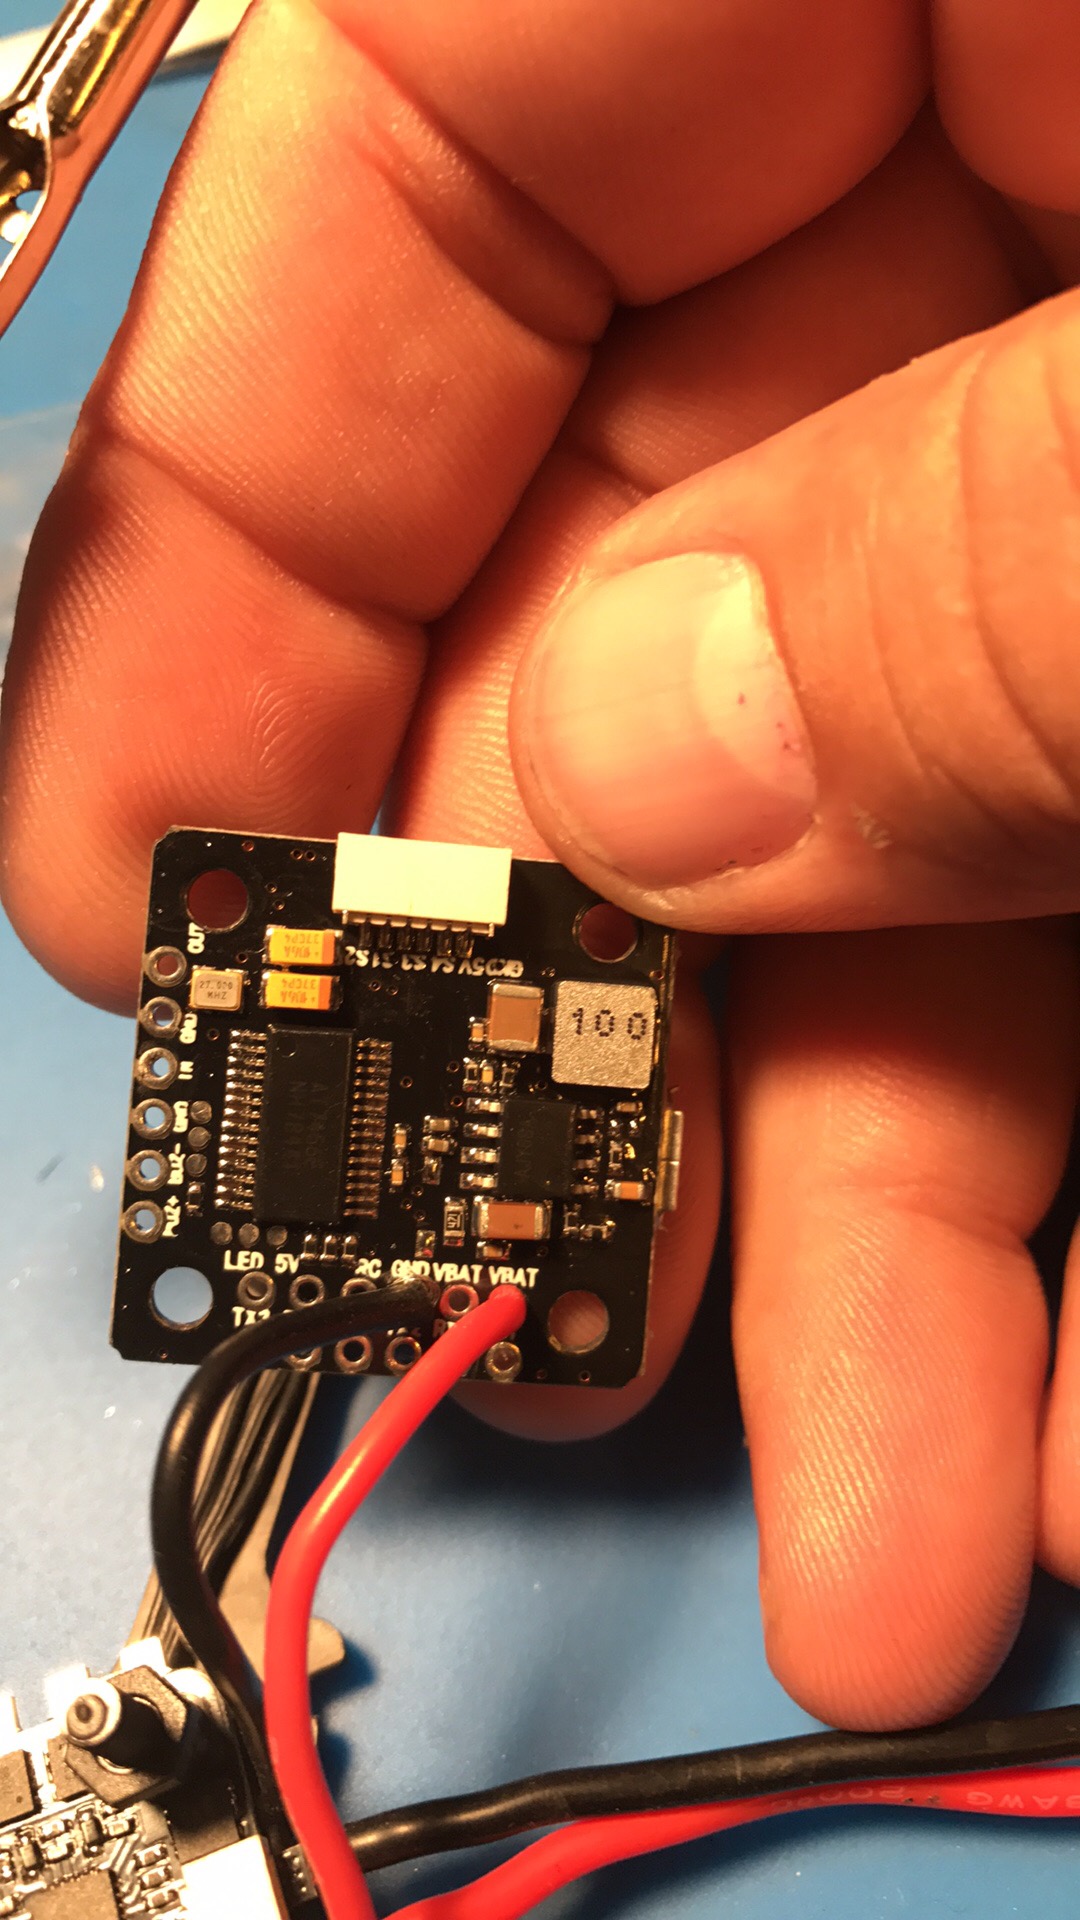
Install battery plug and FC power wires
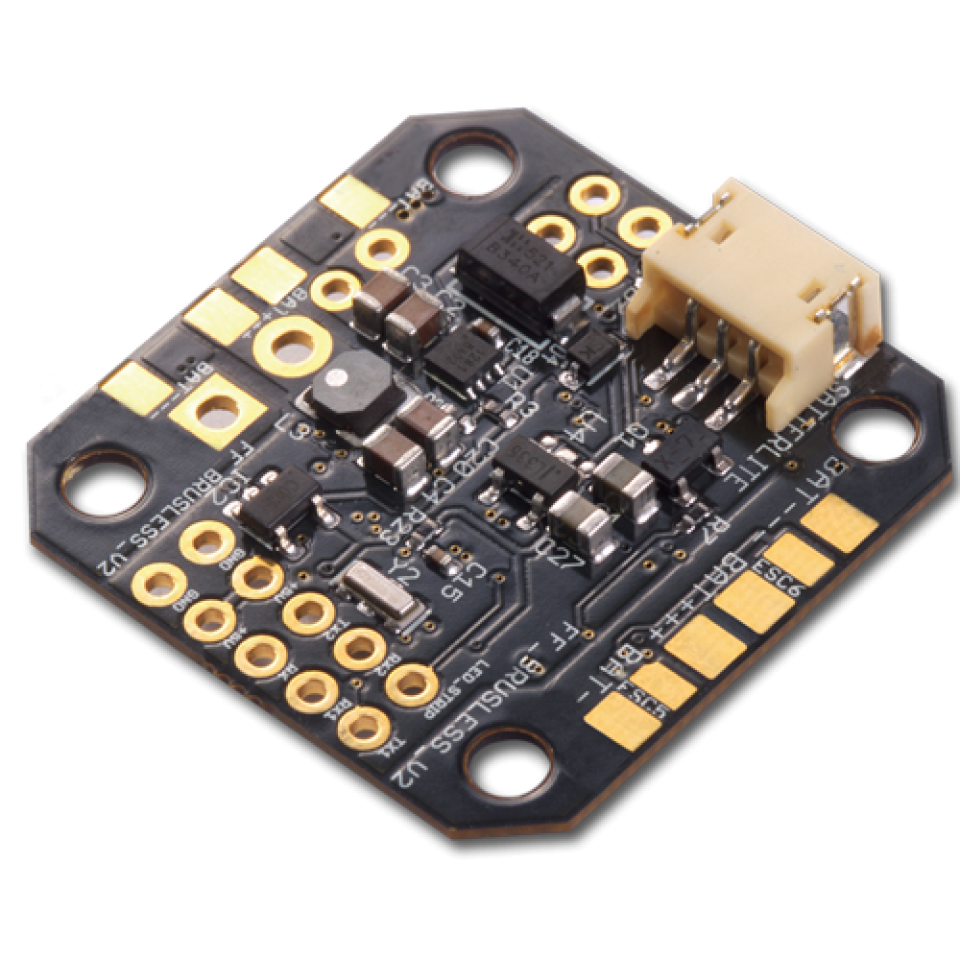
Battery plug and FC power wires on the esc are the first thing I do. Set your battery wire length and solder on your battery connector. Solder on your positive and negative leads that will supply power from the battery to the FC.
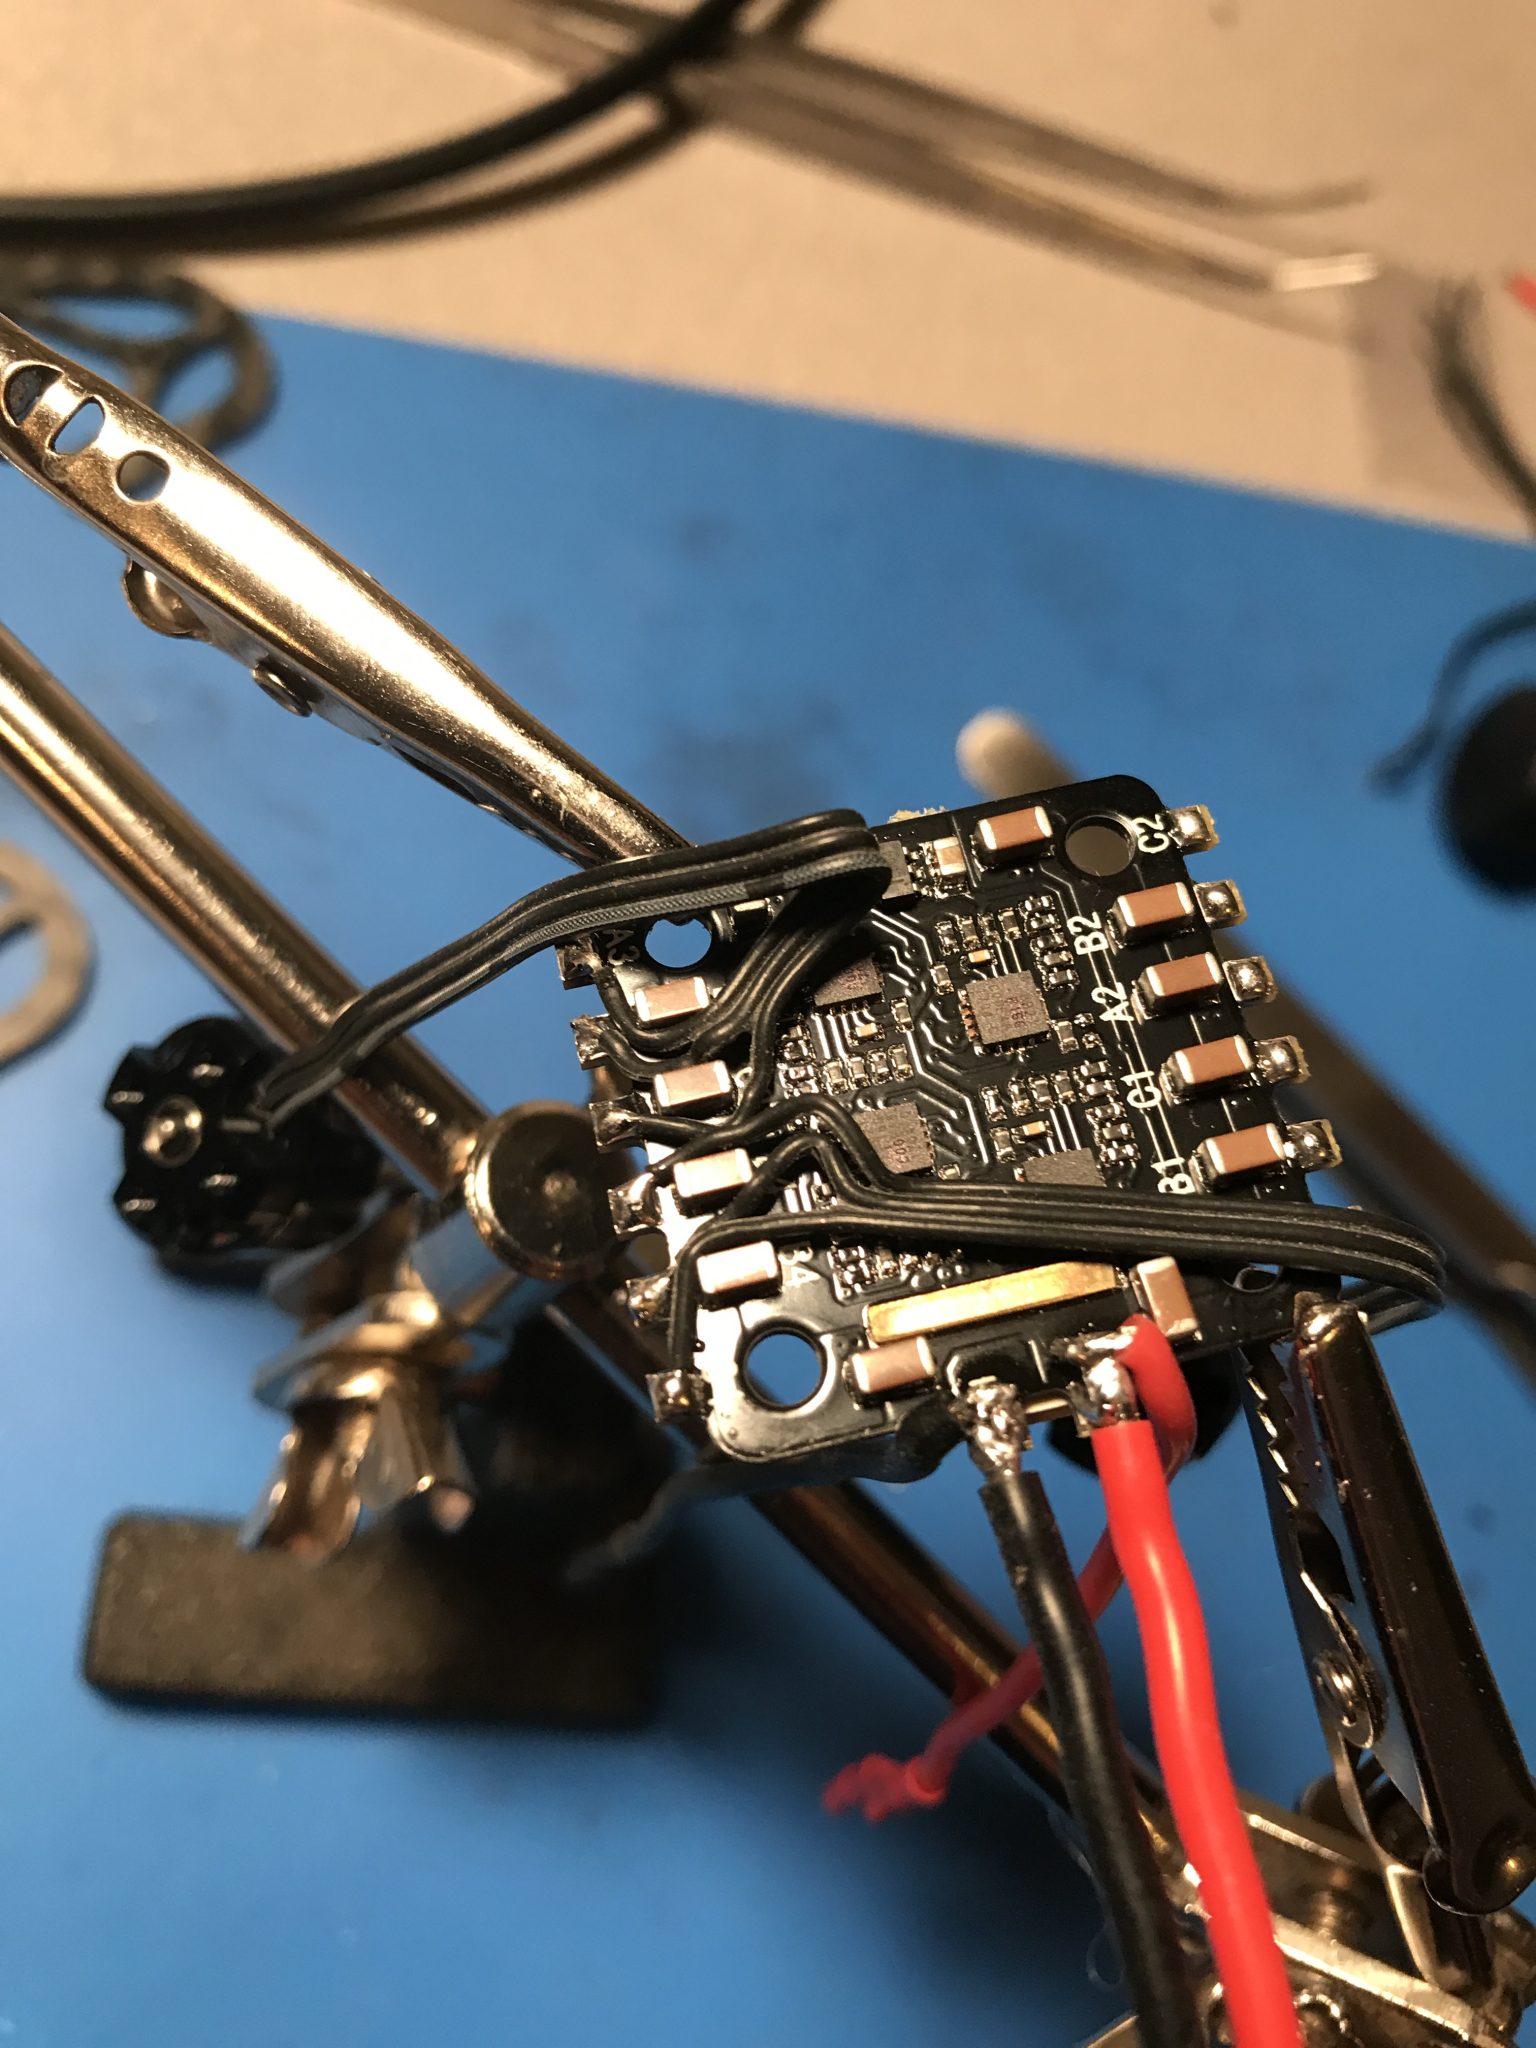
Solder motors to ESC
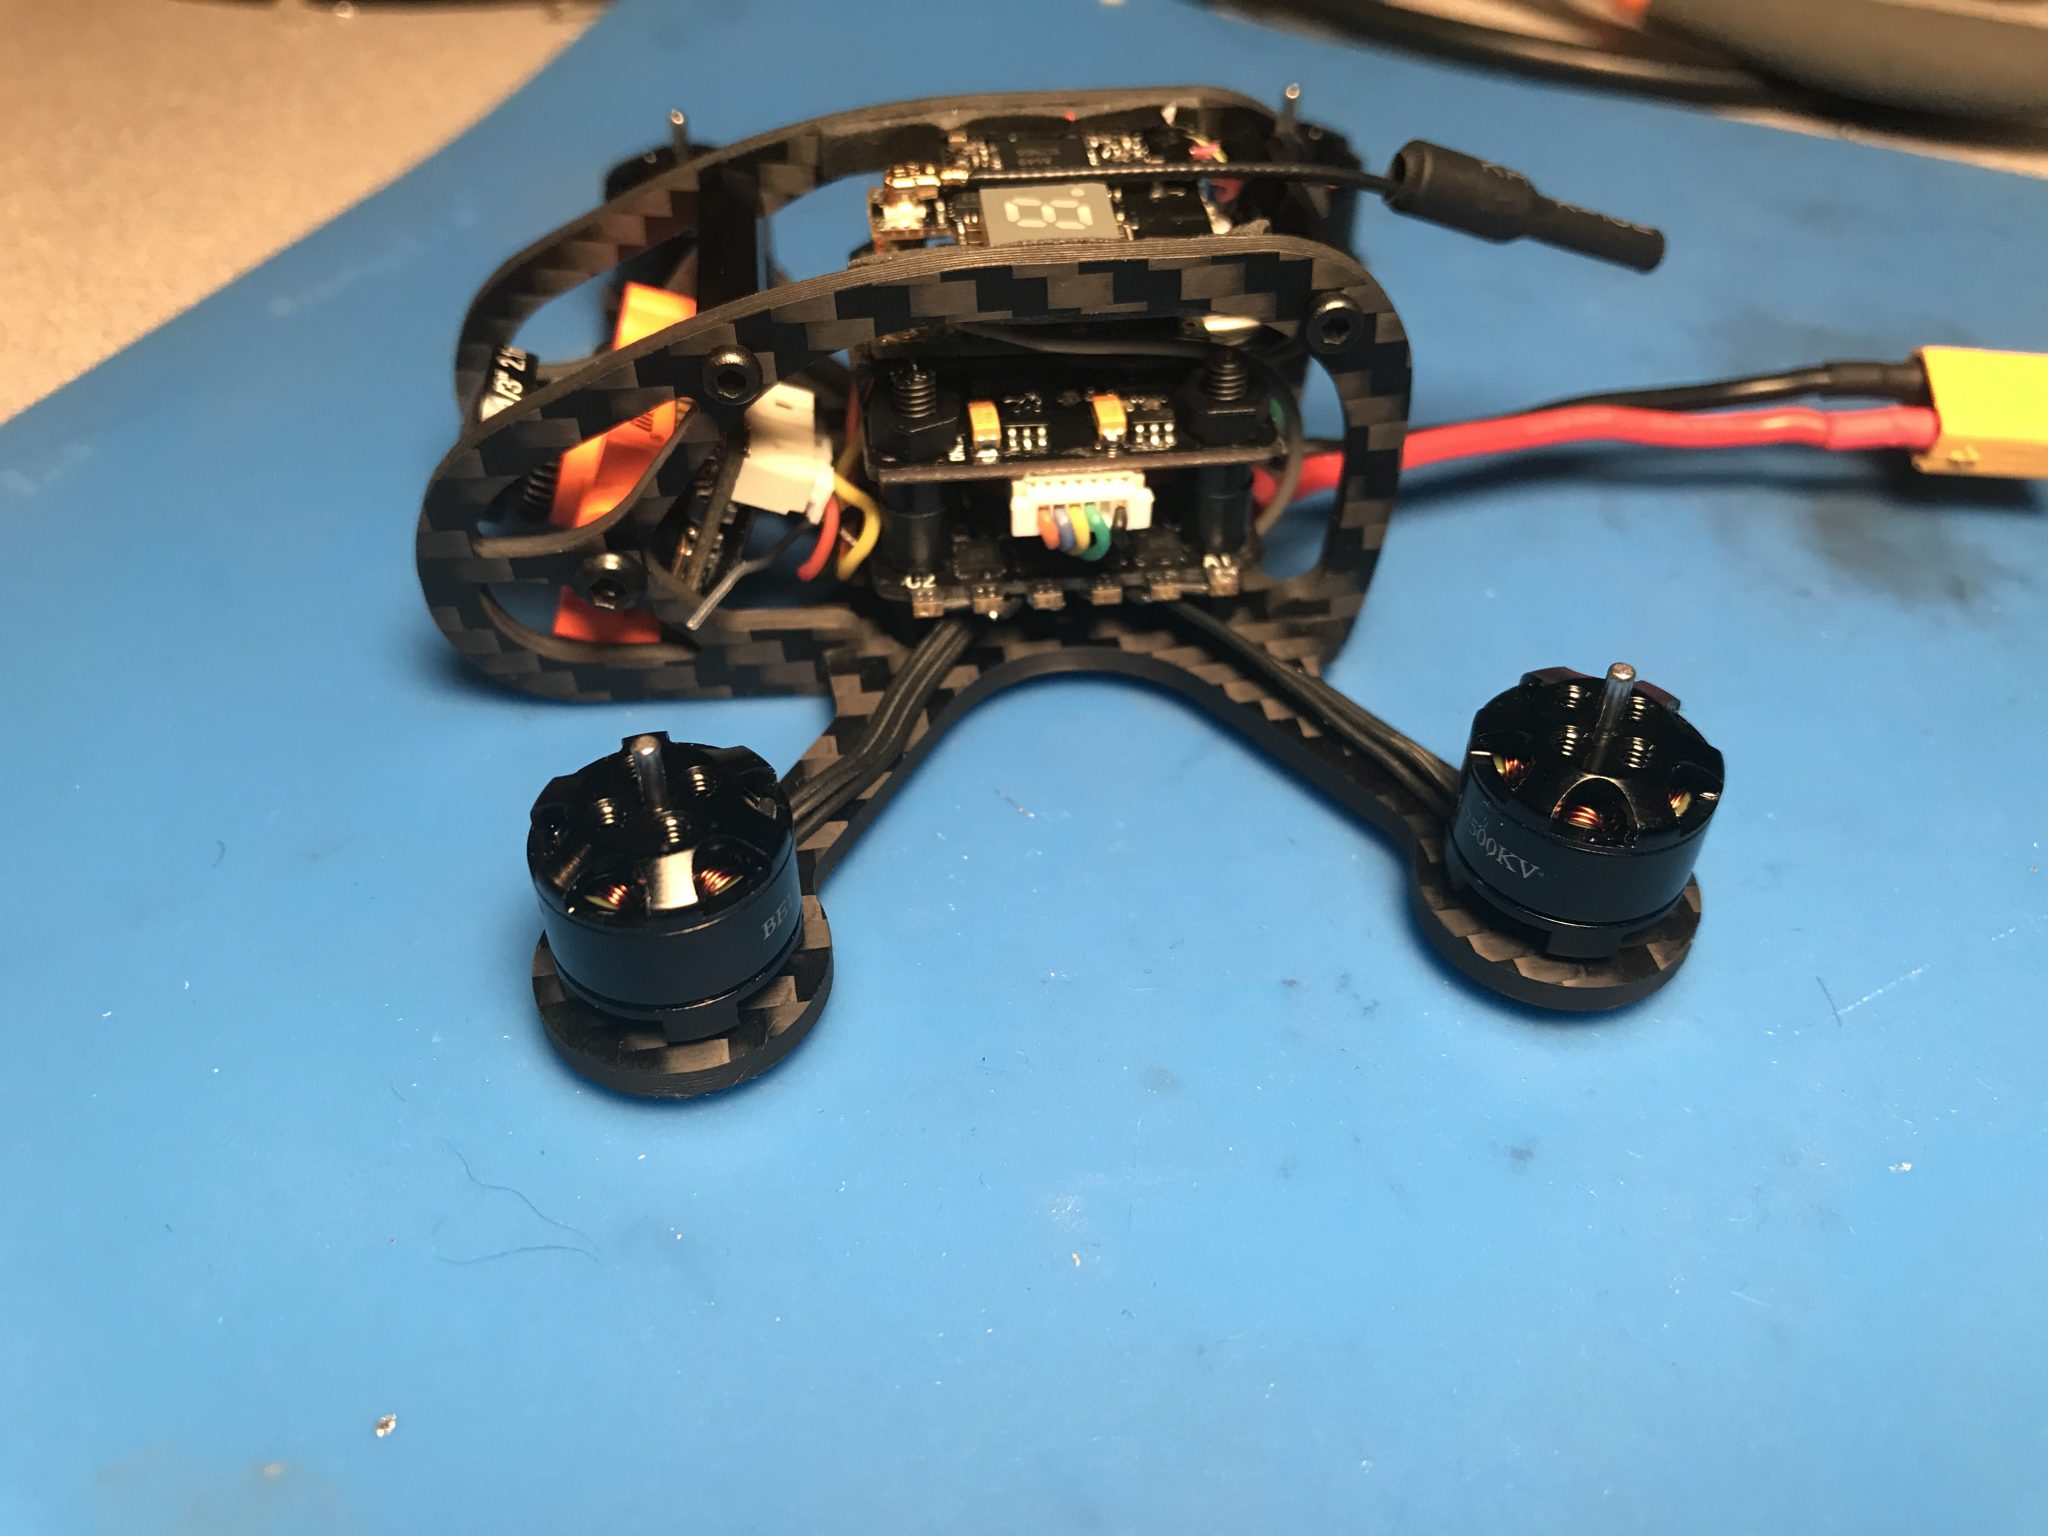
Esc and motors. Only trim the length of the motor wires if you are sure about your set up. You can place the Esc board any way you like and put motors in whatever position works best for your build. It is very easy to change motor position in Betaflight after the build is done. I installed the esc with the battery wires facing the rear and on the bottom of the board. If you set it up exactly as I do you can copy and paste the motor resource. Once the motors are soldered on the wires should change direction like the motor in the top left of the picture below.
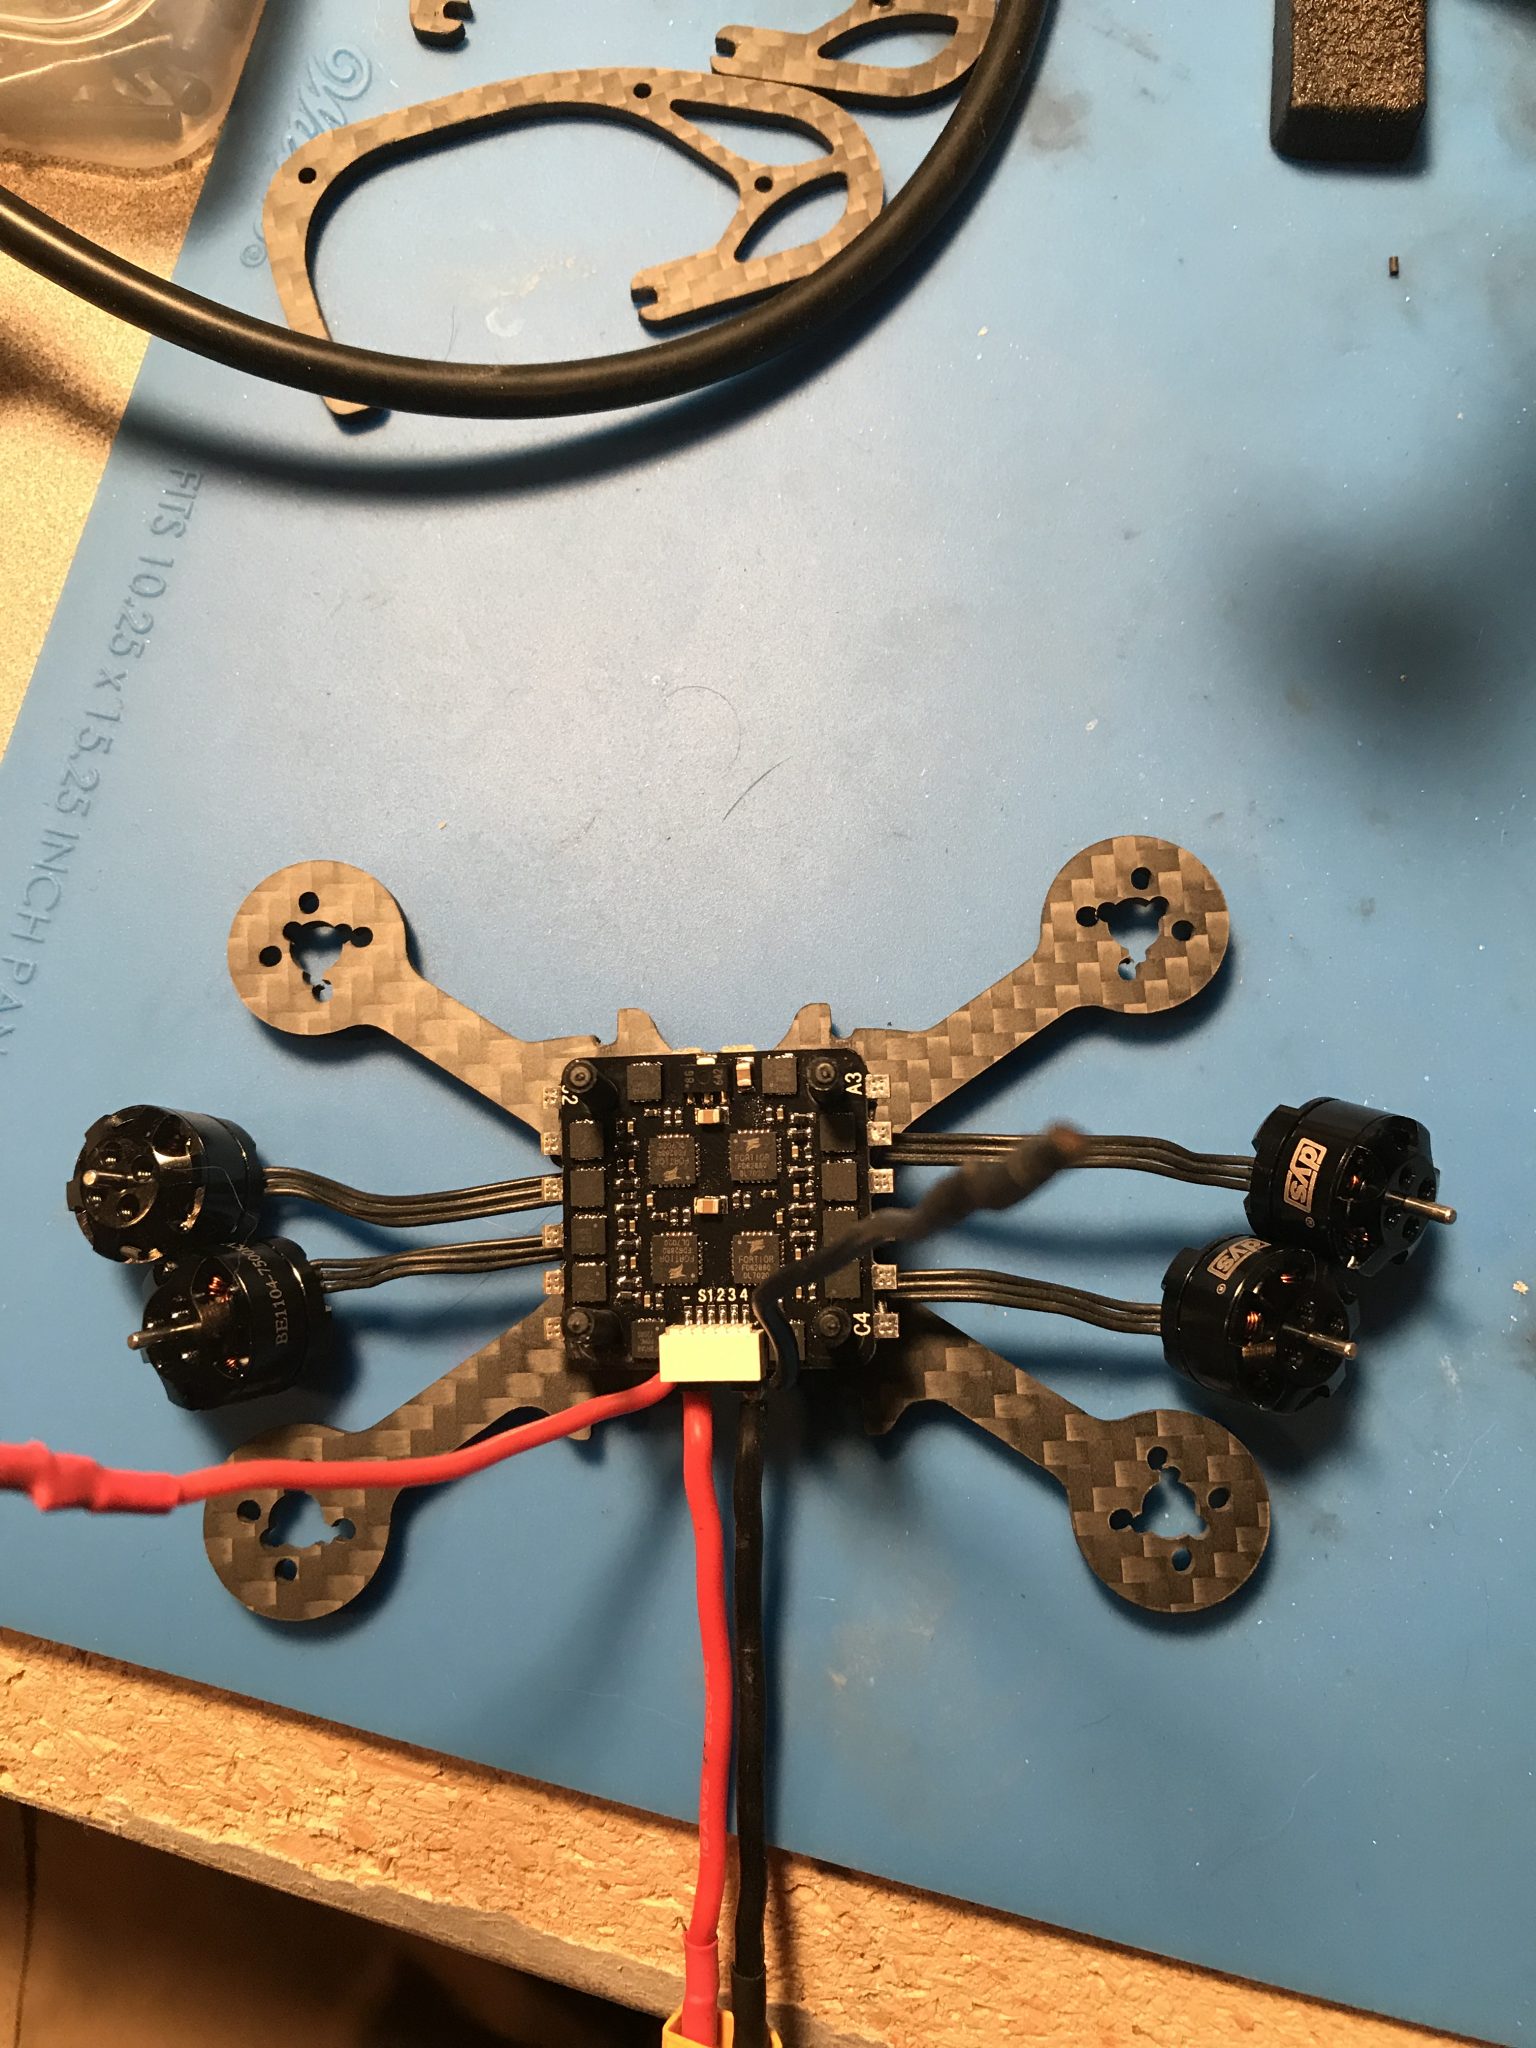
Mount ESC and motors
I used 5 mm spacers under the esc to ensure I have enough space for motor wires and battery strap. The screws to hold the motors on should have a shaft link of 4 mm, any longer might ground out a winding and any shorter will end up getting pulled out.
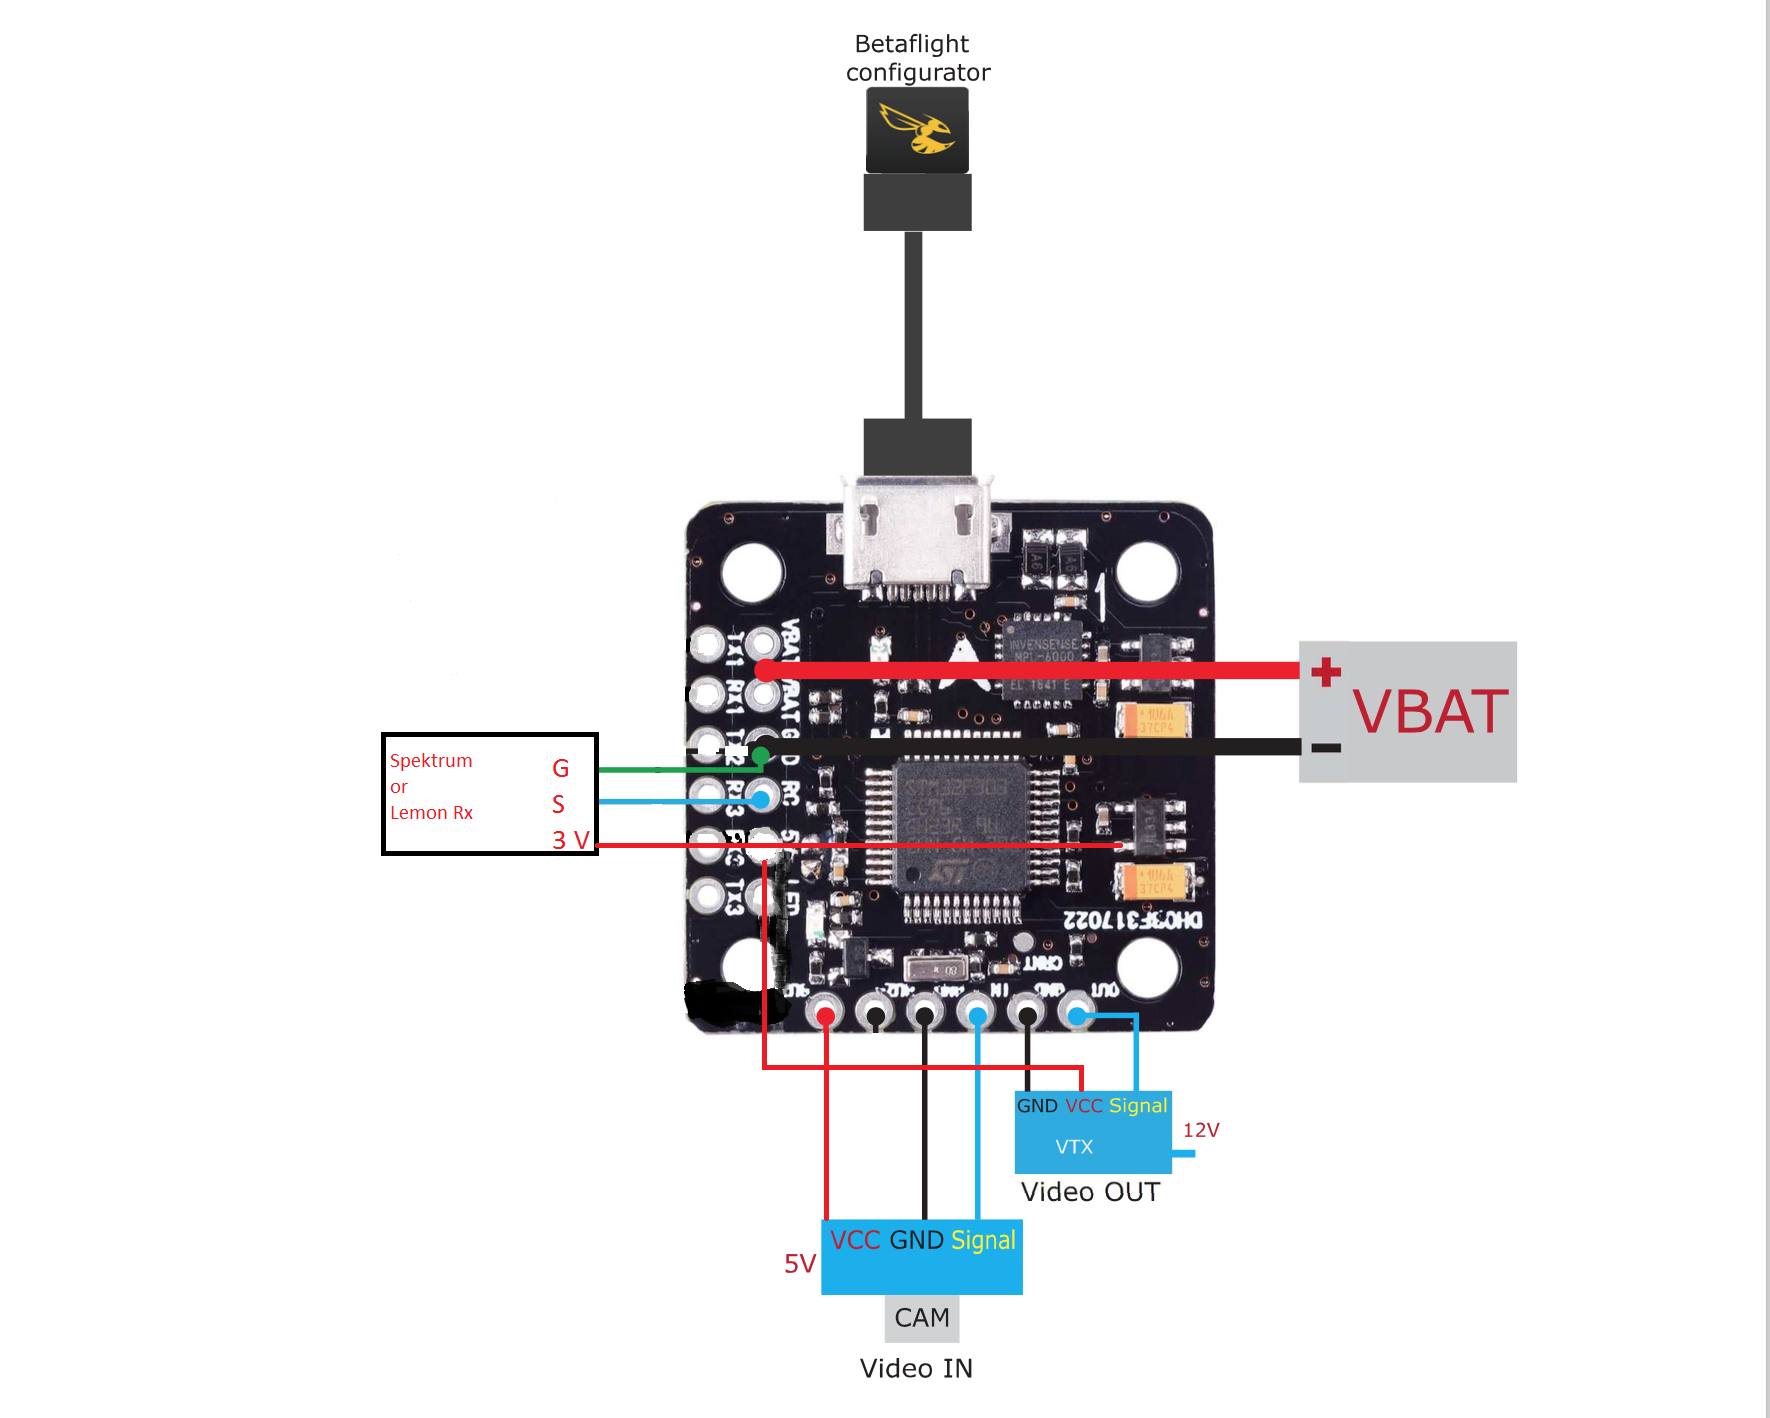
Mini F3 FC with OSD wiring diagram
This is the diagram found on FlexRC which covers other receivers along with buzzer and LED.
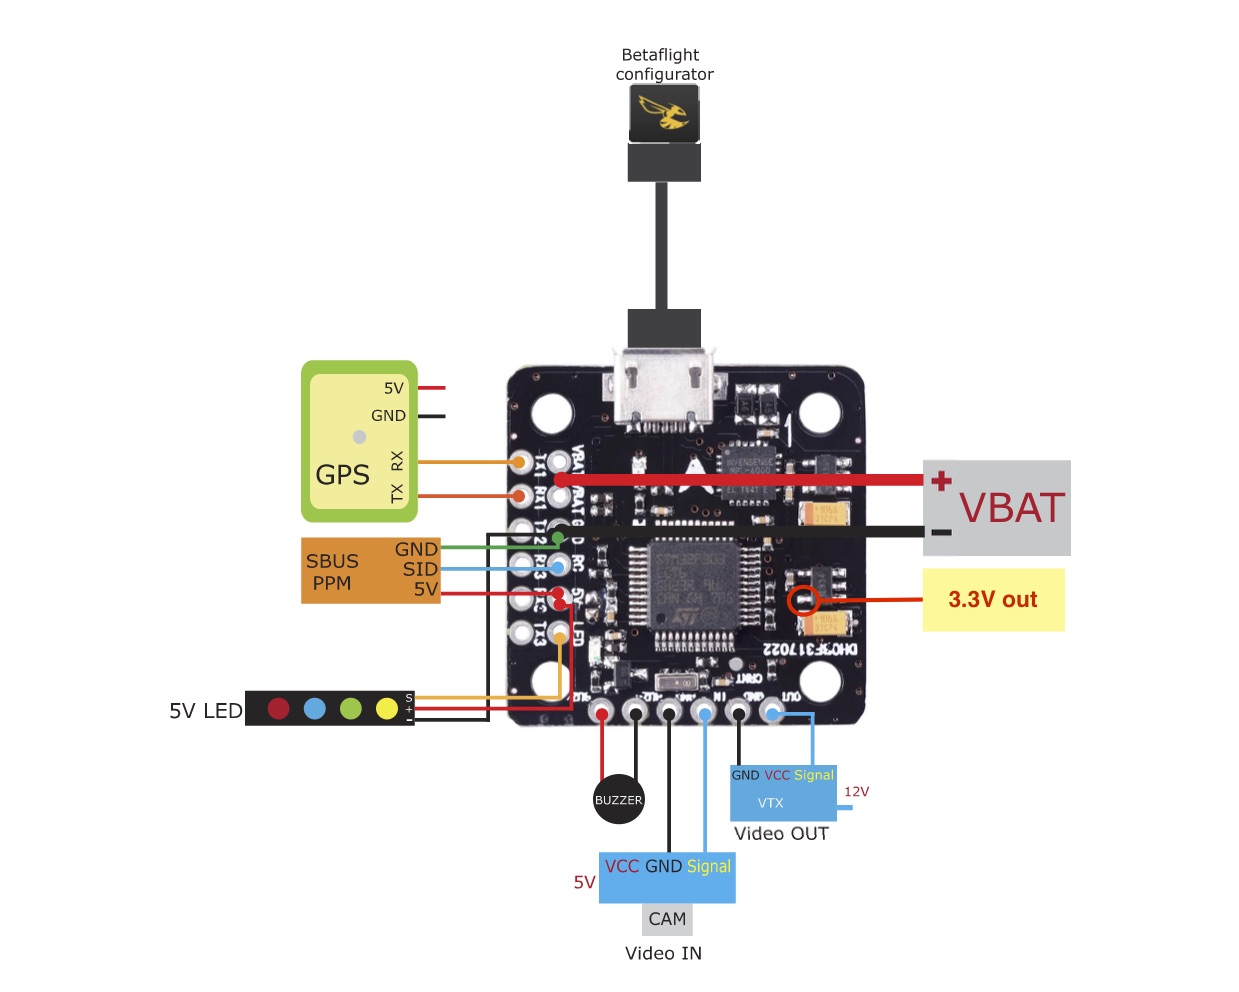
Spektrum receiver wiring diagram
This is the diagram that covers the way I have wired this build.
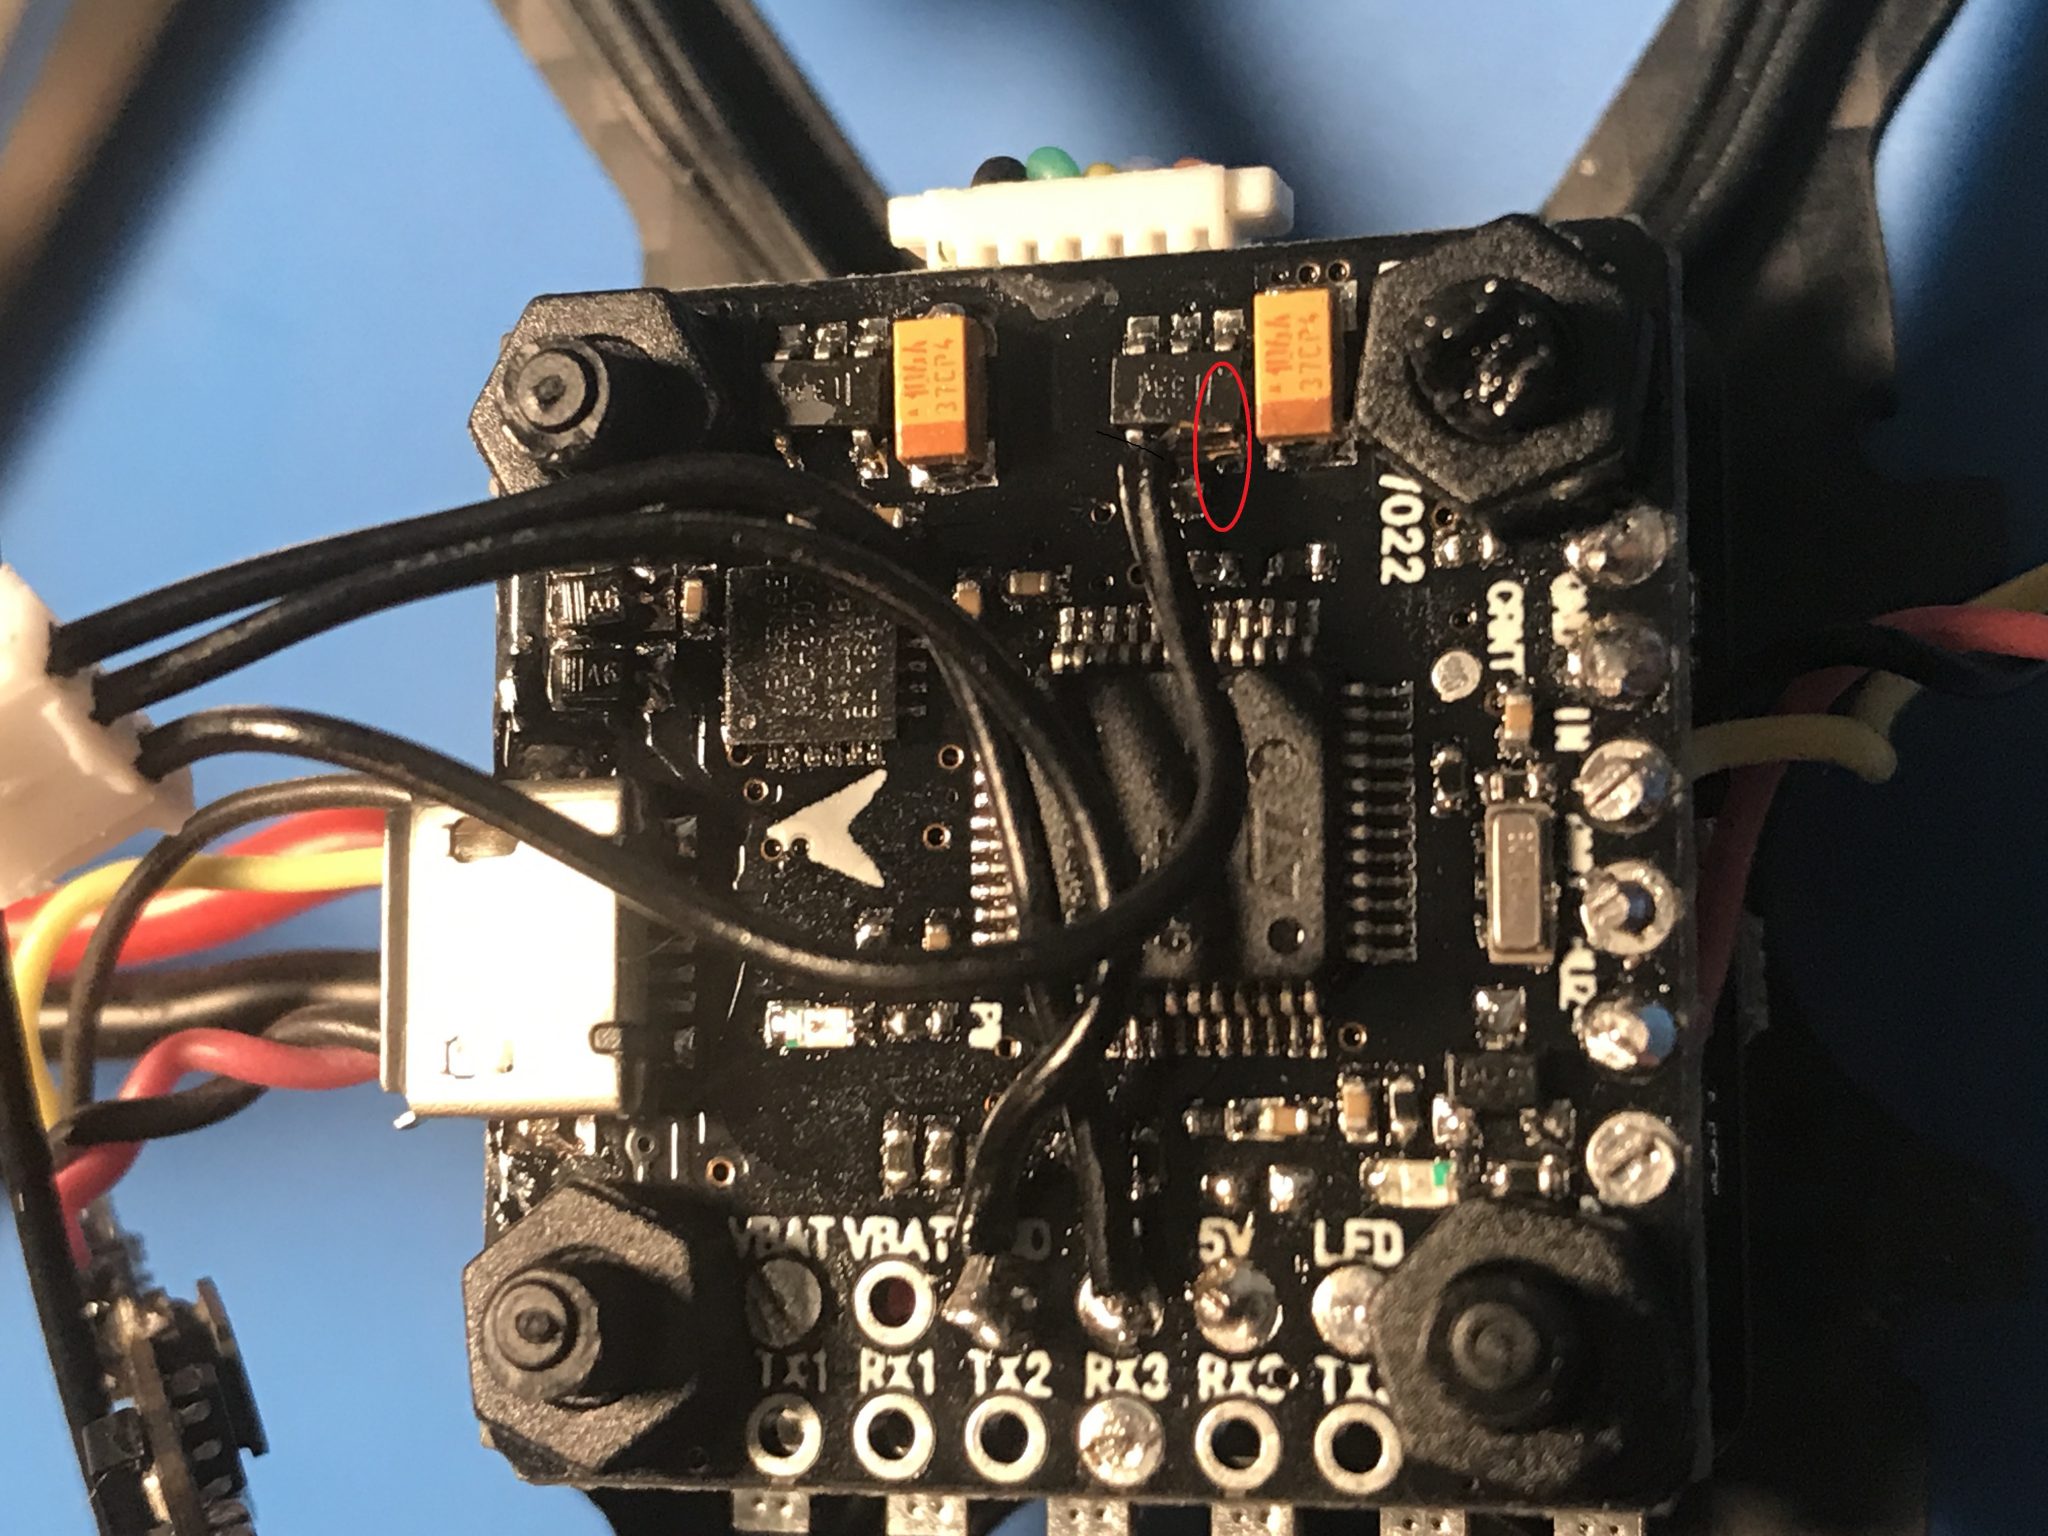
Solder FC power leads
First I solder in the FC power leads, making sure they are long enough but not too long so that I can take the FC off the stack if needed. Doing this first allows the ability to power up the FC to verify voltage where needed. I run the power wires to the bottom of the board.
Solder camera wires
Next I solder in the camera. These wires go under the FC.
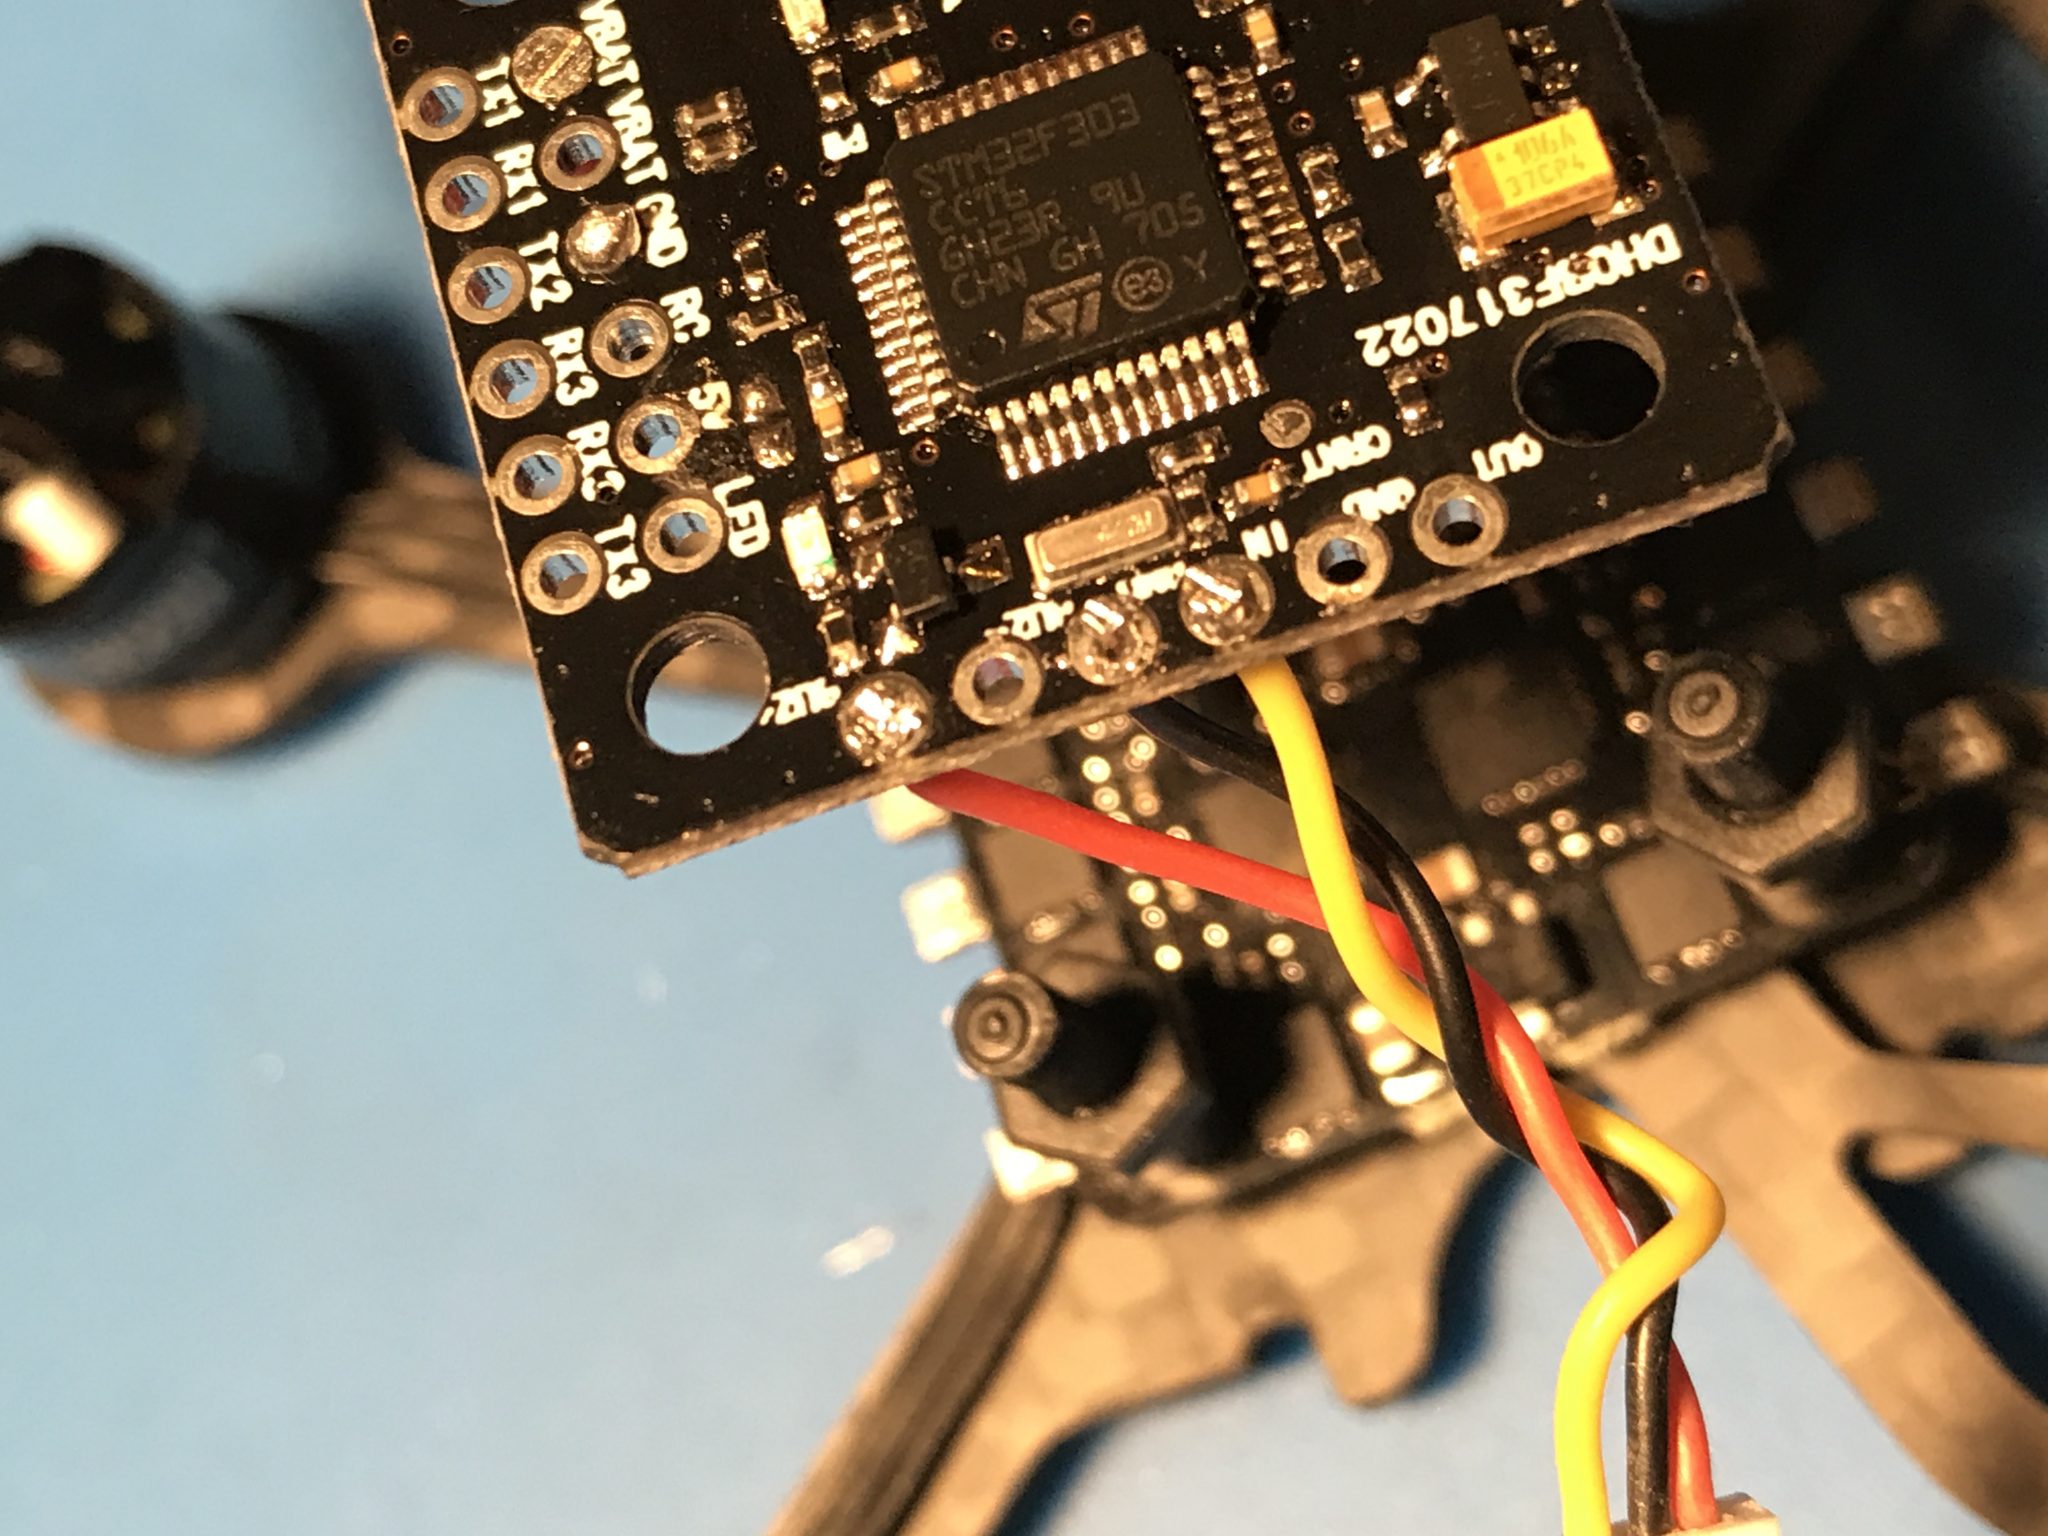
Solder VTX
Next I solder in the Vtx. I removed the audio lead and the camera power lead from the Vtx as they are not needed on this set up. These wires go under the FC.
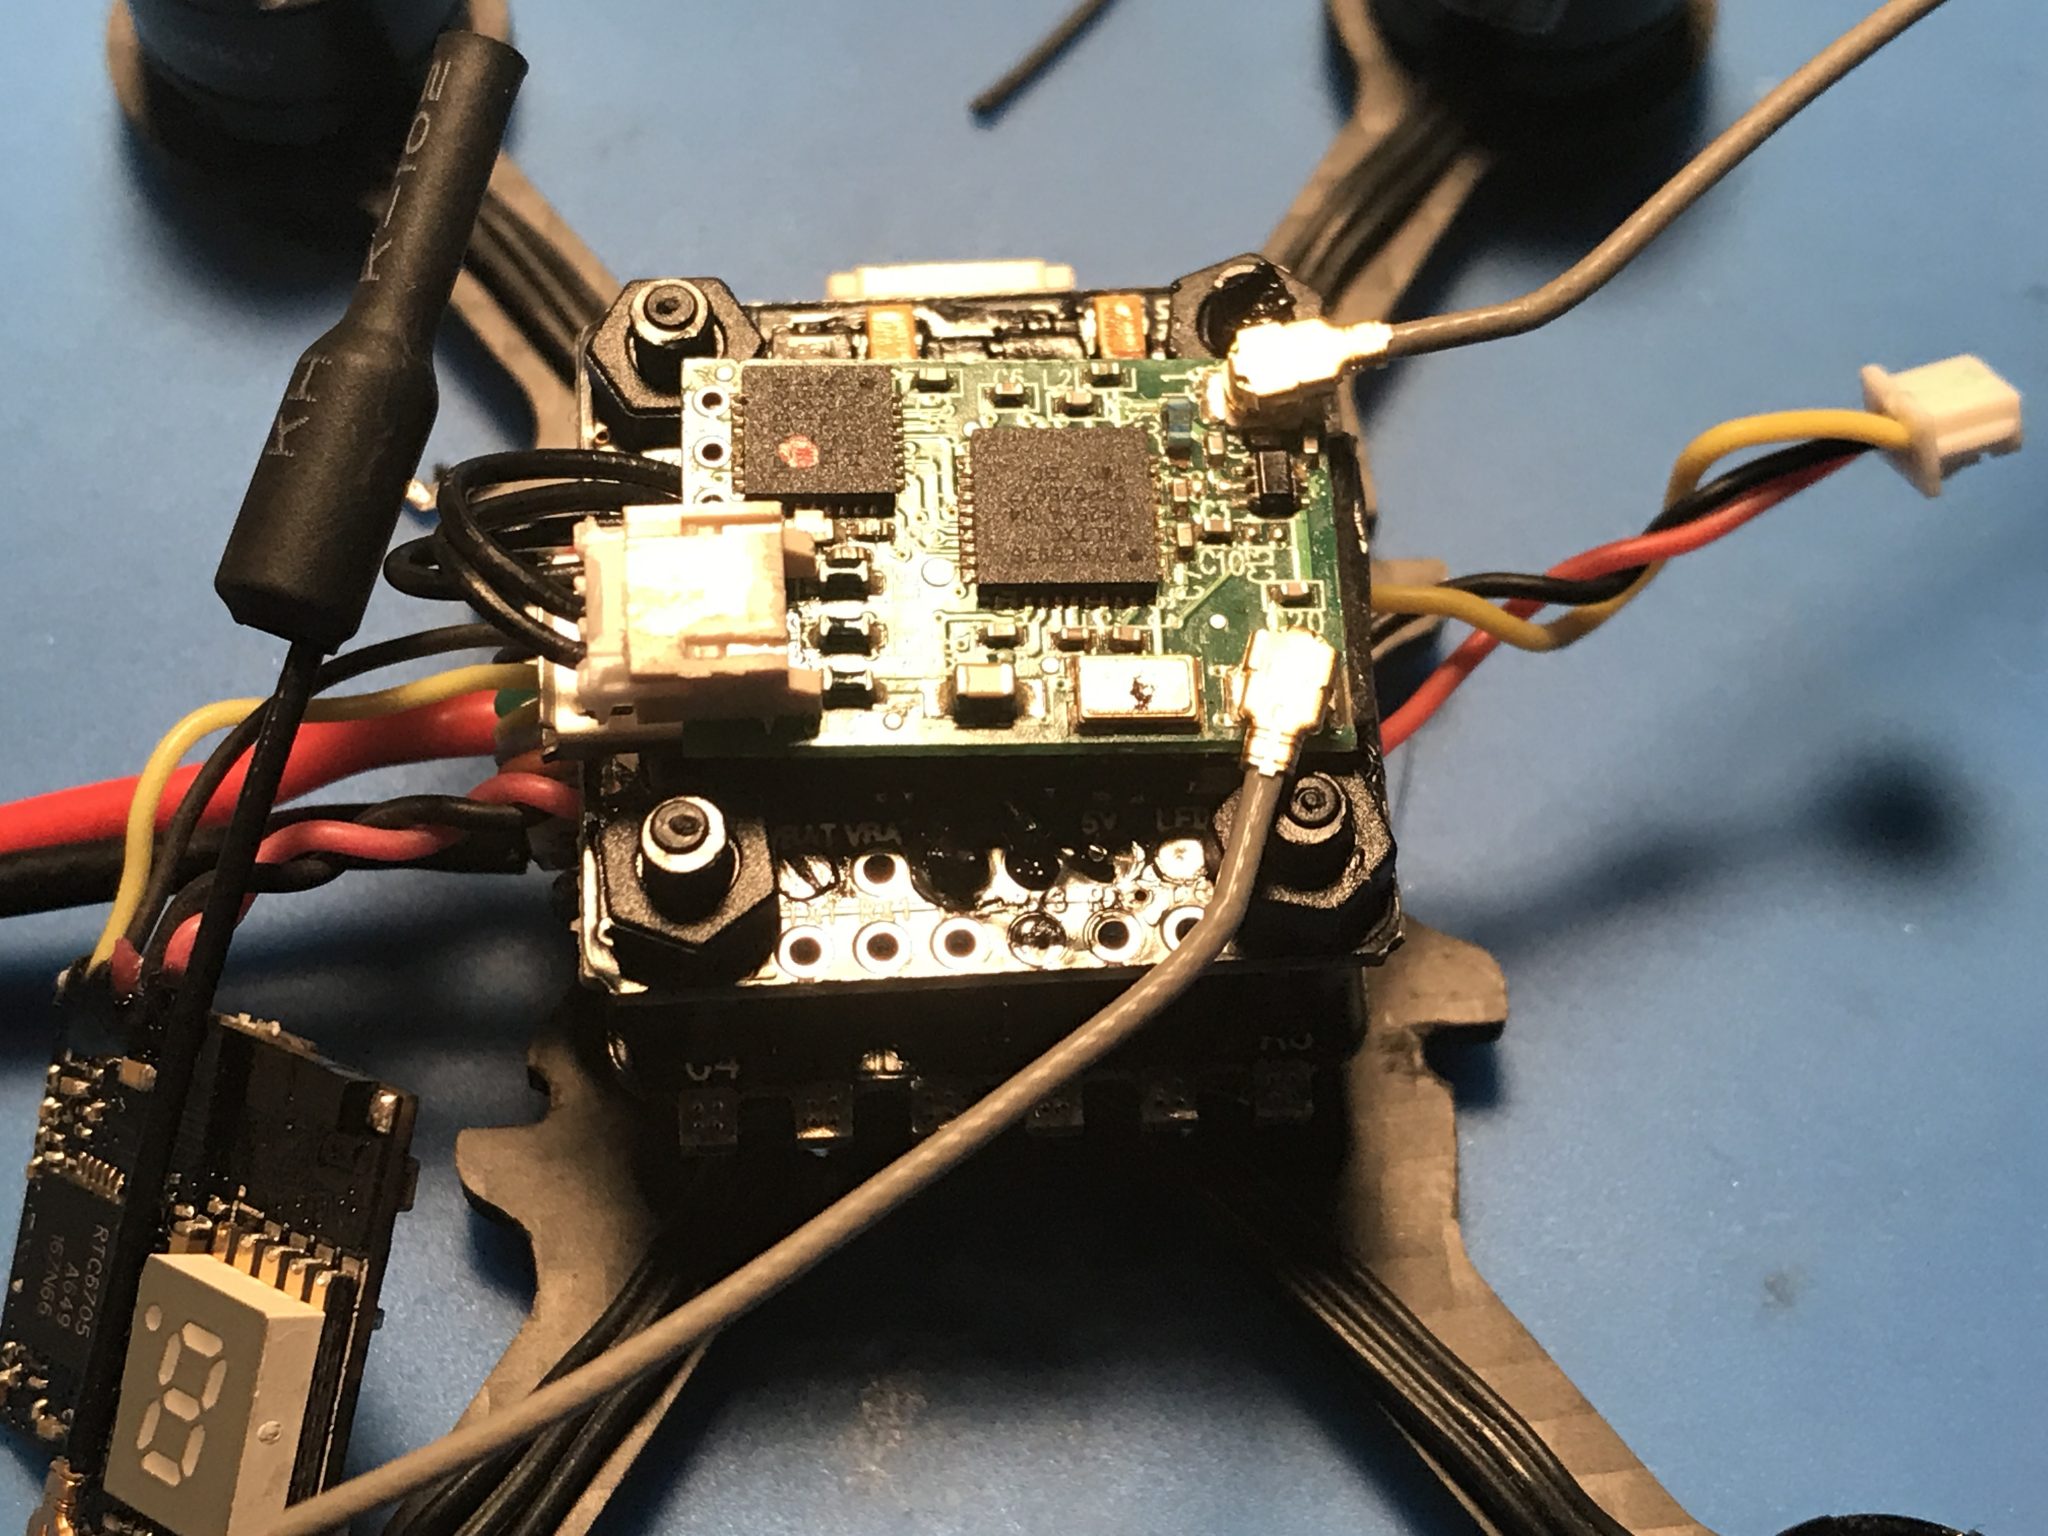
Mount FC
Now I mount the FC using 5mm spacers between the ESC board and the FC. I also mount the FC with the arrow pointing to the rear of the quad. This puts the USB port at the rear for easy access. If you do this you will need to change yaw position -180 in betaflight.
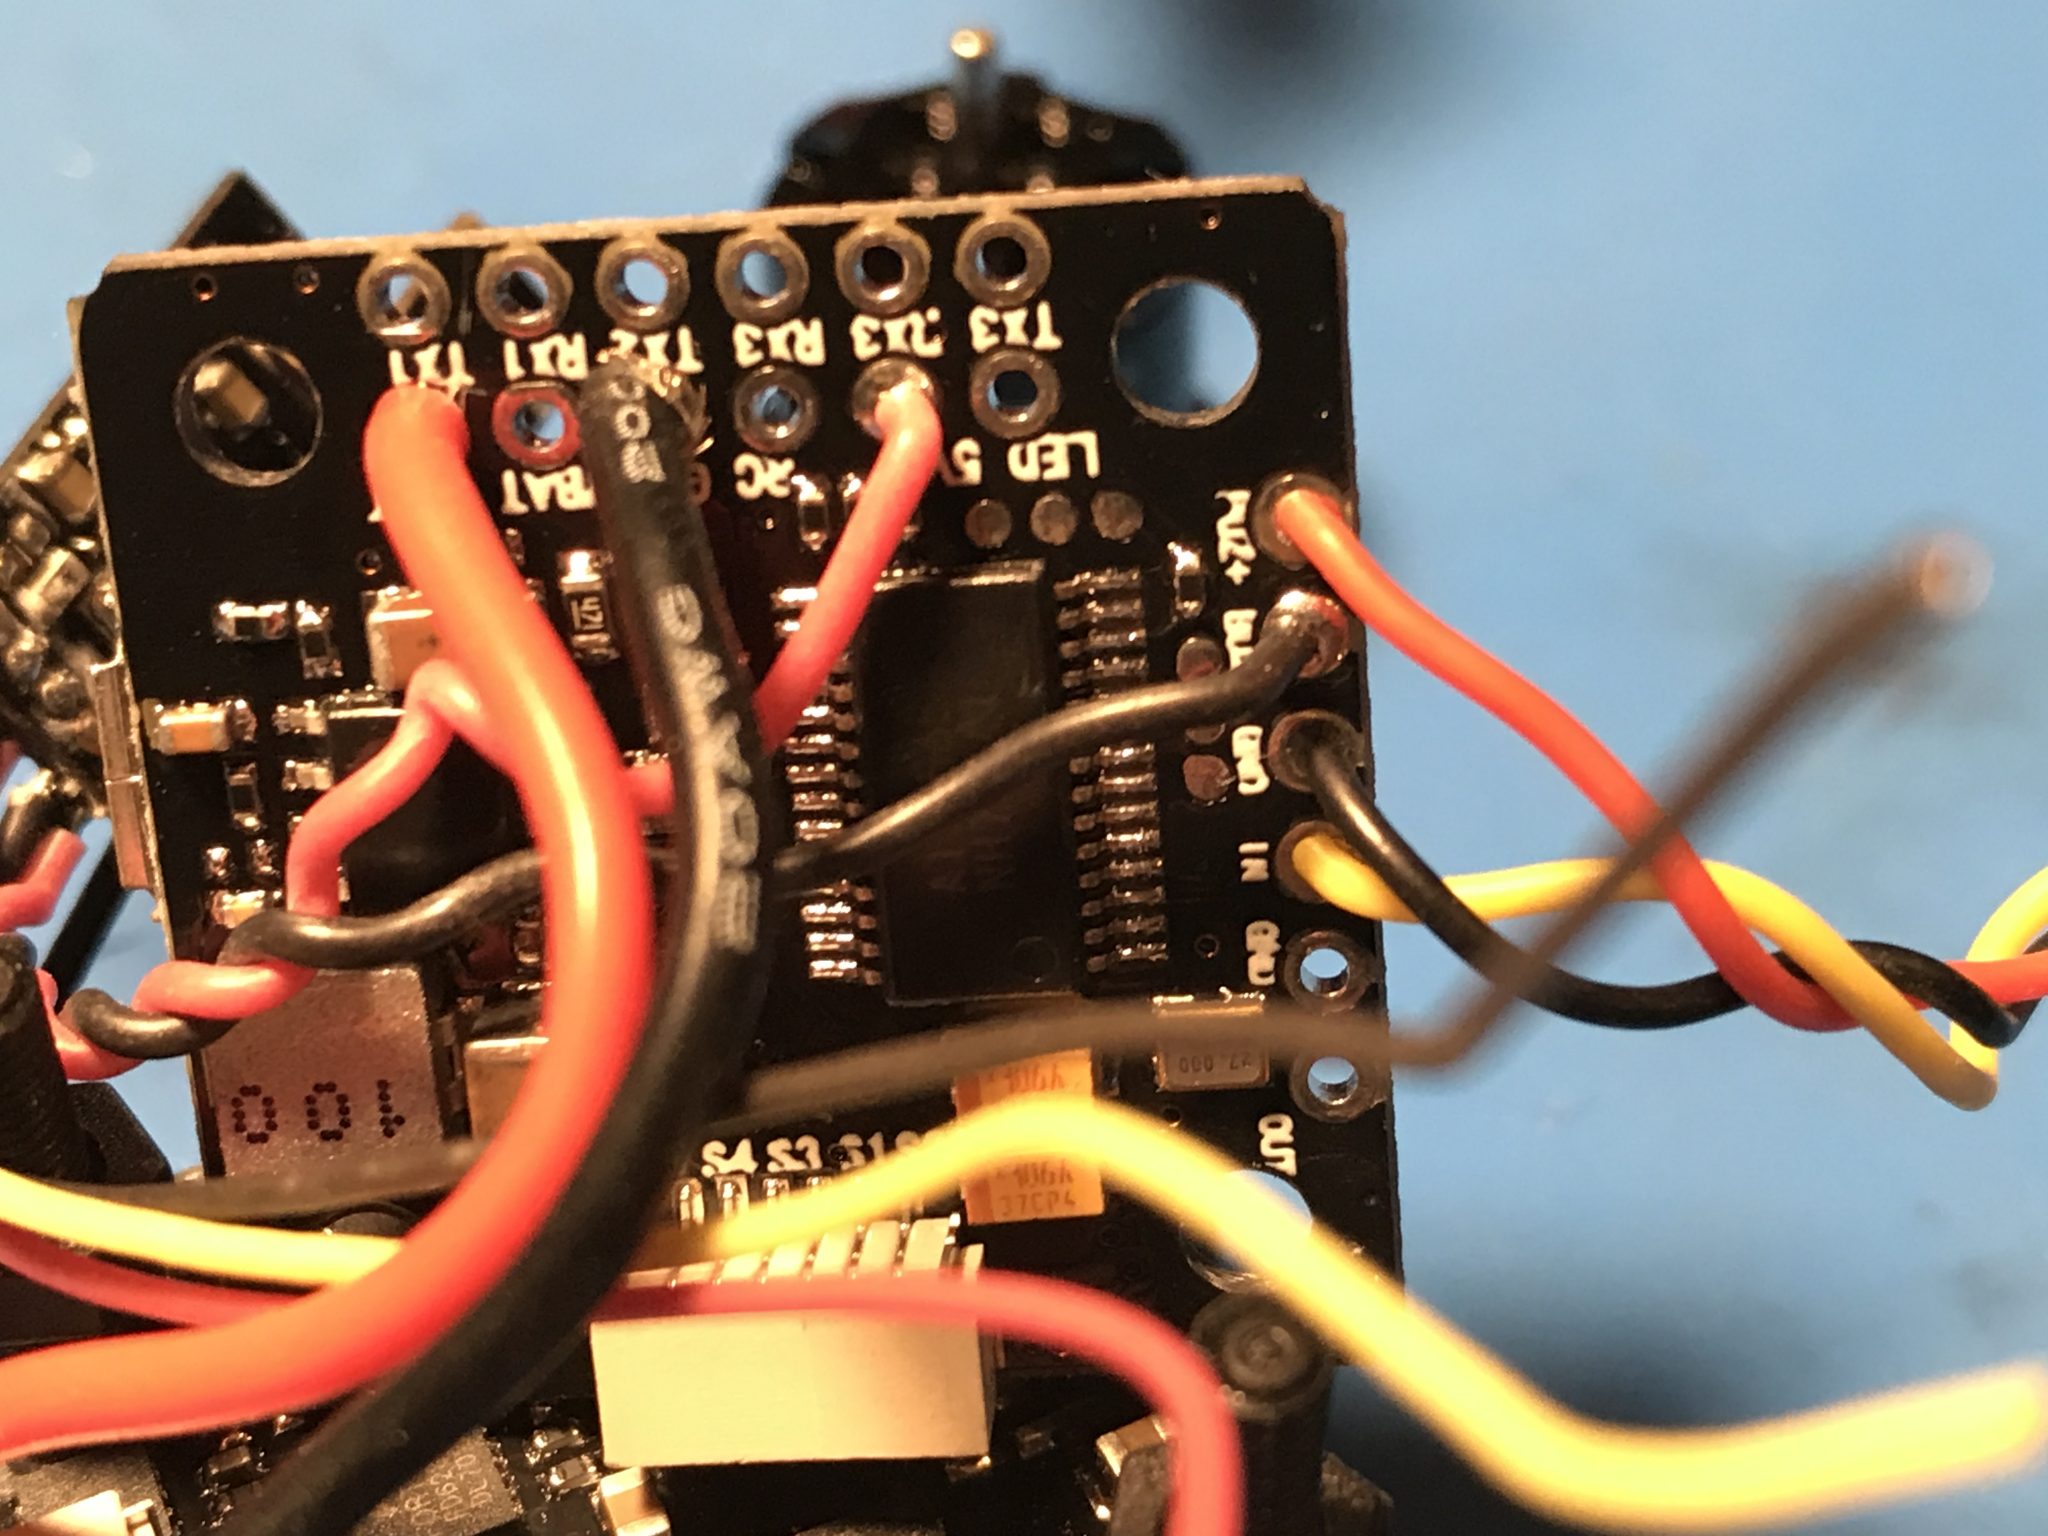
Install Spektrum receiver
I used a spektrum Rx I had but normally use Lemon Rx. On the spektrum the grey wire is signal, black is ground and orange is 3.3v. Here is a pinout of the Lemon Rx.
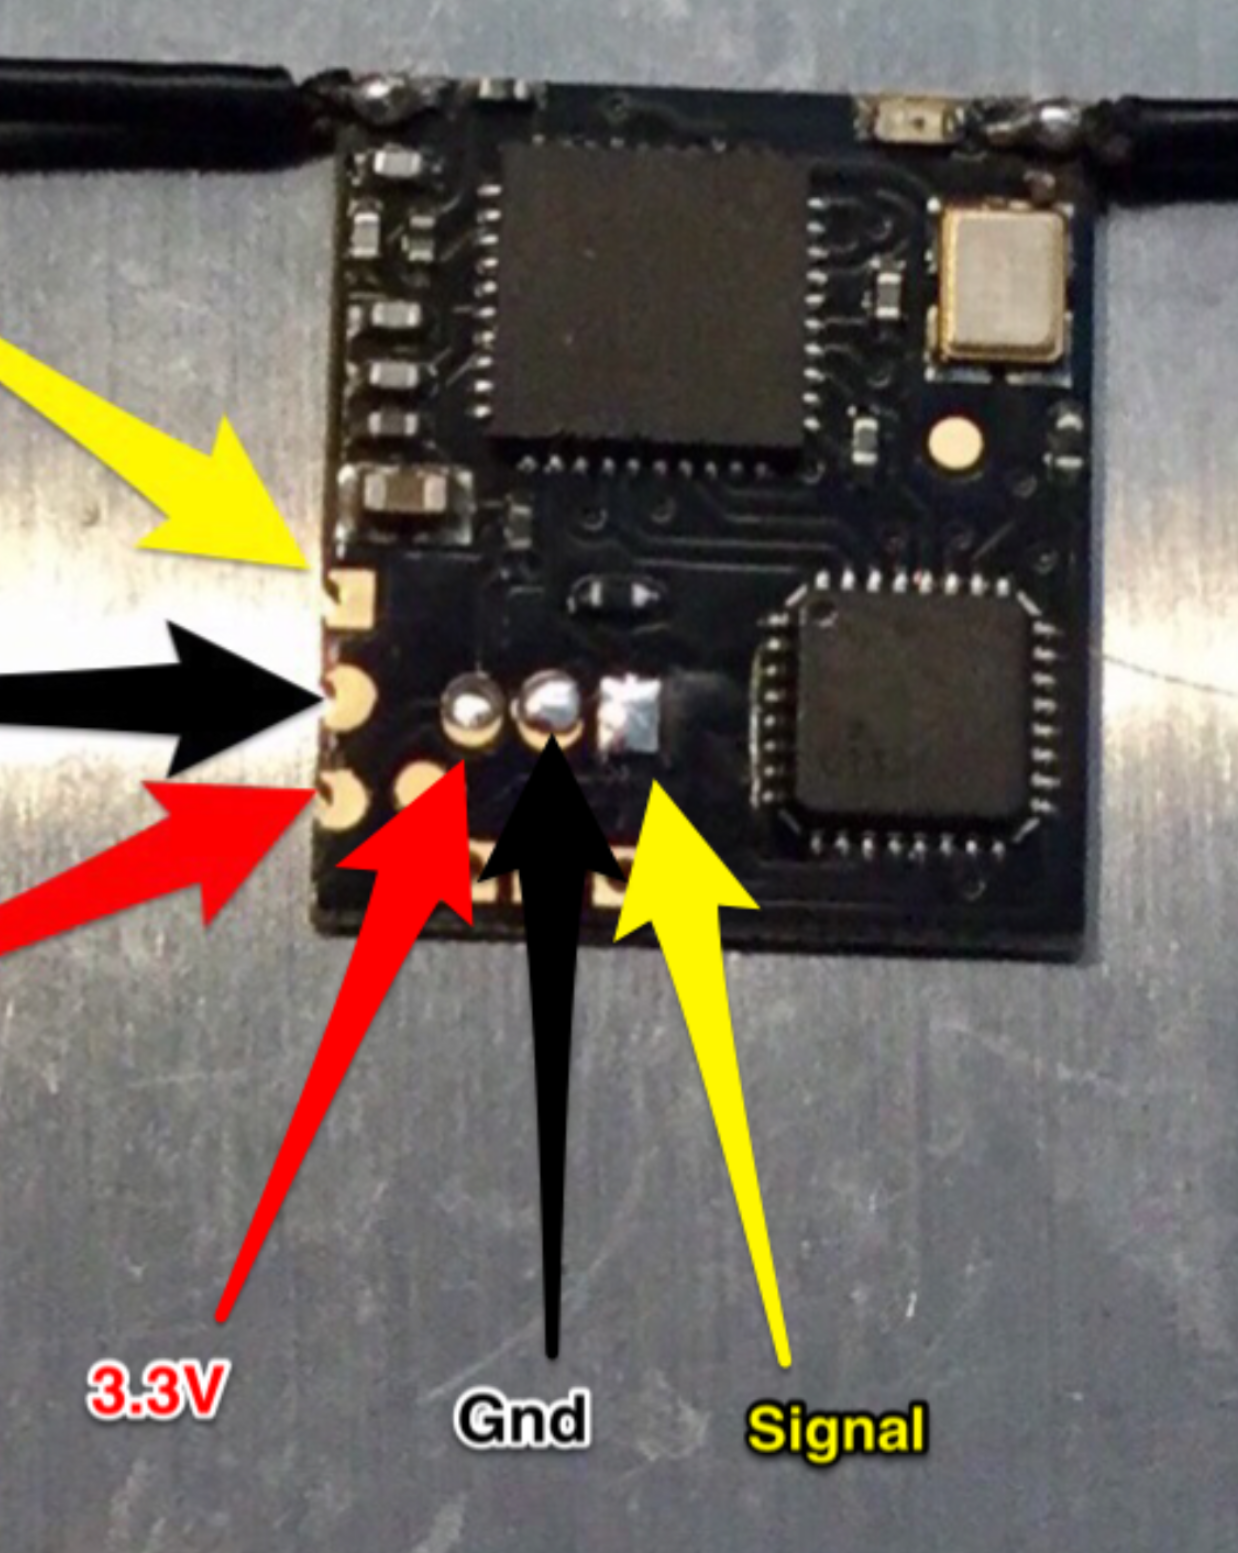
Look closely at the wiring diagram that shows the spektrum Rx. Before you solder the power wire it is a good idea to use a multimeter to verify you have the right spot. Once you are sure, solder in the Rx wires on the top of the FC.
Mount Rx
Now use some double sided foam tape to secure the Rx on top of the FC.
IMPORTANT NOTE!
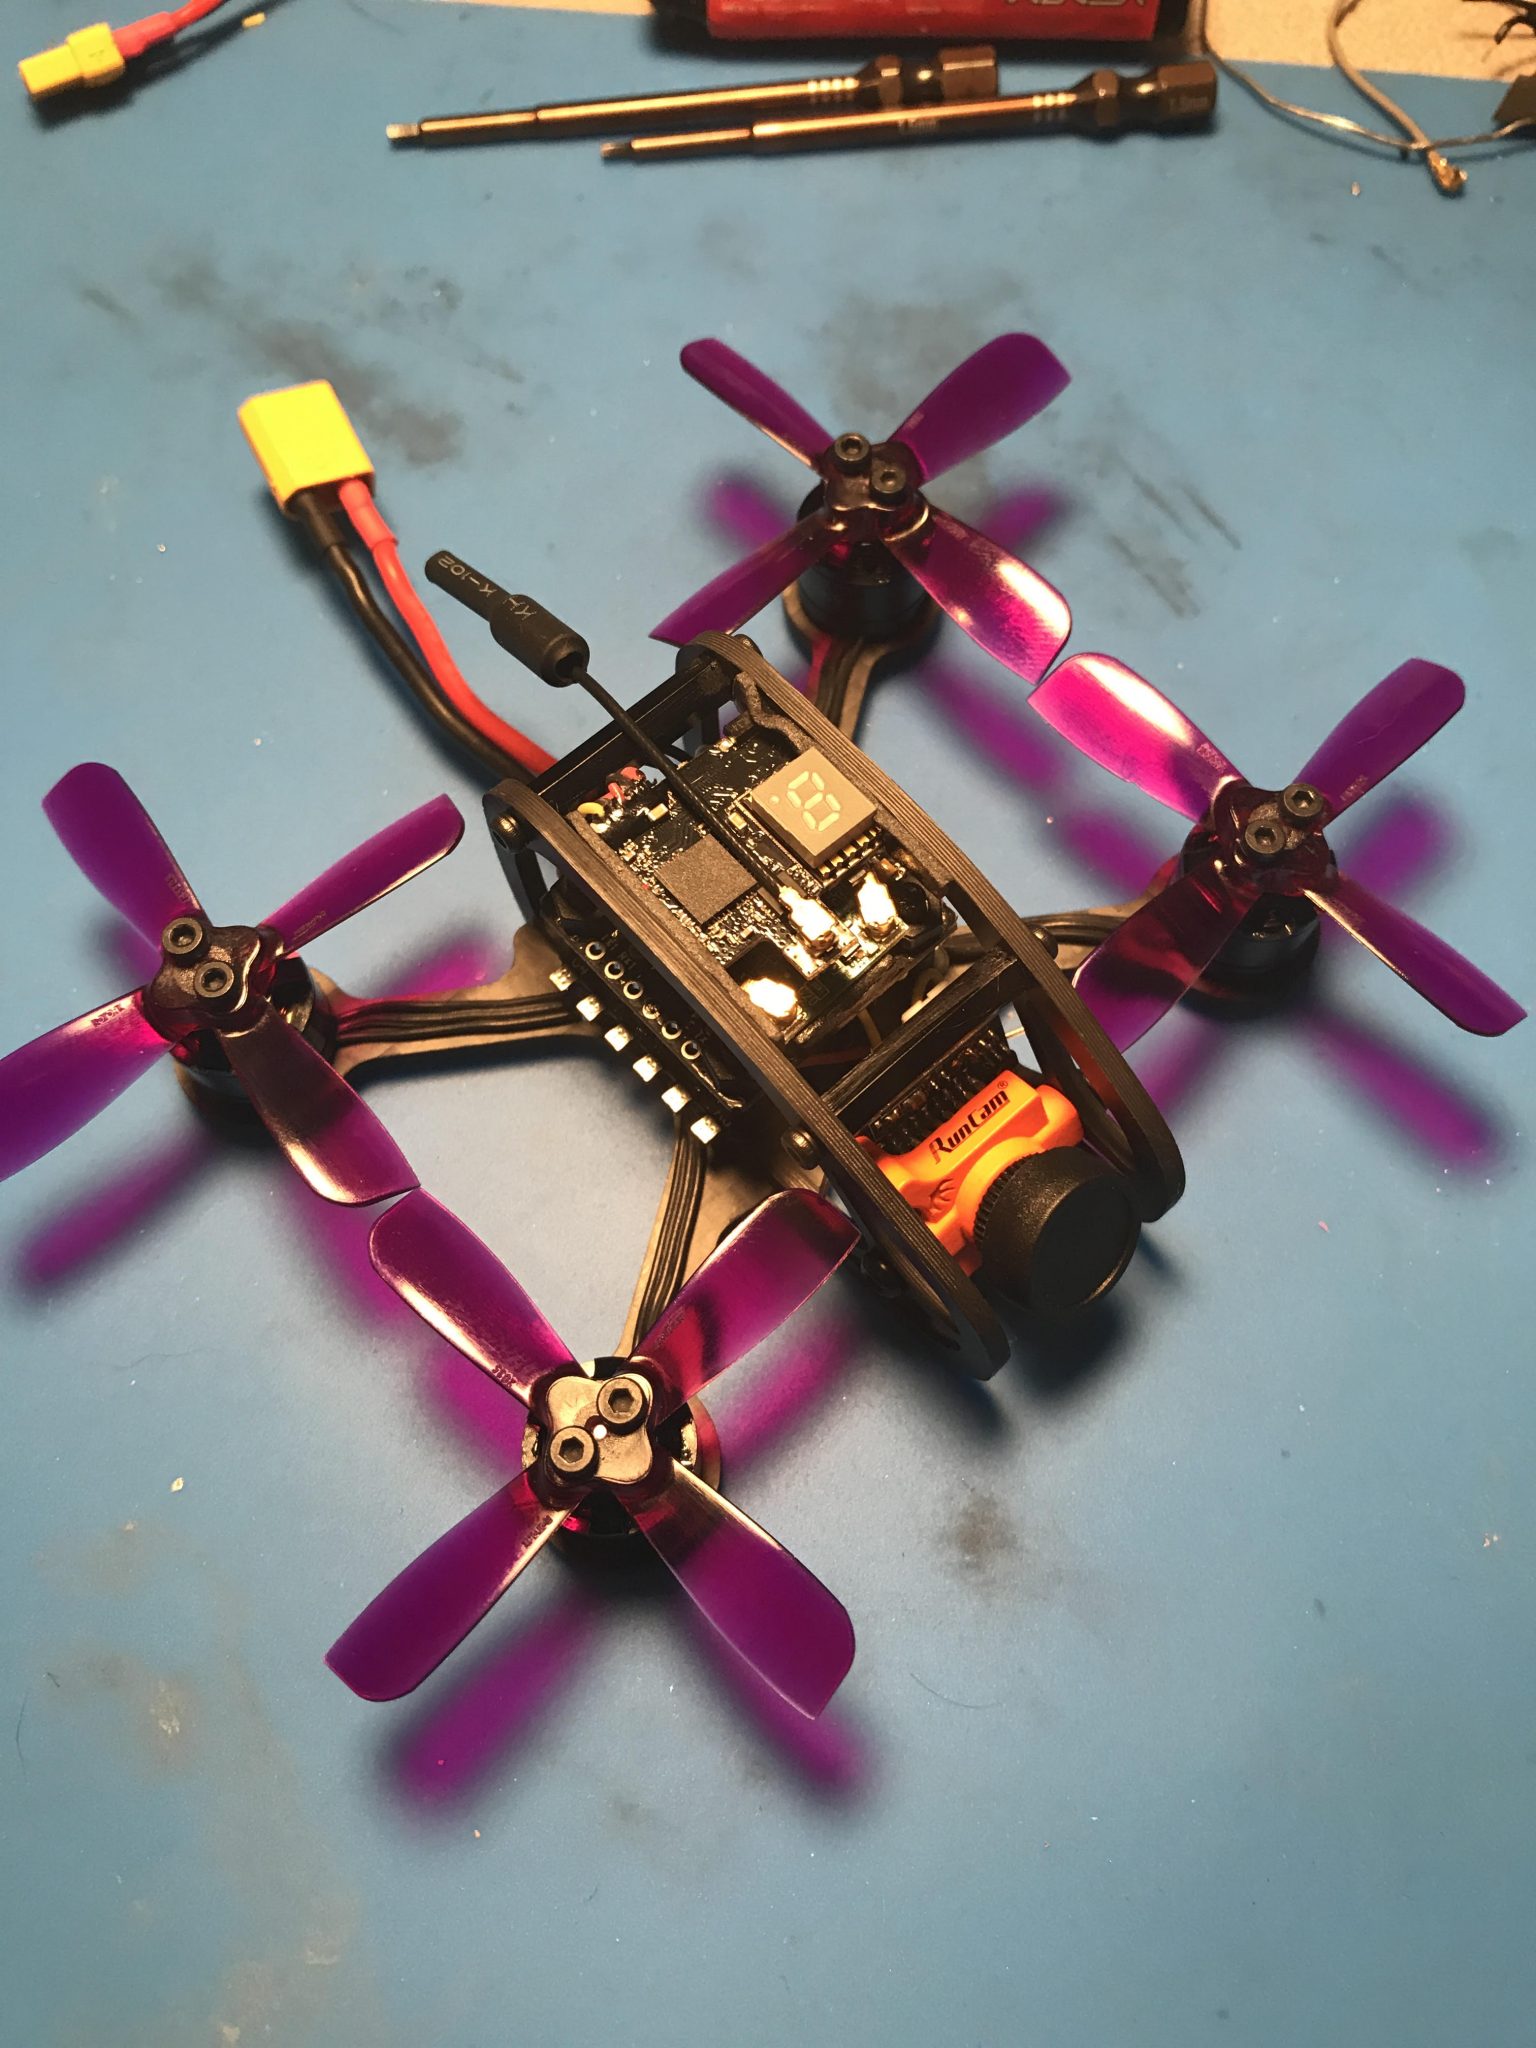
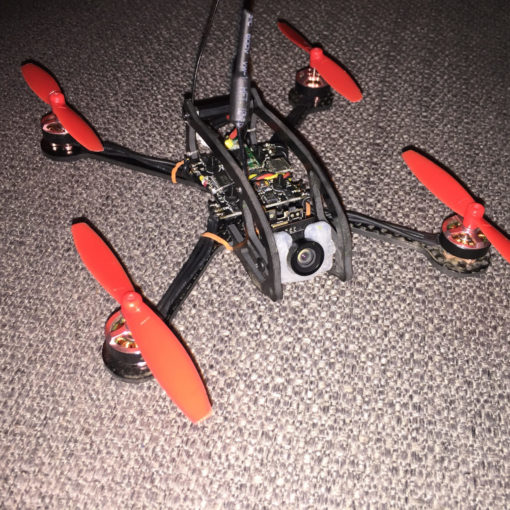
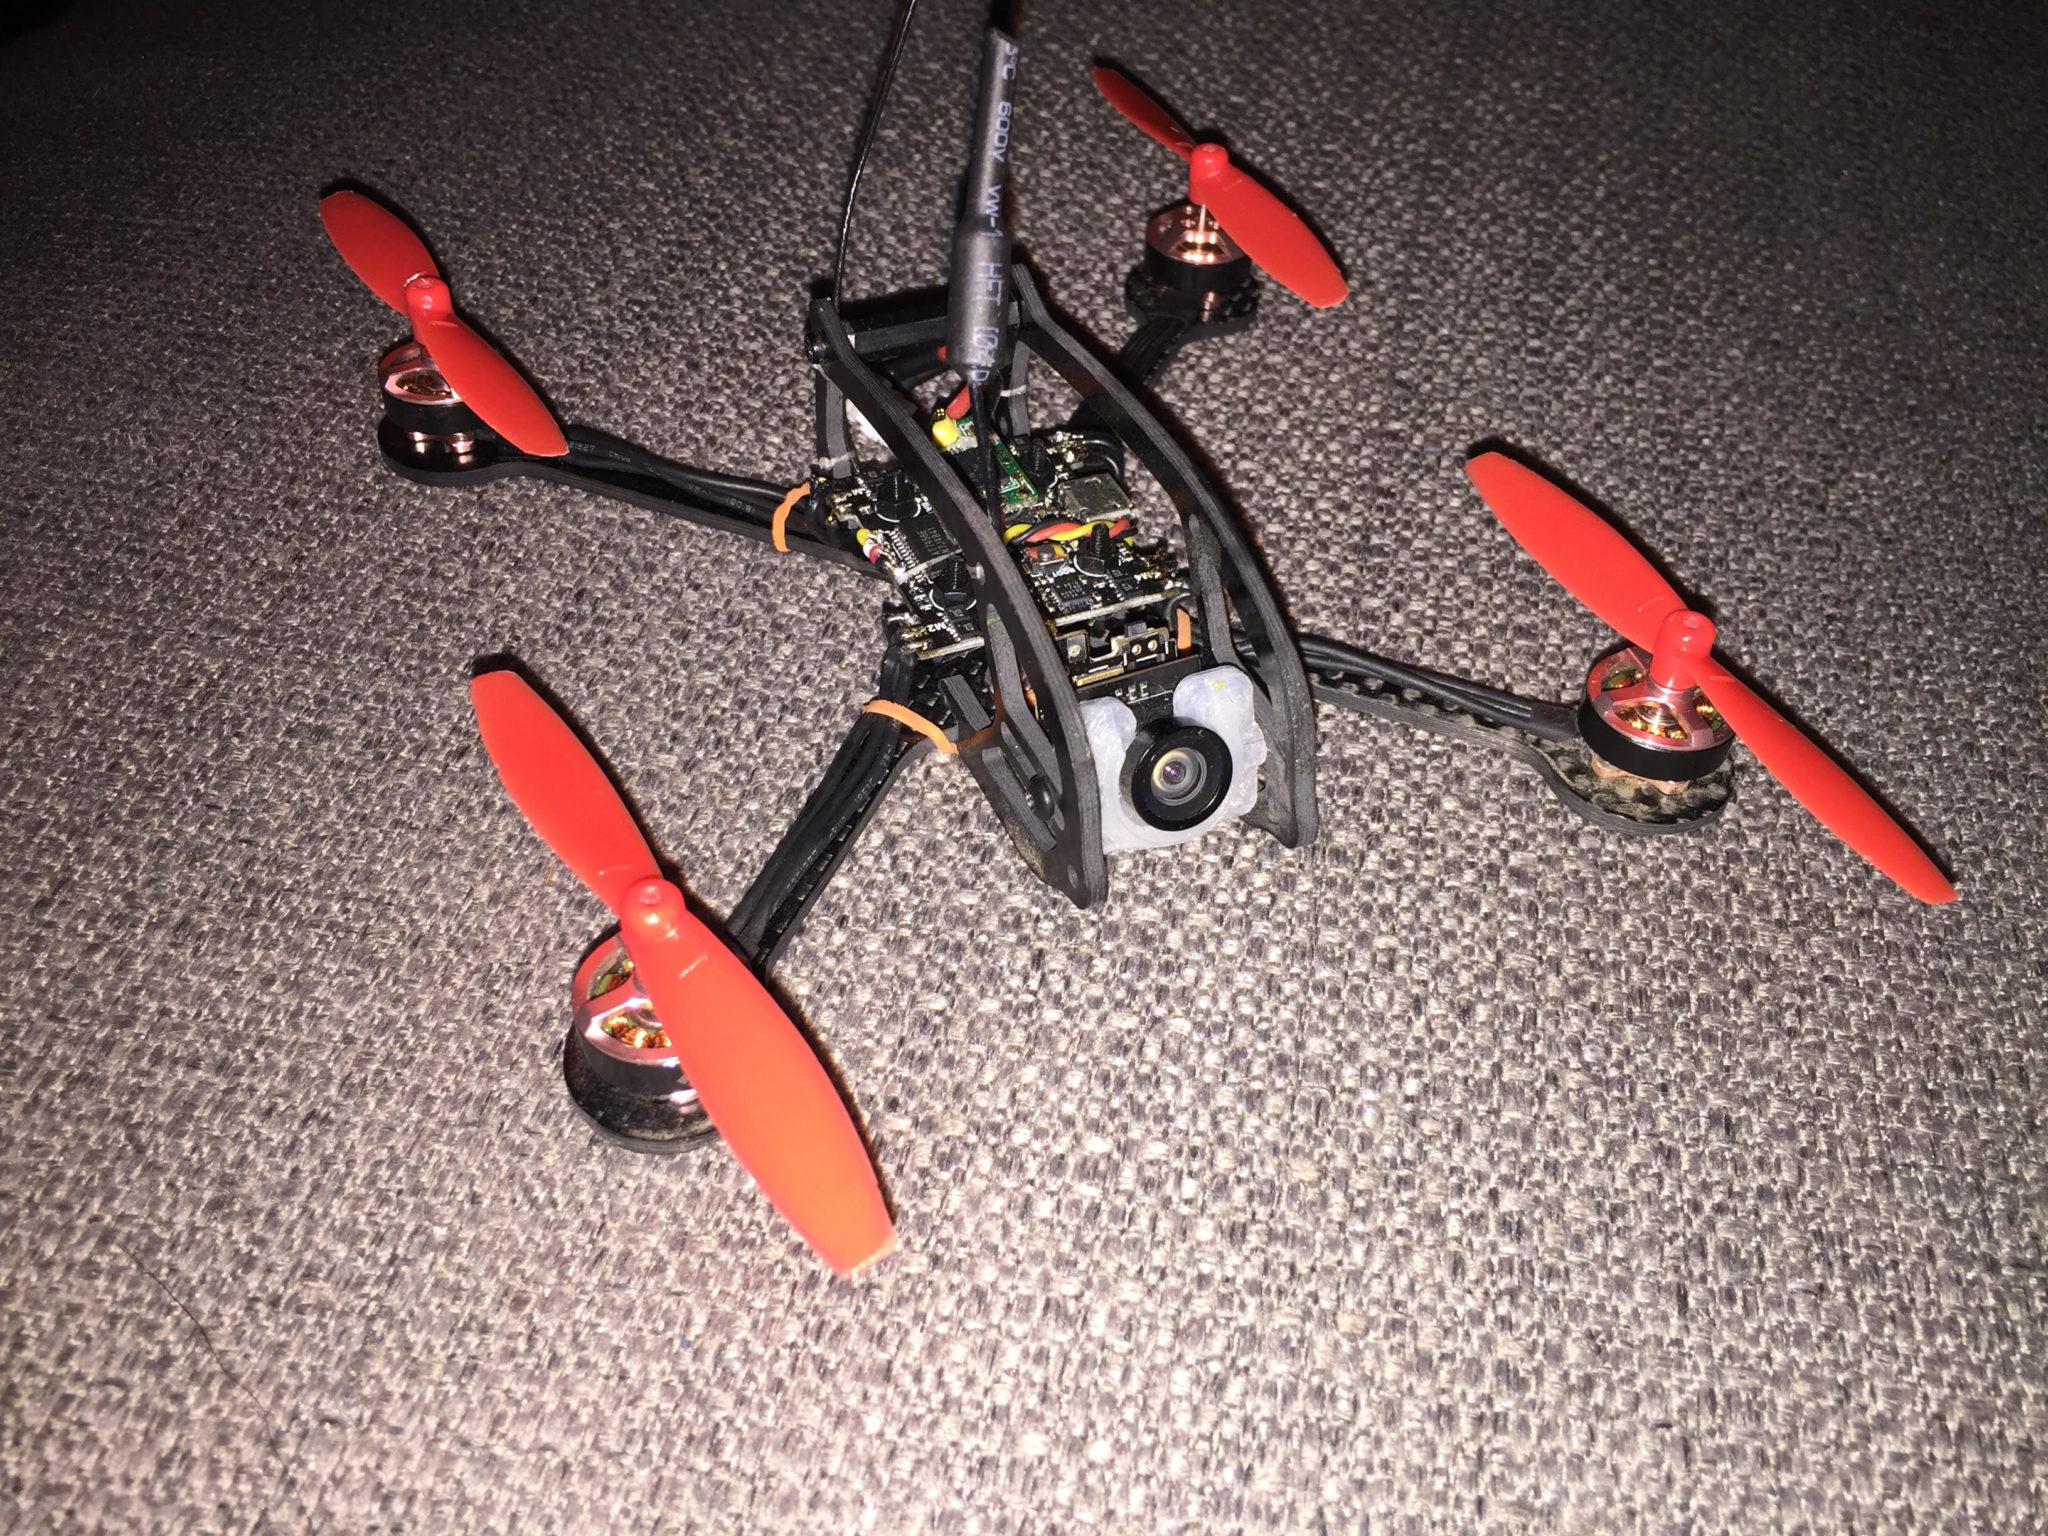
I do not recommend installing the Vtx the way i did. It defeats the purpose of the awesome carbon fiber roll cage design by putting the Vtx in a position it is almost sure to get broken. It is recommended that you create enough space between the Esc board and the FC that you can fit the Vtx between them.
IMPORTANT NOTE!
I do not recommend installing the side plates that make the roll cage while the electronics are on the frame. While it is possible to do this you risk damaging your electronics while trying to get the side plates on.
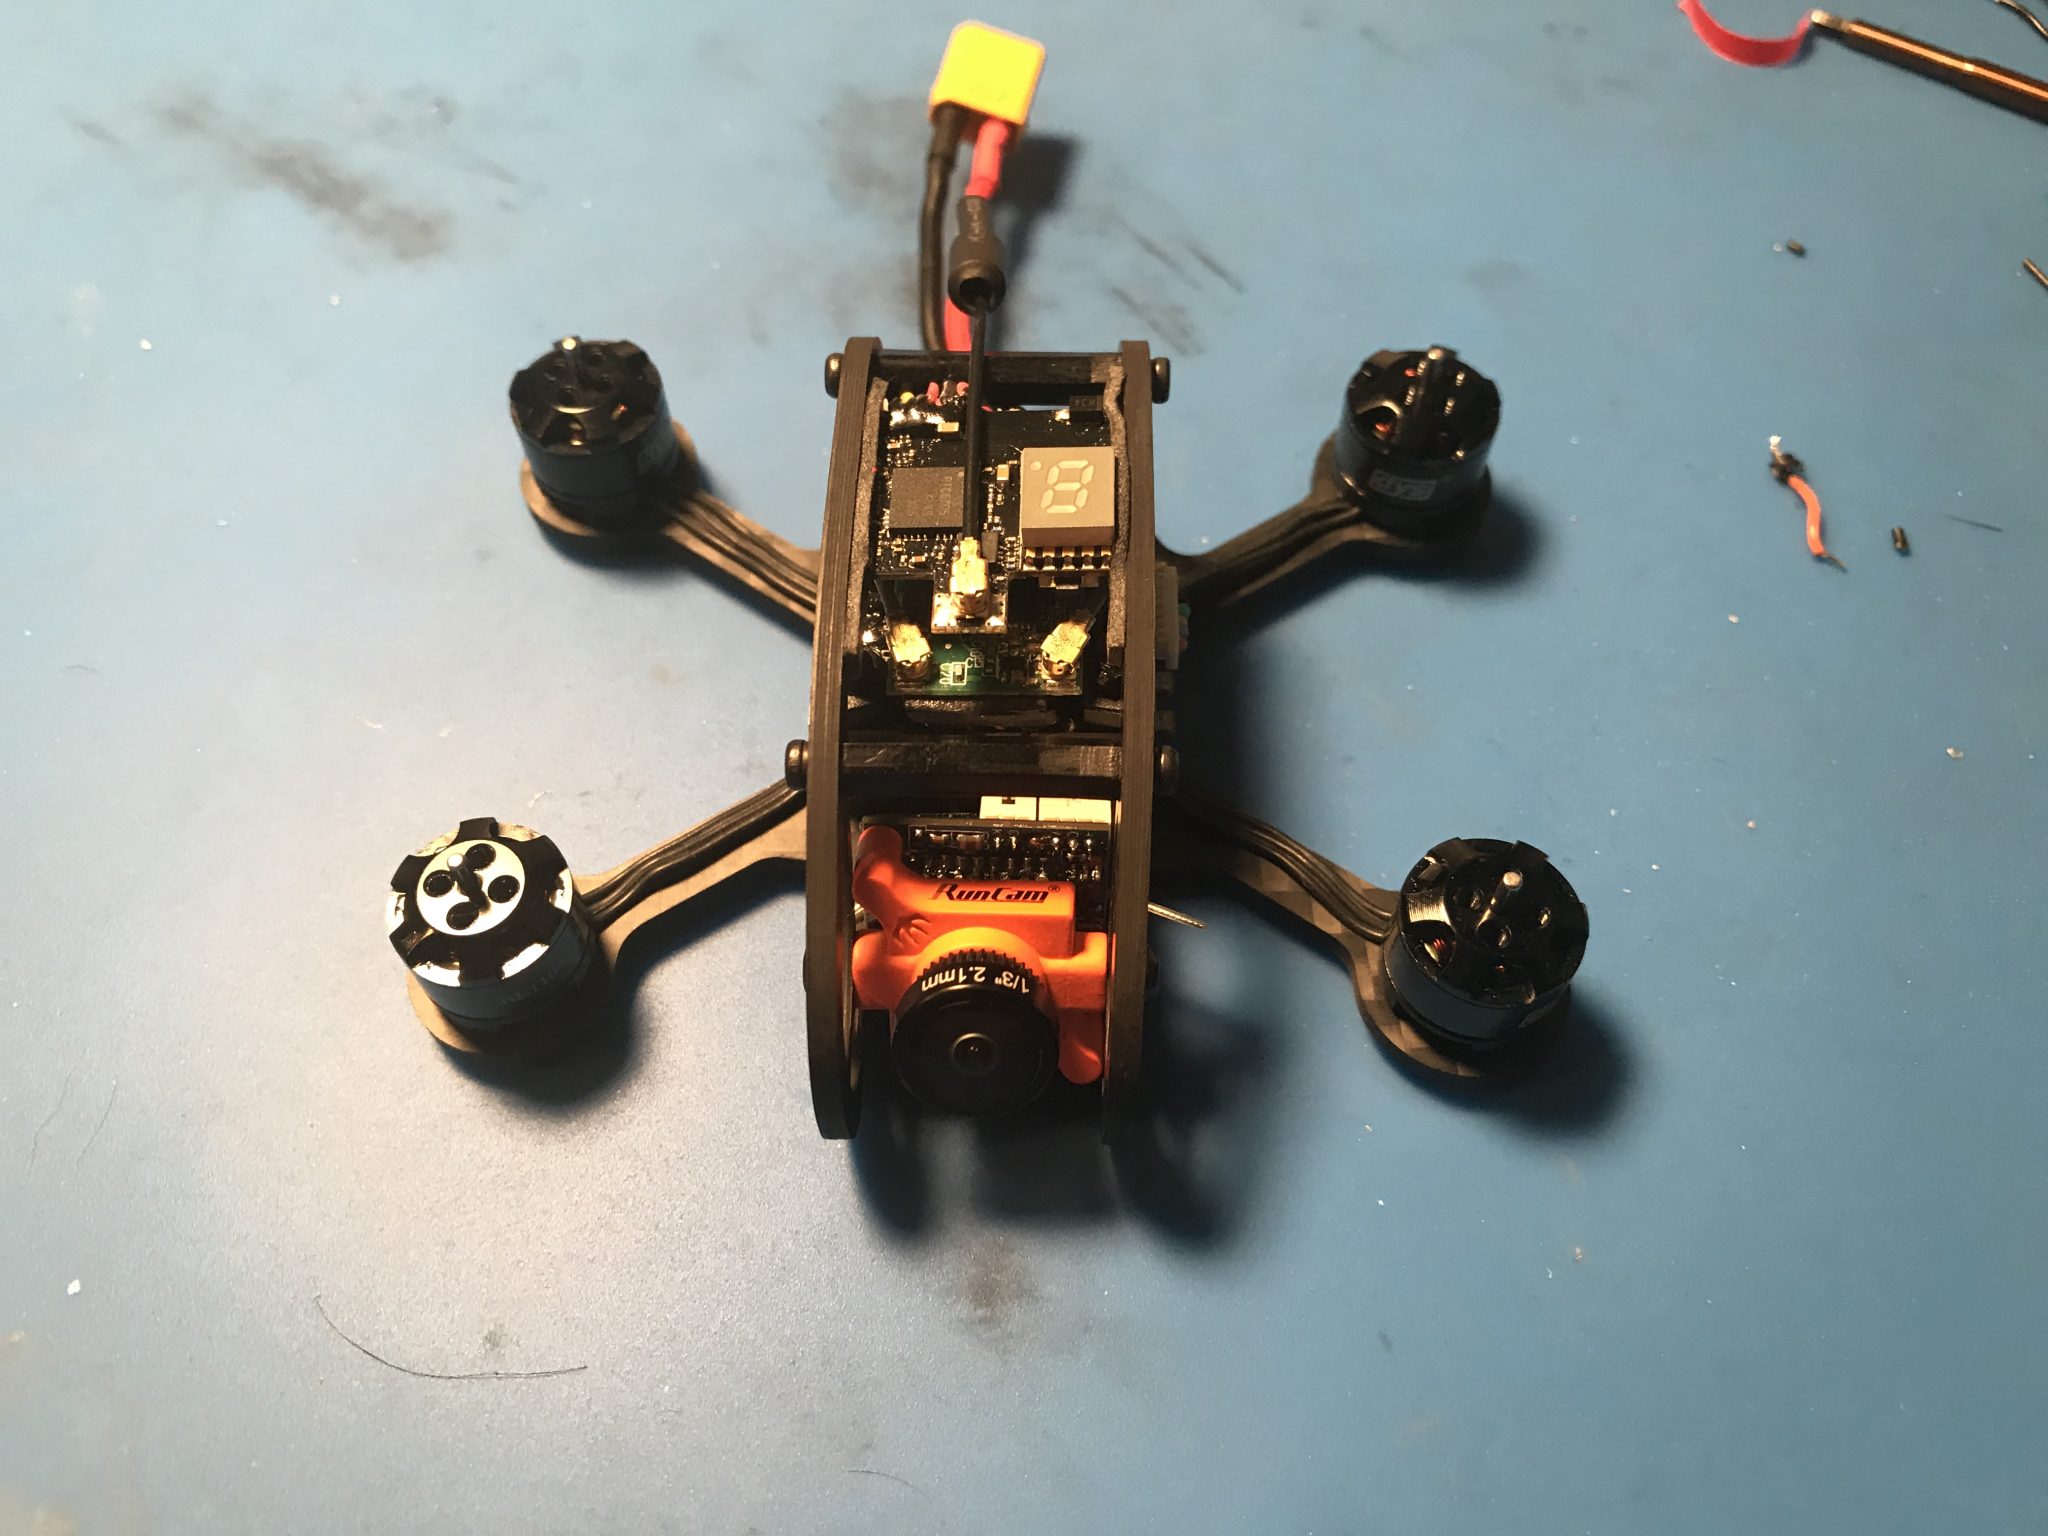
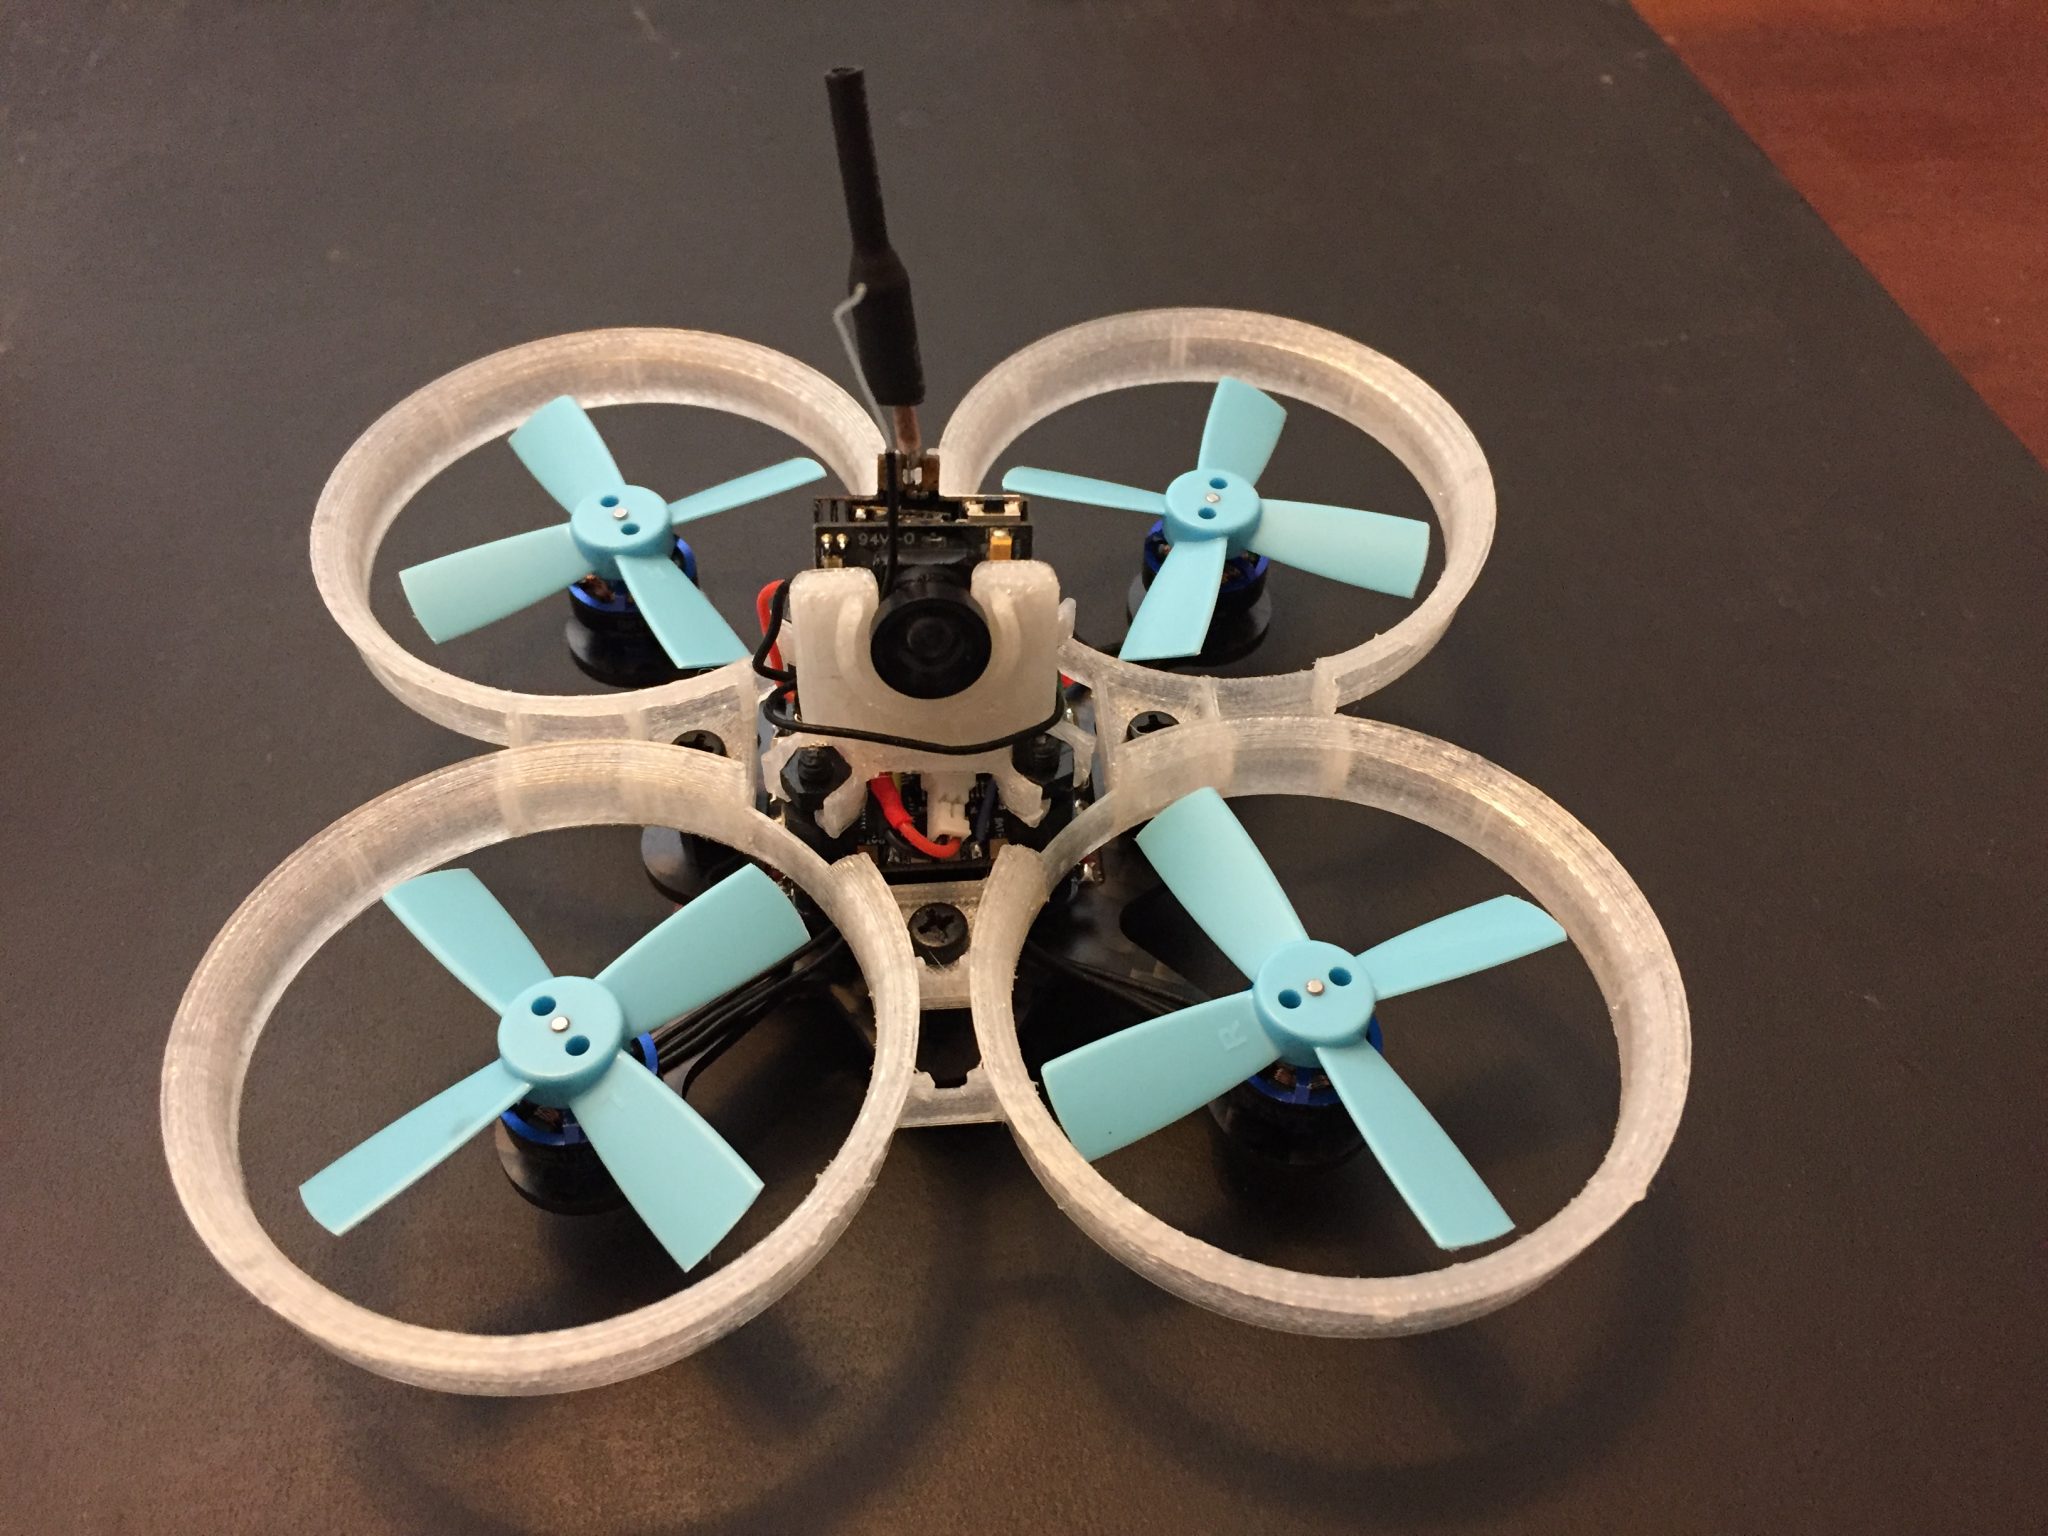
Install side plates, camera and support spacers.
Betaflight configuration
I did not flash this board, I just ran it the way it came. Get connected to betaflight and get your Rx bound.
Here is a link if you need help binding a Lemon Rx
How to configure cleanflight and bind satellite receiver
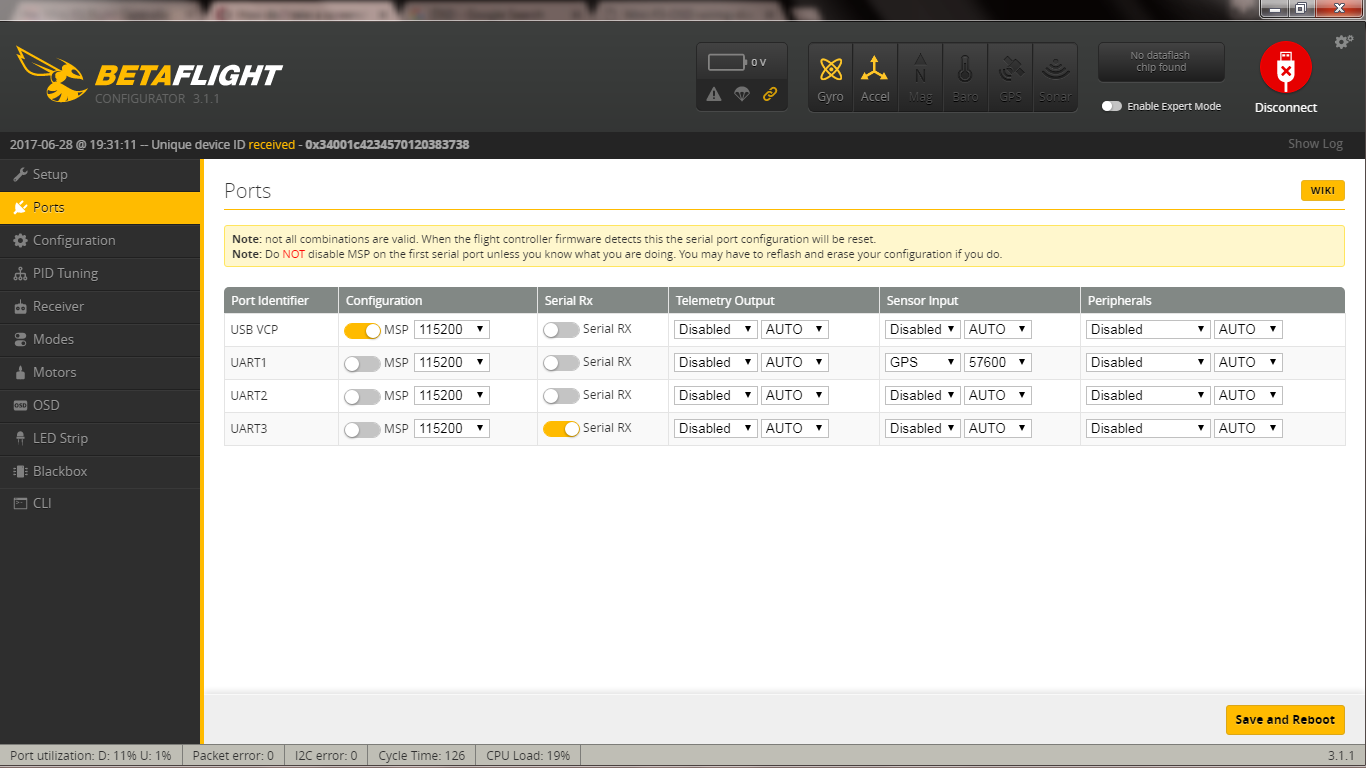
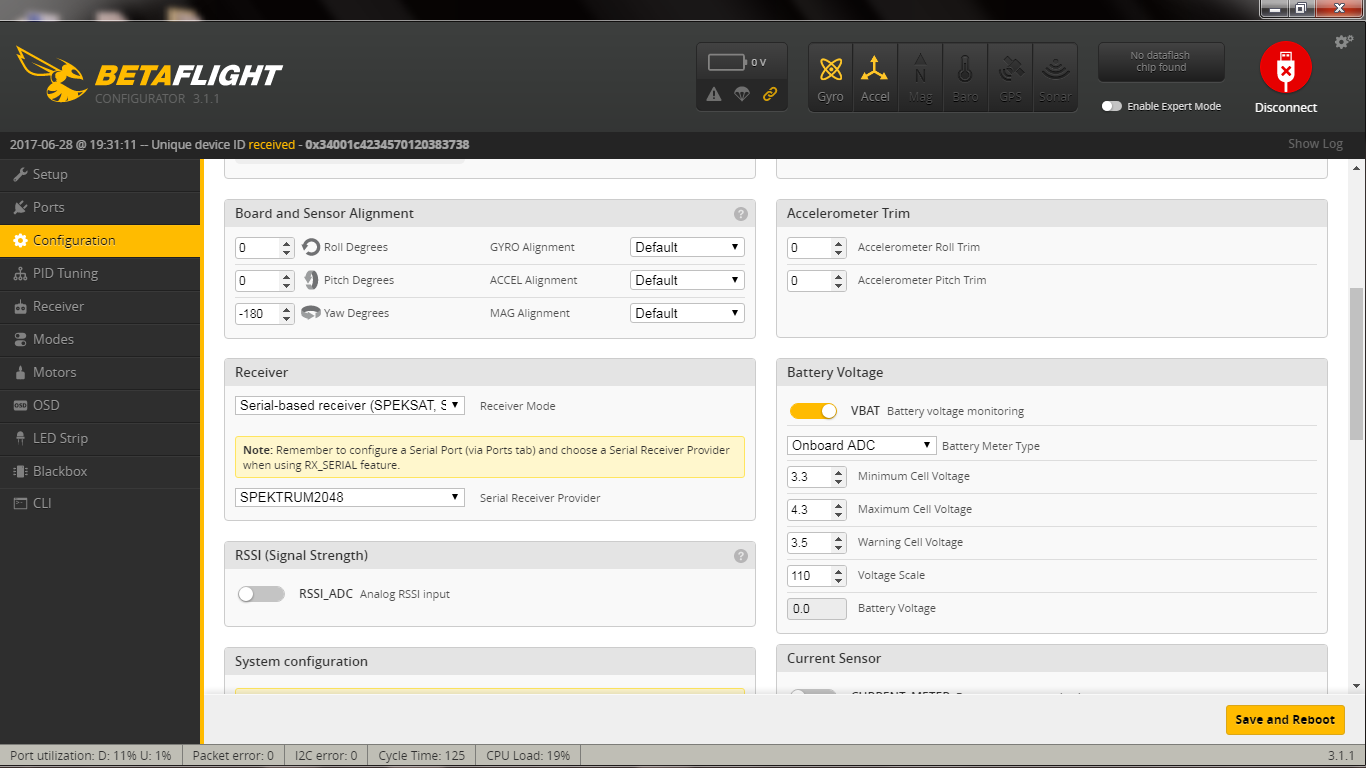
Here are some screen shots of my betaflight set up.
If you set your FC the way I did you will need to change yaw position to -180 for proper setup.
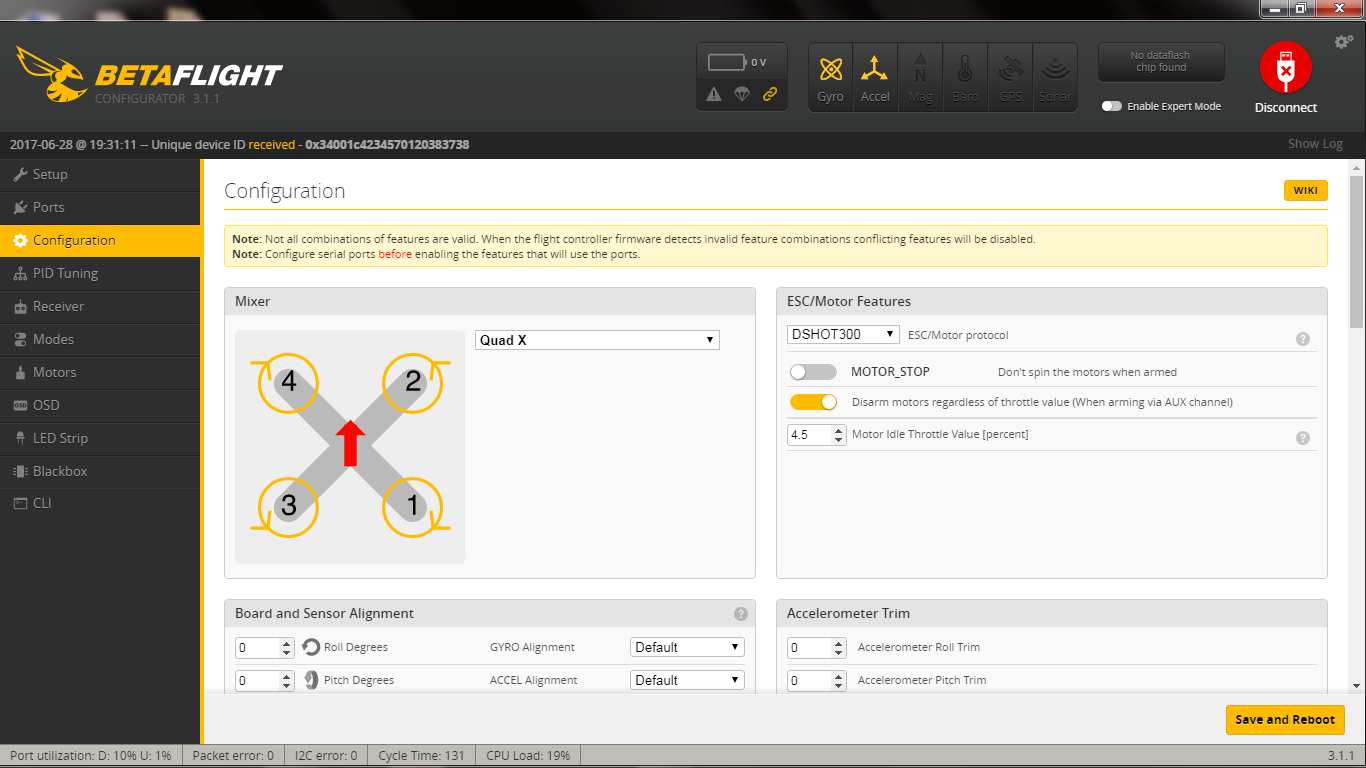
If you flight controller is exactly the same as mine and you set up your motors the way I did you should be able to go to the CLI tab paste this text
resource MOTOR 1 B09
resource MOTOR 2 B08
resource MOTOR 3 A02
resource MOTOR 4 A03
Enter
Type
save
Enter
If this does not put you motors in the correct position watch this video and it should help you get them correct.
Now finish setting up your receiver, mode and motors tabs and you should be ready to fly!
Here is a video of the first couple of flights.

7 thoughts on “Ascent with spektrum rx build log”
What motor size and kv are you using? I’m building an Ascent but will probably use 1103 10000kv motors on 2s.
You can use any motors from 0703 to 1304
I am using 1104 7600 kv motors and also use 1104 6500kv motors.
Can you explain why the FC got full voltage from the esc battery terminals? i am unsure where 5 volts is coming from the FC
Because FC has built in BEC (voltage regulator) which steps down battery power to 5V
[…] you can follow if you build your quad to match one their recommended build specs. They can be found here and […]
[…] you can follow if you build your quad to match one their recommended parts list. They can be found here and […]