We will review how to build and wire FlexRC Pico Core V2, which consists from the following parts:
- Mini F3 Flight Controller with 20x20mm mount
- Tiny 10A 4 in 1 – Cicada – BusyBee2 BLHELI_S ESC
- XT30 battery connector
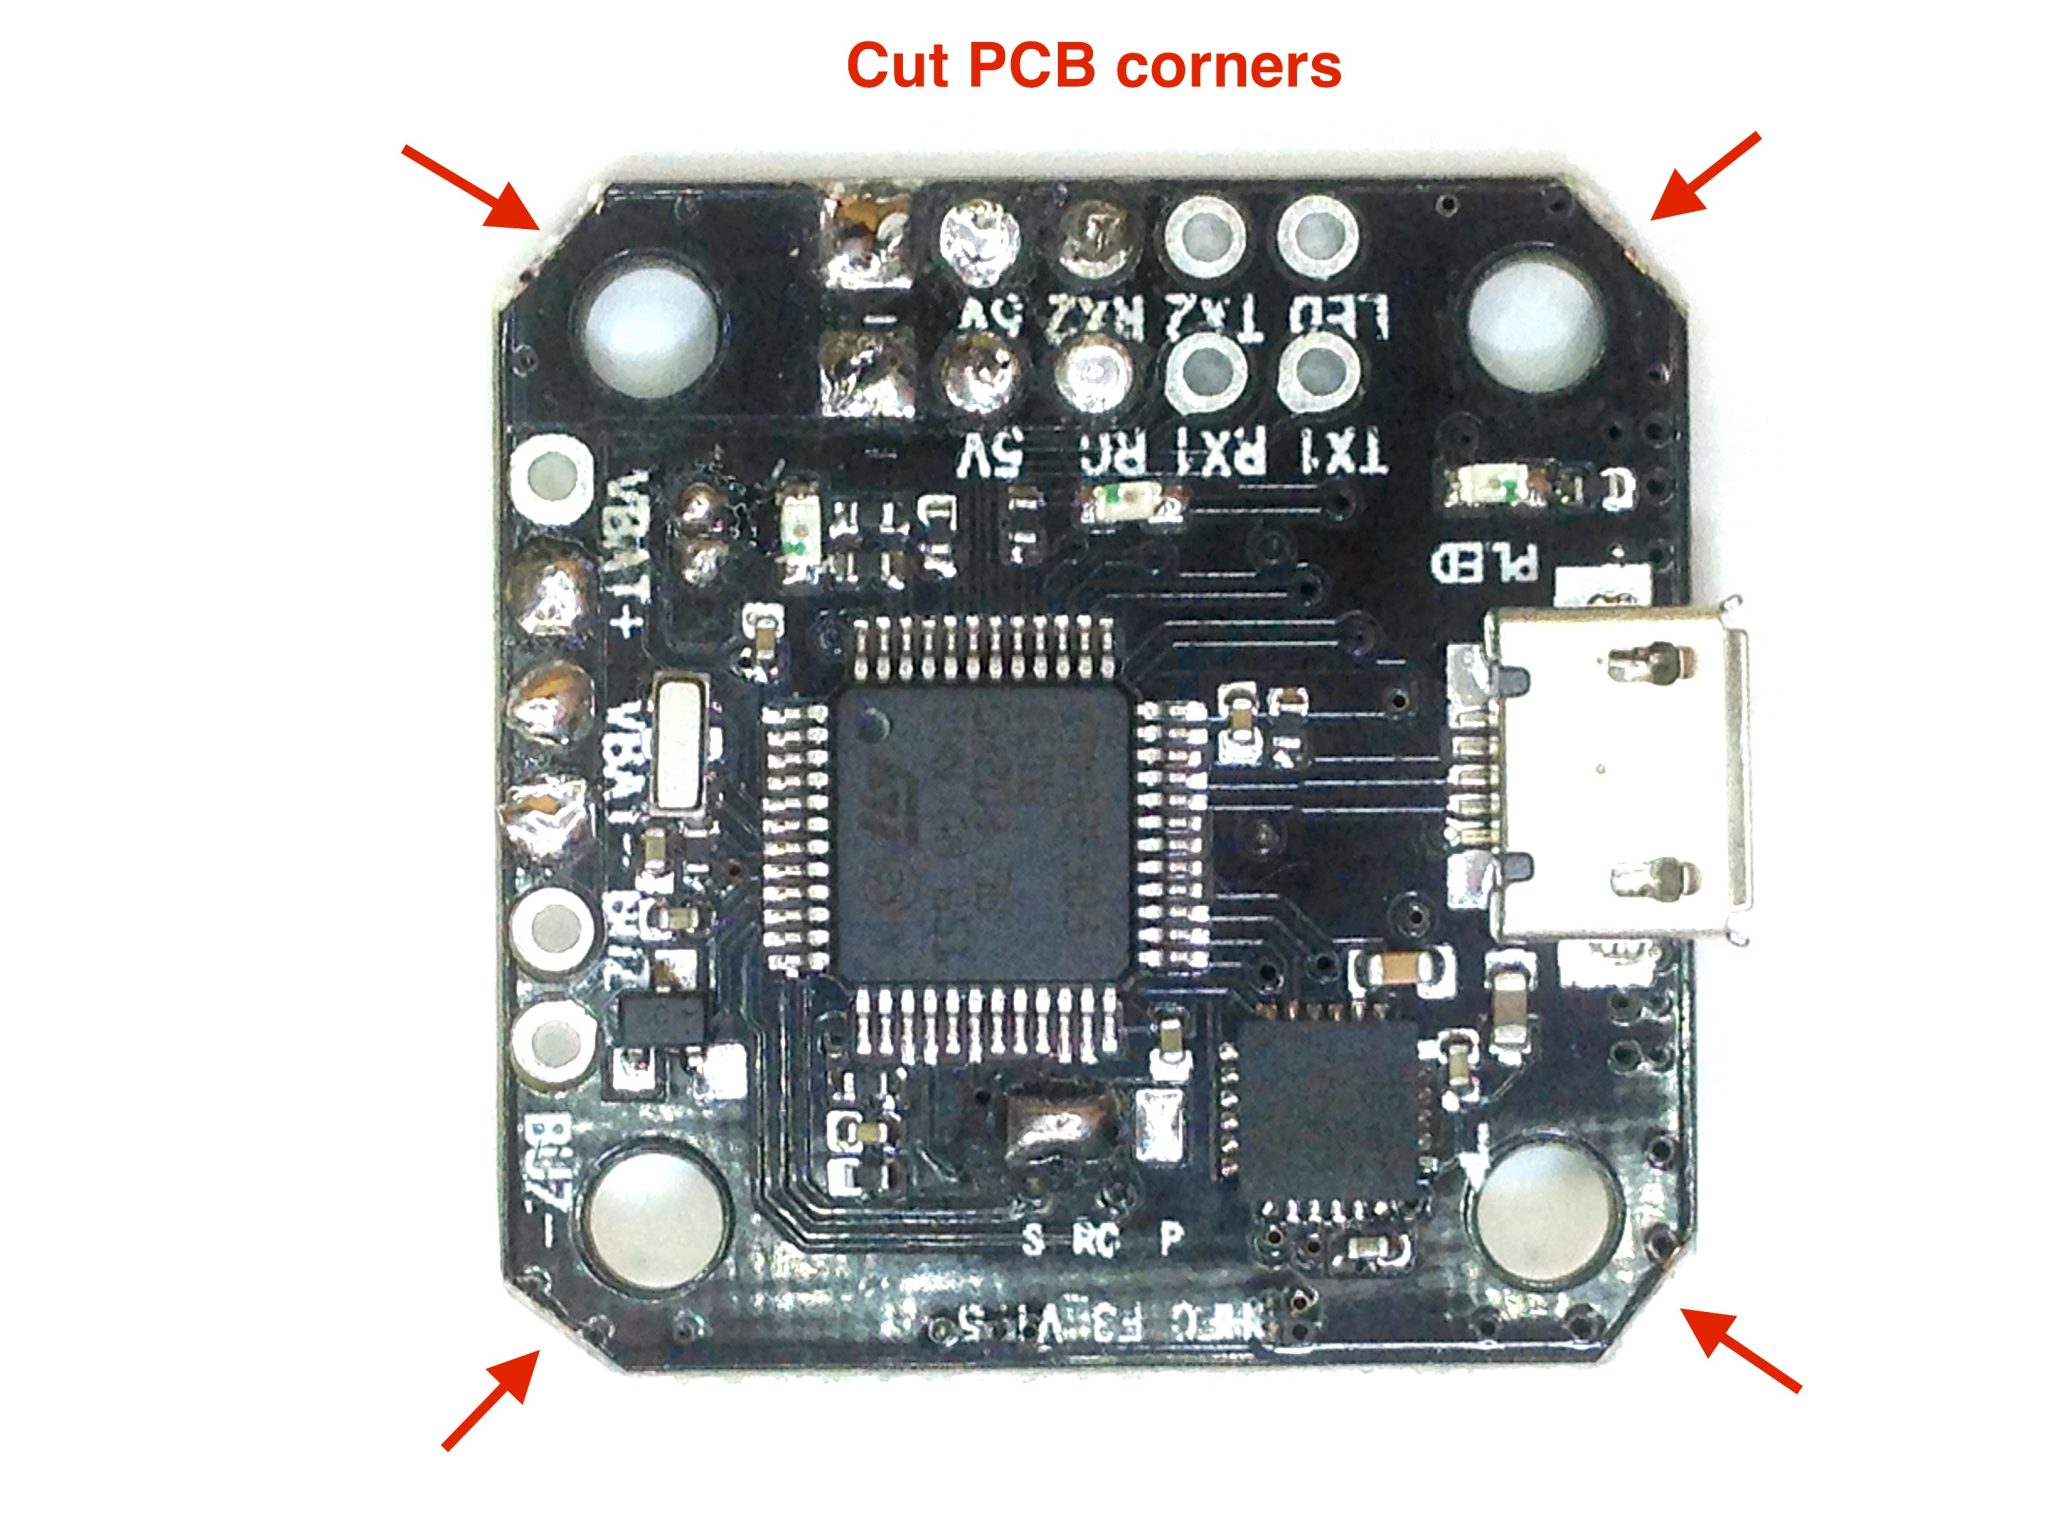
Cut PCB corners
If you’d like to use Pico Owl ducts then you will have to cut Mini F3 PCB corners. It can be easily done with cutters.
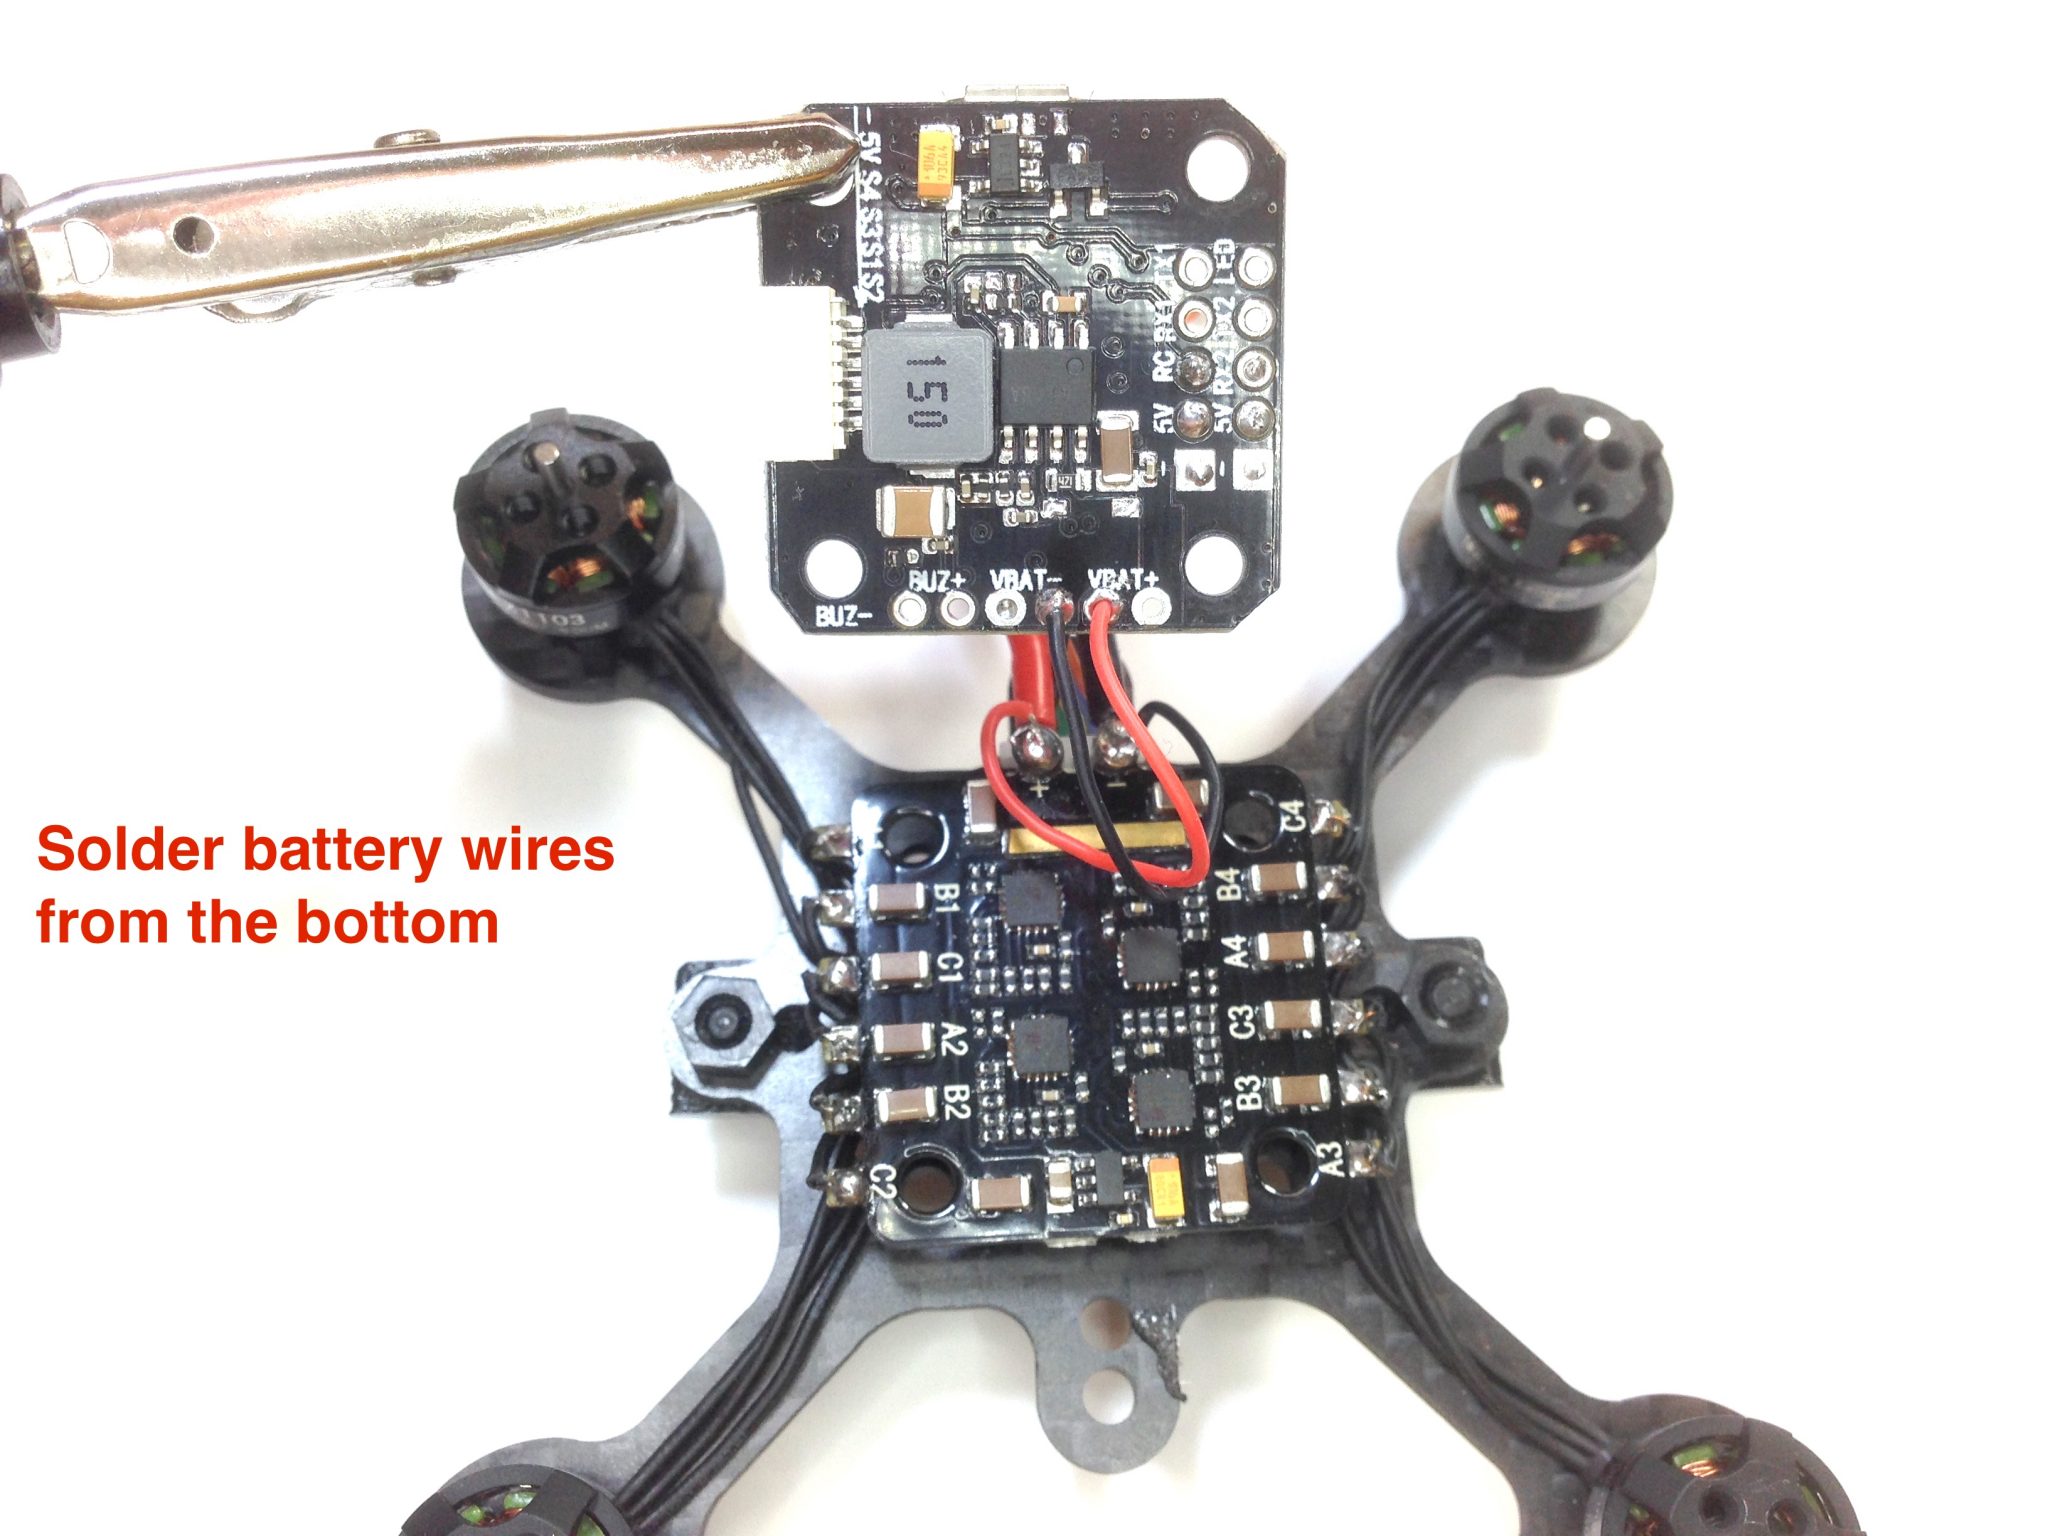
Solder power wires
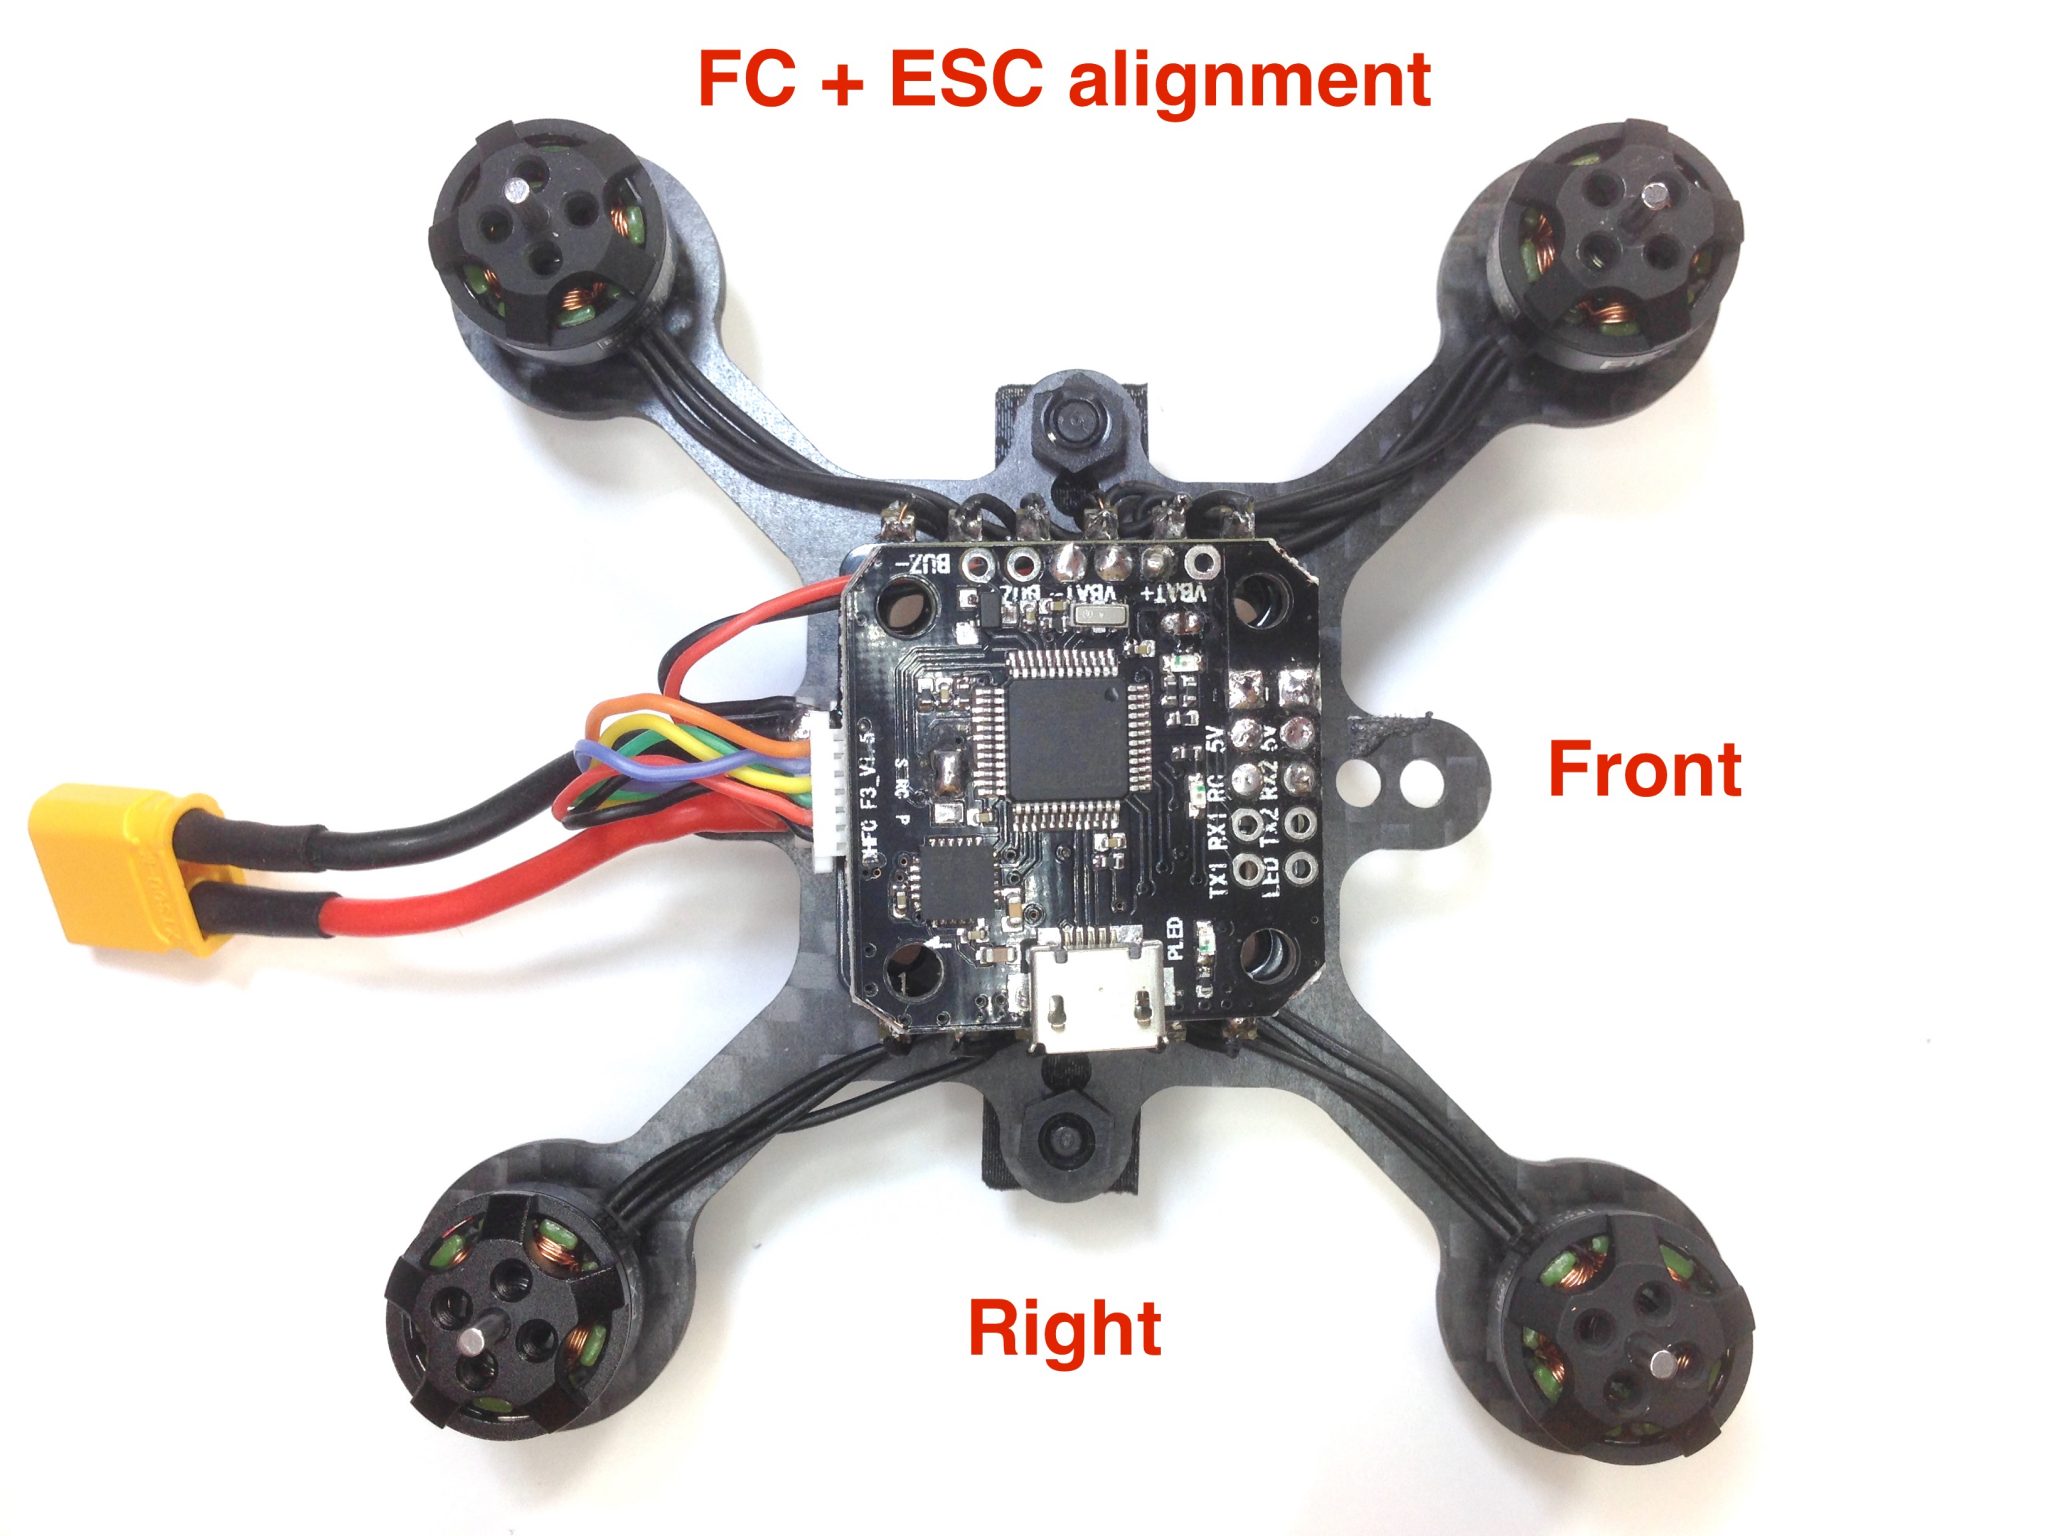
Align Mini F3 FC with ESC
Align Flight Controller with ESC and displayed on the picture and insert signal wires plug.
Install battery connector

Install mounting hardware

Betaflight settings
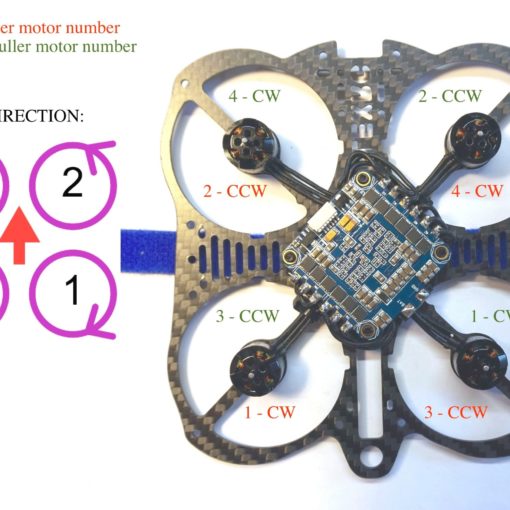
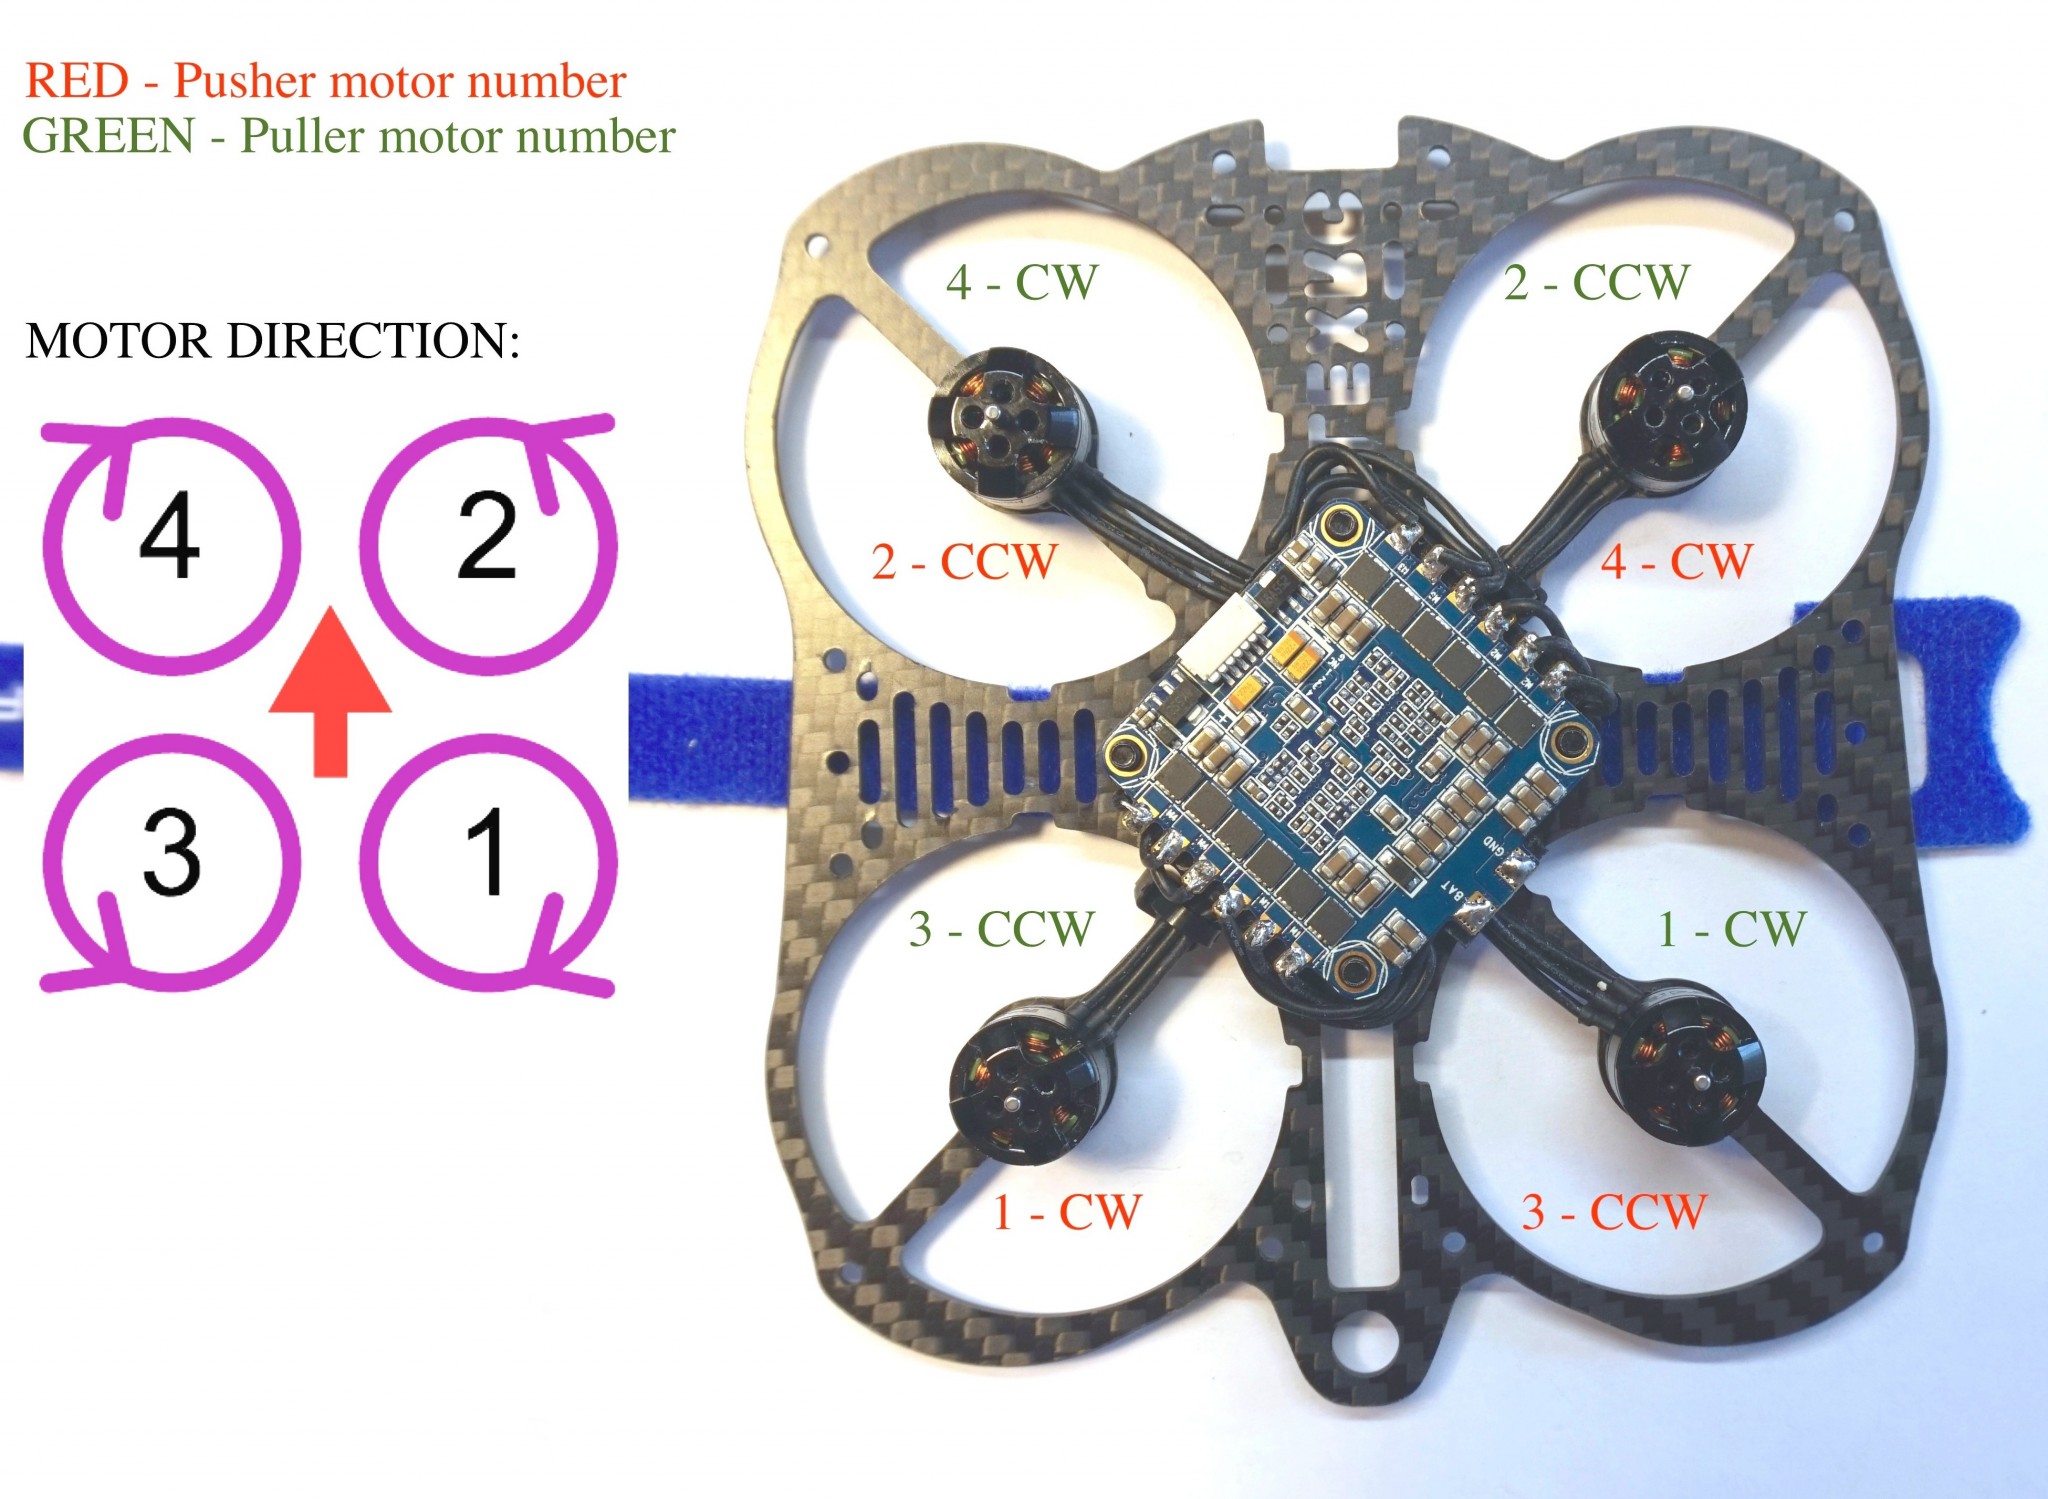
Now we can fix motors order, activate DSHOT and set correct board orientation by going to Betaflight -> CLI tab and copy/pasting the following commands:
resource MOTOR 1 A01

resource MOTOR 2 B00

resource MOTOR 3 A06

resource MOTOR 4 A02
resource MOTOR 1 A01
resource MOTOR 2 B00
resource MOTOR 3 A06
resource MOTOR 4 A02
set motor_pwm_protocol = DSHOT300
set align_board_yaw = 180
save
Please note that “resource” are set twice because on the first attempt resources are getting reset.