Building your own quad can be very satisfying. You can completely customize to your own requirements and if it finally works it’s even more fun then buying ‘off the shelf’ and easier to repair when you break something.
The thing I love about the FlexRC frames is the durability and flexibility. Building is fun but knowing that a crash every now and then will not stop interrupt your session is key to me.
When diving into the hobby and learning about the possibilities there might come a moment when you think: ‘want to do all of that!’
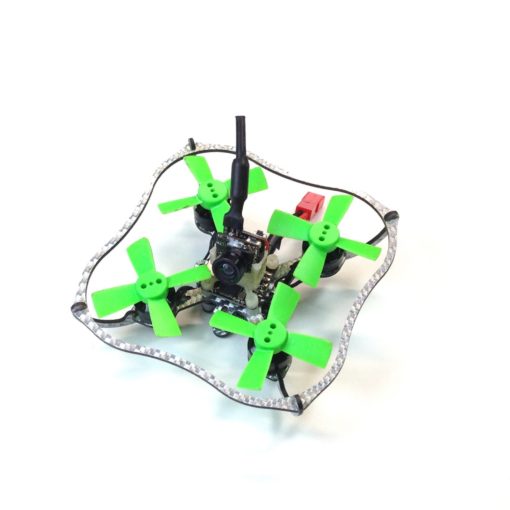
That is how my Owl evolved.
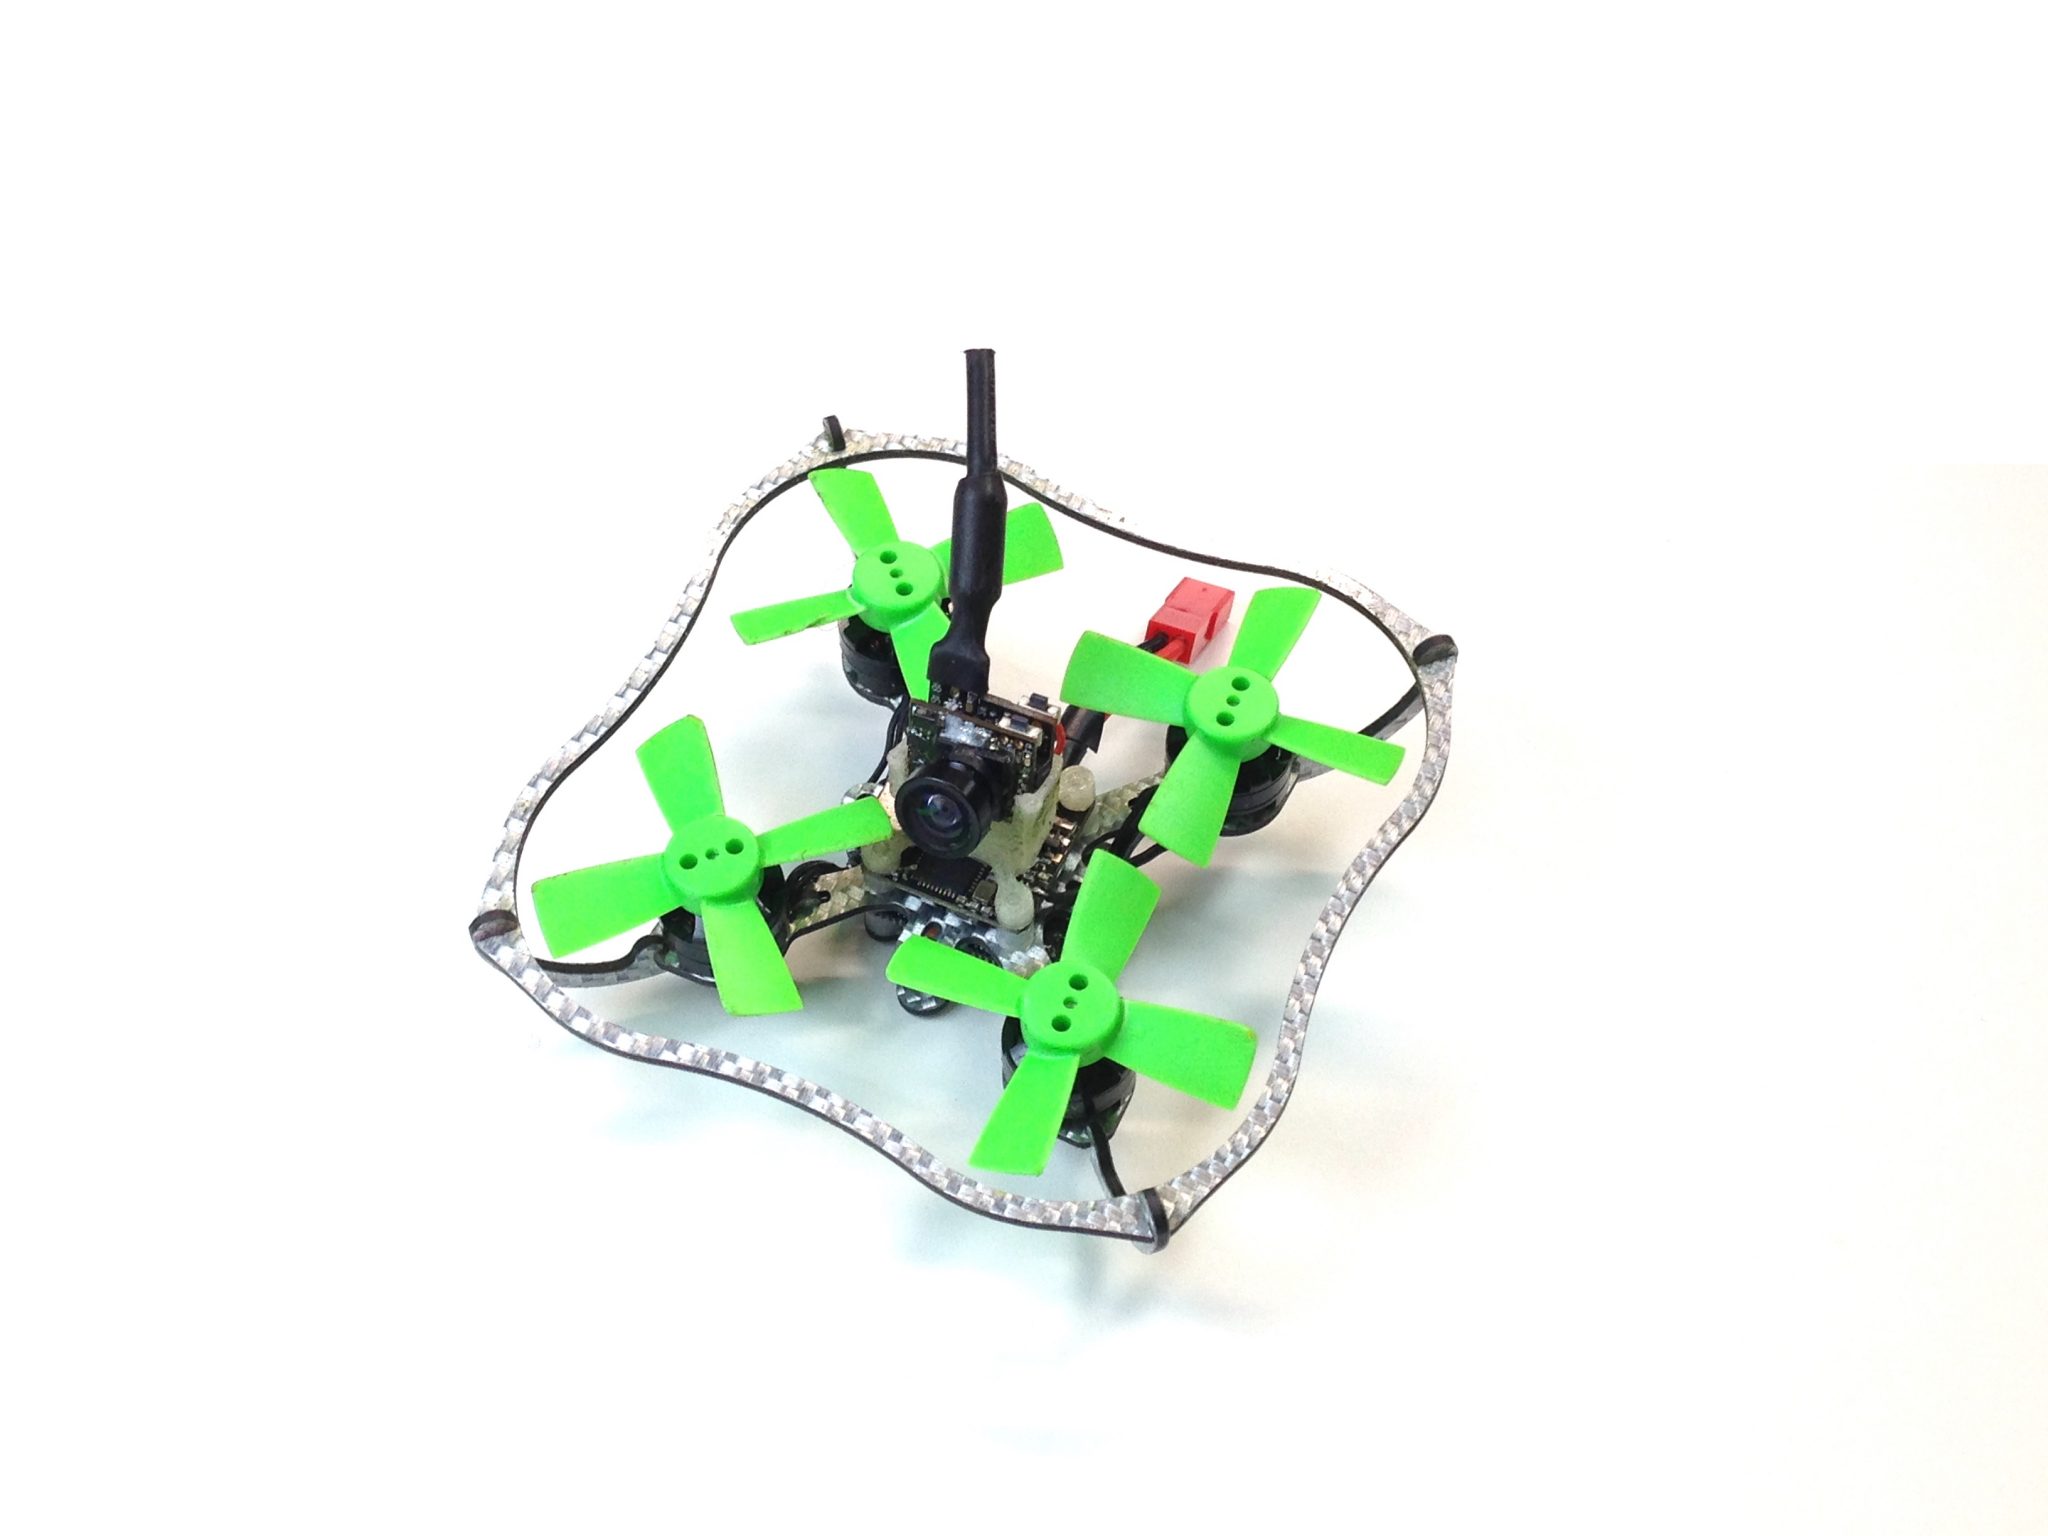
What have I crammed into this awesome compact frame?
- Camera and VTX
- OSD
- LEDs + Buzzer
- Blackbox
- Telemetry (FrSky Smartport)
- GPS
- Mid Range (1KM) telemetry and Ground Station connection
I am running the latest iNAV software which is another Cleanflight fork (just like Betaflight) but targeted at more advanced GPS functions.
I will discuss all the more ‘special’ features and the things I learnt and skip the basics to keep it a bit compact.
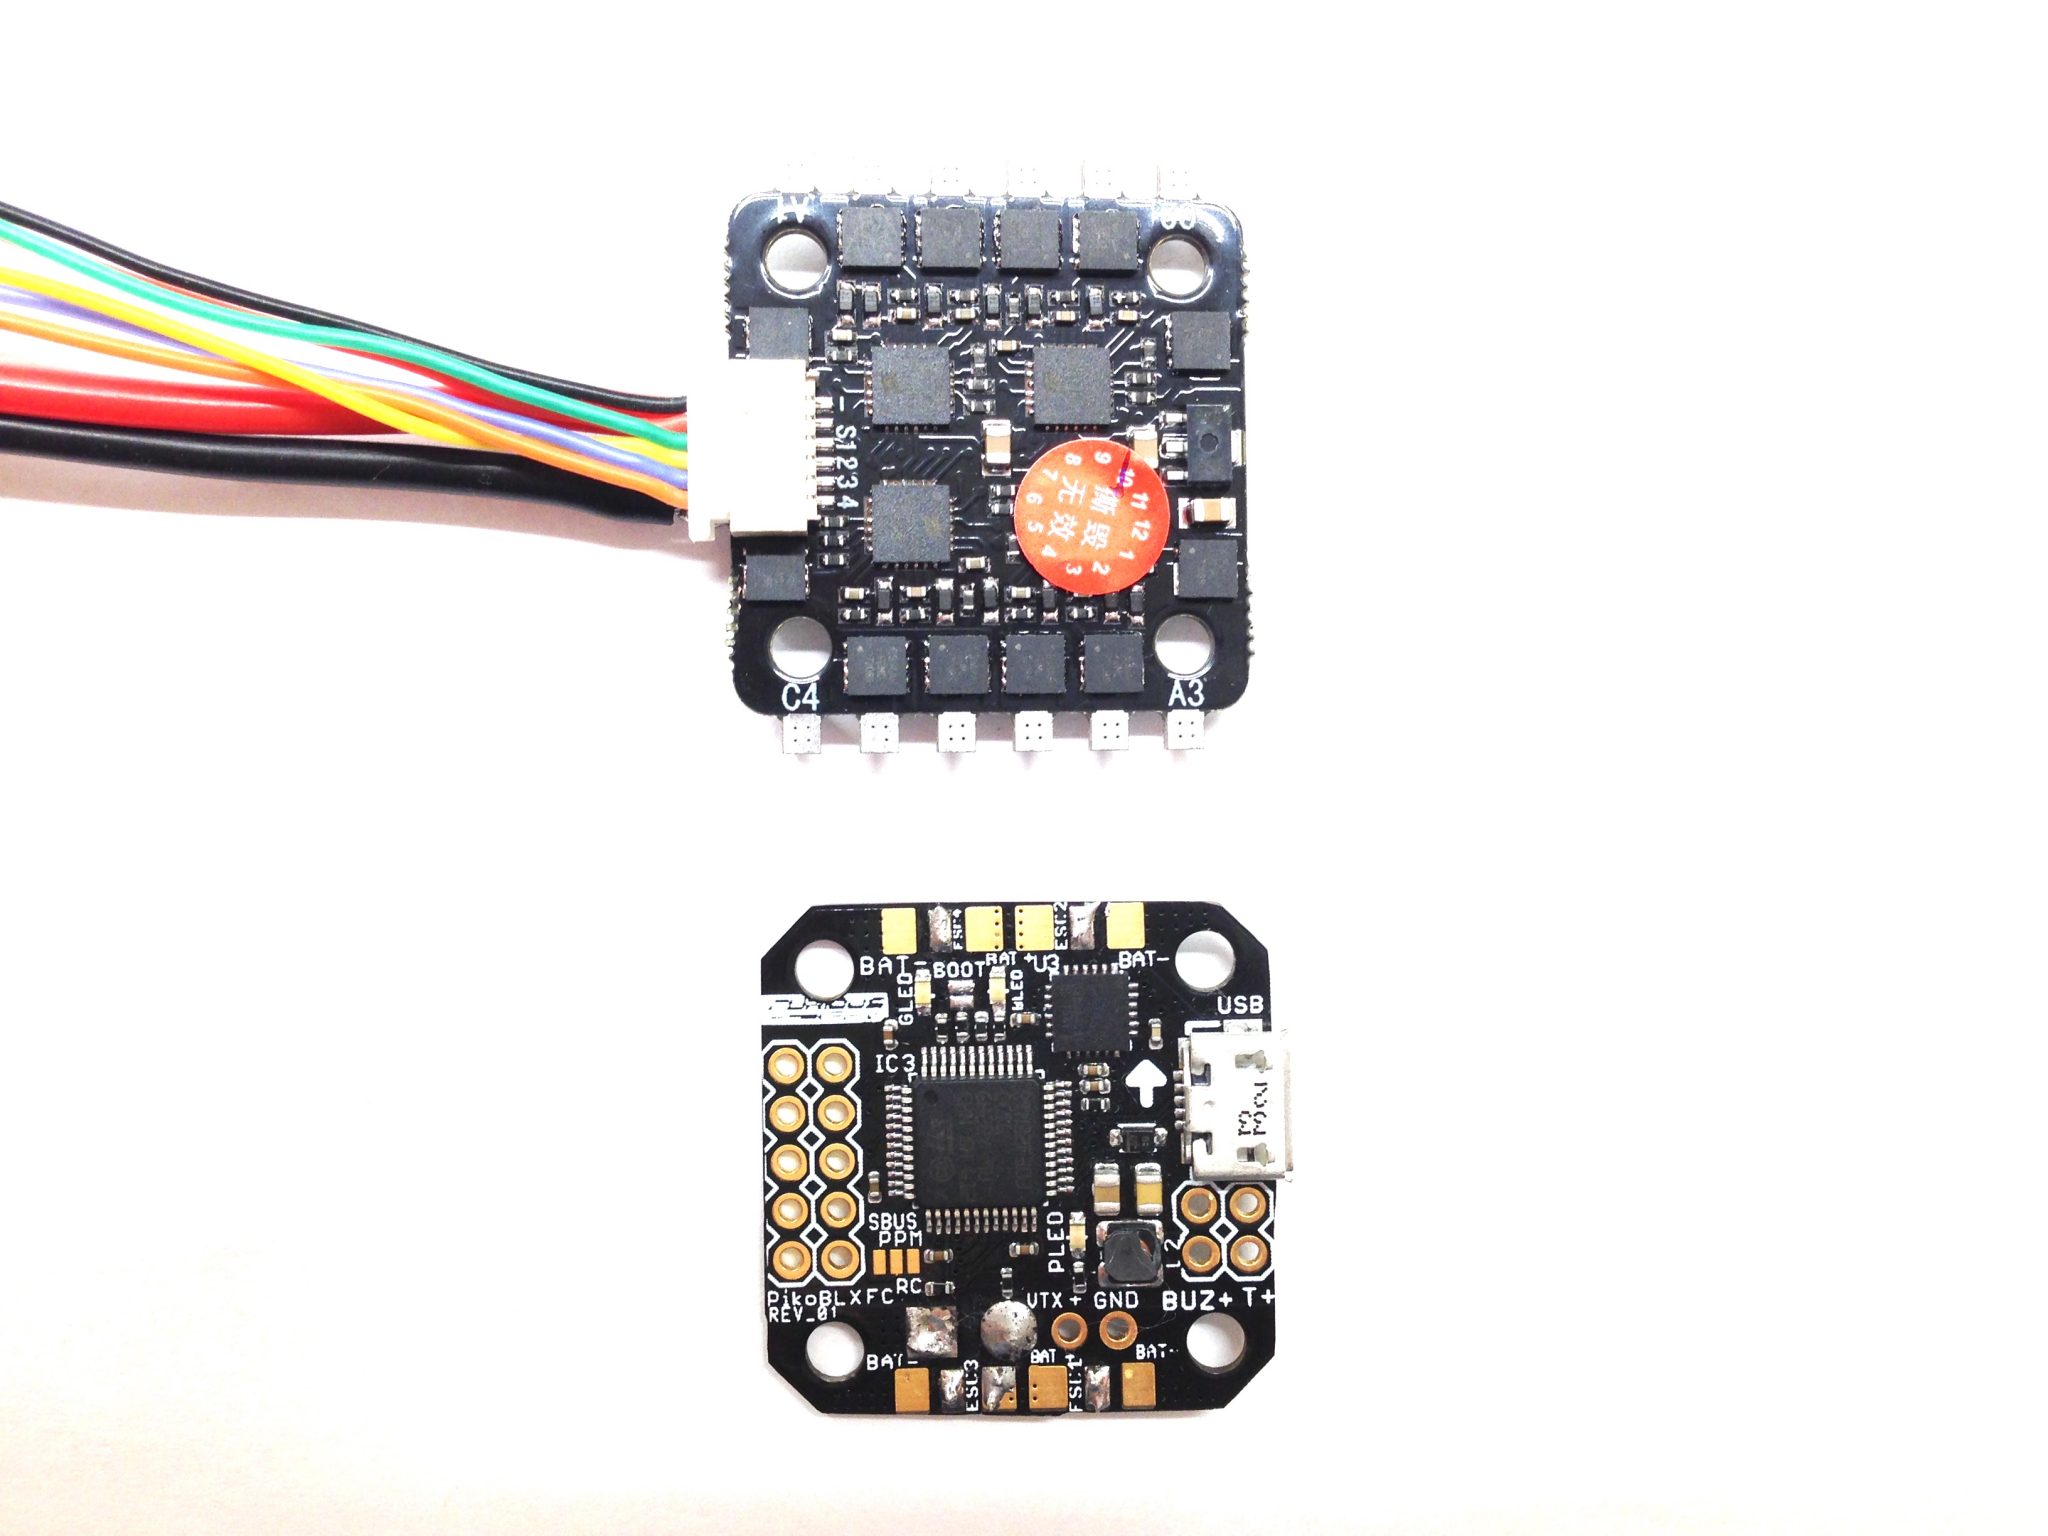
The flight controller
When you want to run a lot of peripherals you need a lot of connections of course. I checked out 2 flight controllers that seemed to tick the right boxes:
- Omnibus F4 V3 http://www.readytoflyquads.com/flip-32—f4—omnibus-v3
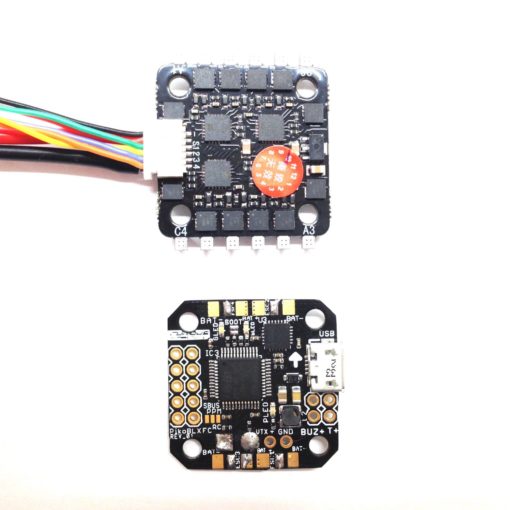
- MyAirBot F3S AIO Pro http://shop.myairbot.com/index.php/f3saio-pro.html (In the past also available through the FlexRC shop)
The omnibus comes with OSD, Baro, LED and Buzzer connections, SD card for blackbox, 4 serial ports and the V3 version should not have the BEC problems the other versions have.
There are some pads that can be used for additional IO (if you’re handy with a soldering iron)
This seems great but in practice iNAV doesn’t provide free resource allocation like Betaflight does(!).
If you connect a Compass through the I2C interface it means that you will lose a serial connection and if you want to use some PWM pins (5 and 6) for serial you will lose your LED option.
This made me move to the F3S AIO PRO.
Baro, Compass, LED and Buzzer connections, Onboard Blackbox memory, OSD (standard MWOSD), 4 serial ports and one of those ports is equipped with 2 I2C pins (used for compass). And all can be used at the same time.
Note: the newer F7 based flight controllers support much more serial ports than the F3 / F4 generations. So far I’ve seen the AnyFC F7 and Omnibus F7. AnyFC can’t be fed by Lipo voltage and Omnibus doesn’t seem to have that many IO ports so I’m still looking around for an upgrade of my F3.
Navigation Basics
To get navigation functionalities working properly the quad needs some additional sensors next to the standard Gyro / Accelerometer.
Barometer (required for altitude measurements), a GPS receiver and a Compass.
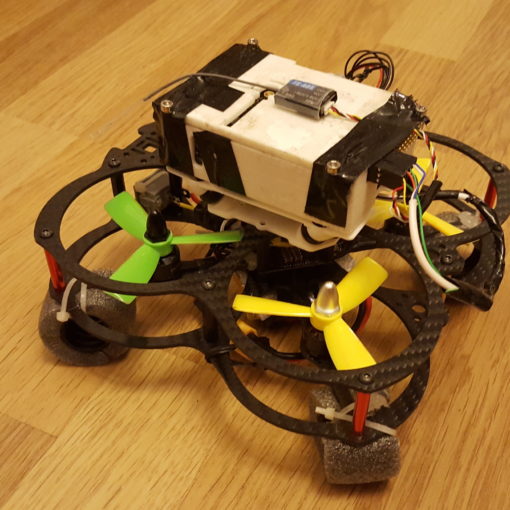
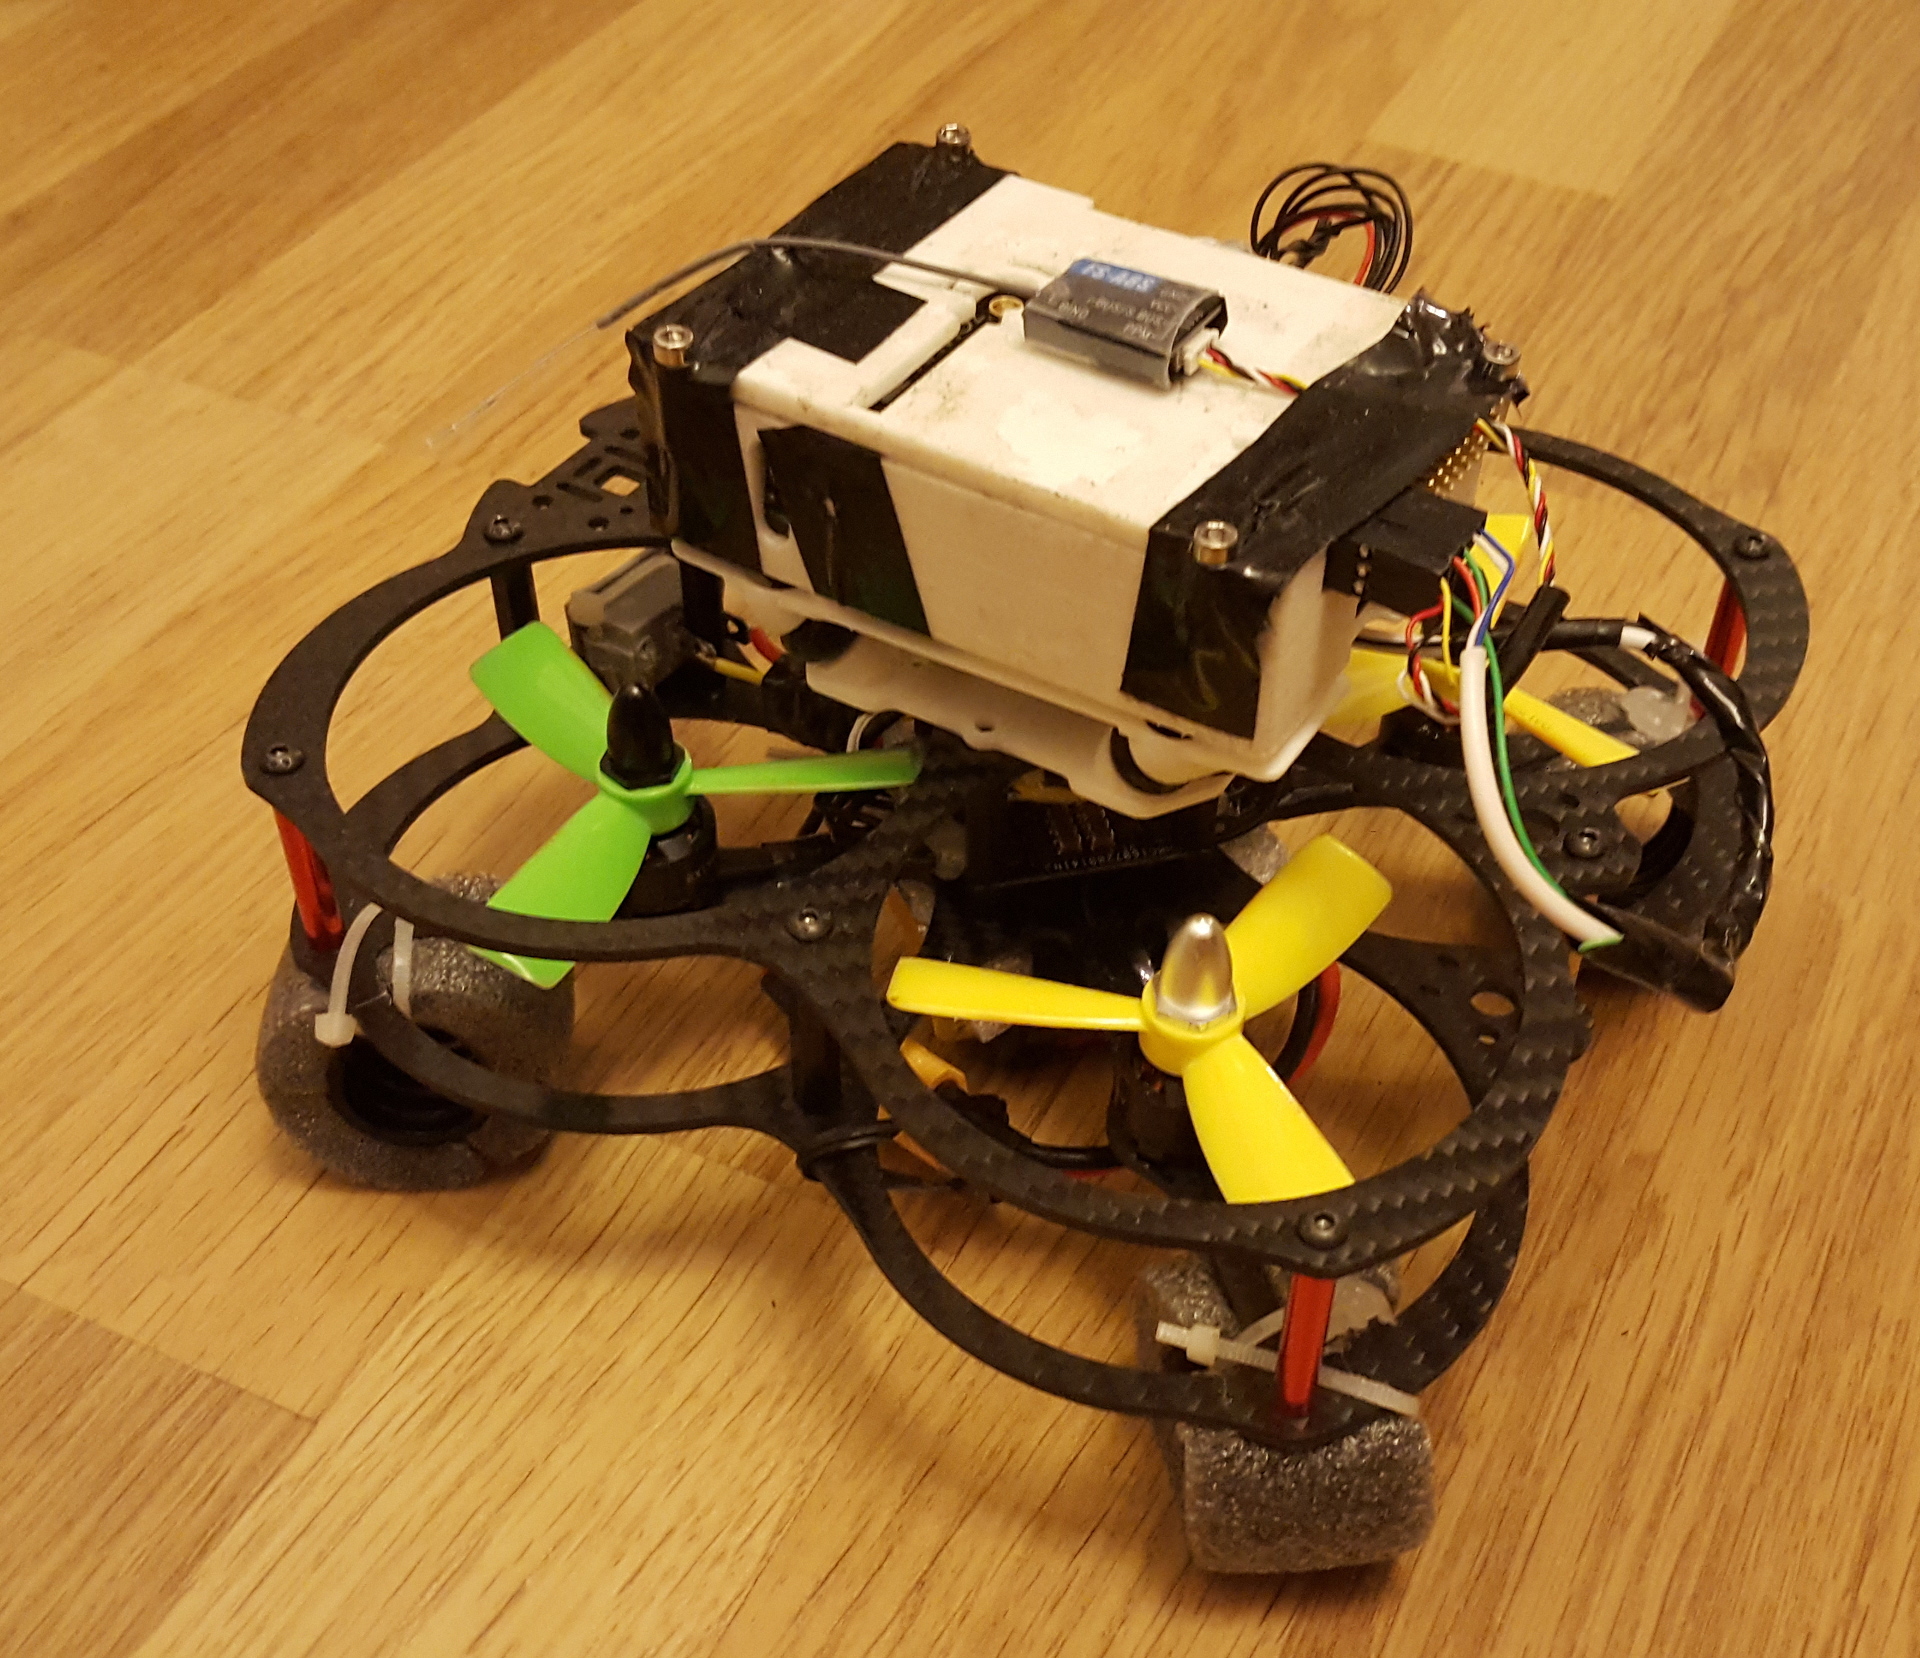
For my first iteration I used the compass that’s installed on the F3S board and a micro M8N (ReadyToFlyQuads) GPS receiver. This gave me a very nice low profile clean build.
It did do some nice position holds sometimes but I also had some scary ‘flyaways’ even though it would have a nice 16 SAT fix looking at its location it could be all over the place!
Not the rock solid performance I was hoping for.
Could be the surface of the antenna but also the noise that comes from the electronic components.
Next step
Bigger GPS antenna and put it on a mast to move away from interference. Ended up with a Tarrot GPS mast since you can simply detach. Used male /female jst SH connector to be able to remove the GPS recever completely and still do some FPV flying.
The Ublox M8N receivers are supposed to be the best ones for the purpose and indeed getting some from China improved the performance a lot. The support GPS, Glonass, Beidu and the European Galileo when you run the 3.01 firmware.
This pushed me to the next step in my adventure. Most of the Chinese M8N receivers don’t allow to update the firmware (?!). U-Blox warns for clones and indeed most of them come with flash memory that is too small for firmware updates.
In the end I moved to the Holybro GPS receiver. Came with FW 3.01 out of the box and does a great job. Also has a quality antenna so no complaints there.
Compass
For best navigation performance compass and GPS work together. When moving forward compass HEADING and GPS COARSE may only be off for a couple of degrees. Else when doing a position hold you might get what is called ‘Toilet Bowling’. The quad will start moving in circles with increased radius. Since I already moved away from the ultra compact low profile build I decided to use the compass in the HolyBro receiver. On the mast far away from any possible interference from ESCs and power lines.
Compass is not connected through a serial port but a 2 line I2C interface (SDA/SCL) one Data and a Clock line. Each component has its own unique address. Different compass devices can coexist and you can select which to use in iNAV UNLESS its the same type of compass.
Since both the F3S and the Holybro use the HMC5983L I decided to remove the one on the F3S board with my rework station. I read it is possible to just cut a trace (probably the SDA line) but it is just too tiny (for me at least).
Luckily it worked out fine! Had some broken F3S boards that I screwed up so I did a practice run 😉
Oh…to get the best performance of the barometer cover it in open cell foam. You don’t want wind or propwash to upset it.
Ground control
Now we have the basic hardware nailed it would be great to be able to configure your quad without a laptop, see it’s location on the map and maybe even let it fly autonomous missions and more.
This is where EZ-GUI comes in. I’m using it on my Android phone and I haven’t checked if there is an IOS or Windows phone version.
Here you can find a basic overview:
My first build was using a standard Bluetooth receiver (which can be picked up for around $12) which worked well but had very limited range.
To connect to EZ-GUI (or the iNAV GUI) a basic serial connection with the MultiWII Serial Protocol on top (MSP). To improve the range I looked at the ESP8266 solution. This is a cheap WIFI chipset with a serial interface and with custom firmware it can be used as a transparent serial port over WIFI. Range has been reported to be up to 150m. I have a bunch of these boards lying around but decided to stop the experiment. If you use your phones WIFI connection to the FC it will try to use that one for internet access too. Map data will not be updated so that was a NO GO for me.
I ended up with a 3DR 433Mhz telemetry link solution which is reported to have a range up to 1KM and can be picked up for around $25.
This is a 2 component system. One board that connects to the FC and one board that connects to USB or USB OTG to your mobile.
I have read that it can work out of the box but for best results it’s recommended to flash a MSP ‘aware’ firmware.
The 3DR radio config utility can be used under windows to flash the firmware and configure the link:
http://vps.oborne.me/3drradioconfig.zip
The ground station board comes with USB connector so that is quite straight forward. The other part of the system comes with servo pin connectors so I used a FTDI adapter.
Firmware can be found here: https://github.com/stronnag/SiK-MSP
With compiled images in this directory: https://github.com/stronnag/SiK-MSP/tree/master/Firmware/dst
I flashed this image: radio~hm_trp.ihx
No need to read the github documentation it assumes a more complex linux python flashing method. The 3dr radio config util works quite well!
Since I’ve connected the telemetry radio to a soft serial port on the flight controller I am running 19200bps I’ve found this to be sufficient. When setting up the connection in EZ-GUI just choose USB/Serial Port.
Make sure baud rate on the 3dr radio’s, FC and EZ-GUI are matching.
That completes the ‘not so standard’ components of my setup.
INAV
Good and recent explanation of INAV and the setup can be found here: https://www.youtube.com/watch?v=T_4ph-YCnaA
Some thinks I learned and important for working with an OWL:
- INAV uses a 6 point accelerometer calibration. When going through this calibration the orientation should be the orientation of the BOARD; not the quad(!) so since the FC is mounted on an angle on the OWL you have to keep this in mind and make sure you have the flight controller orientation according to the orientation on the INAV page https://github.com/iNavFlight/inav/wiki/Sensor-calibration
- On the attached picture you might notice that my GPS receiver is mounted at a 45 degree angle. When you configure your compass orientation in INAV this is in relation to the FC! I’ve mounted my FC at a 135 degree angle on the OWL. INAV (currently) only allows compass orientation in 90degree multiples. So I set the orientation in INAV to 90 degrees clockwise and then rotated my GPS receiver 45 degrees. This is currently scheduled to be fixed in v1.8 of INAV (issue #1029).
- I did testing in a limited size garden 😉 so made some changes to the configuration:
- Set nav_rth_climb_first = OFF (climb first before returning home)
- set nav_rth_alt_mode = current (keep current altitude when coming home)
- set nav_wp_safe_distance = 1000 (allow waypoint distance to be 10 M instead the default 100m)
4 thoughts on “‘Autonomous Owl’ GPS and 3DR Telemetry”
How did you connect the 3dr radio? Everything I could find only states the 3dr is for Pixhawk and APM flight controllers. Are you using another radio to fly the quad? Thanks –Kevin
The 3dr radio connects through a normal ‘serial port’ to the Flight controller.
On the other end I connect it through a USB-OTG to my smartphone.
Nothing special here!
Only thing I did ‘extra’ was to flash a MWP firmware to the 3DR radios. Don’t believe it’s required but found it while reading up on the topic. Link is in the blog as well.
Thanks for clarifying that. I am new to the hobby and have a RTF quad but I am going to build one as soon as the parts arrive from China. I bought a pixhawk clone but I want to build a quad with an F4 board it seems more hands on. What is the GCS software you are using? Is it EZ-GUI? Thanks again for your help.
Yep, I’m using EZ-GUI on Android.