There are quite a few things that need to be set on the Configuration tab. Click the Configuration tab in the left margin and a you’ll see a long screen with lots of options. Fortunately, there is no need touch most of this tab.
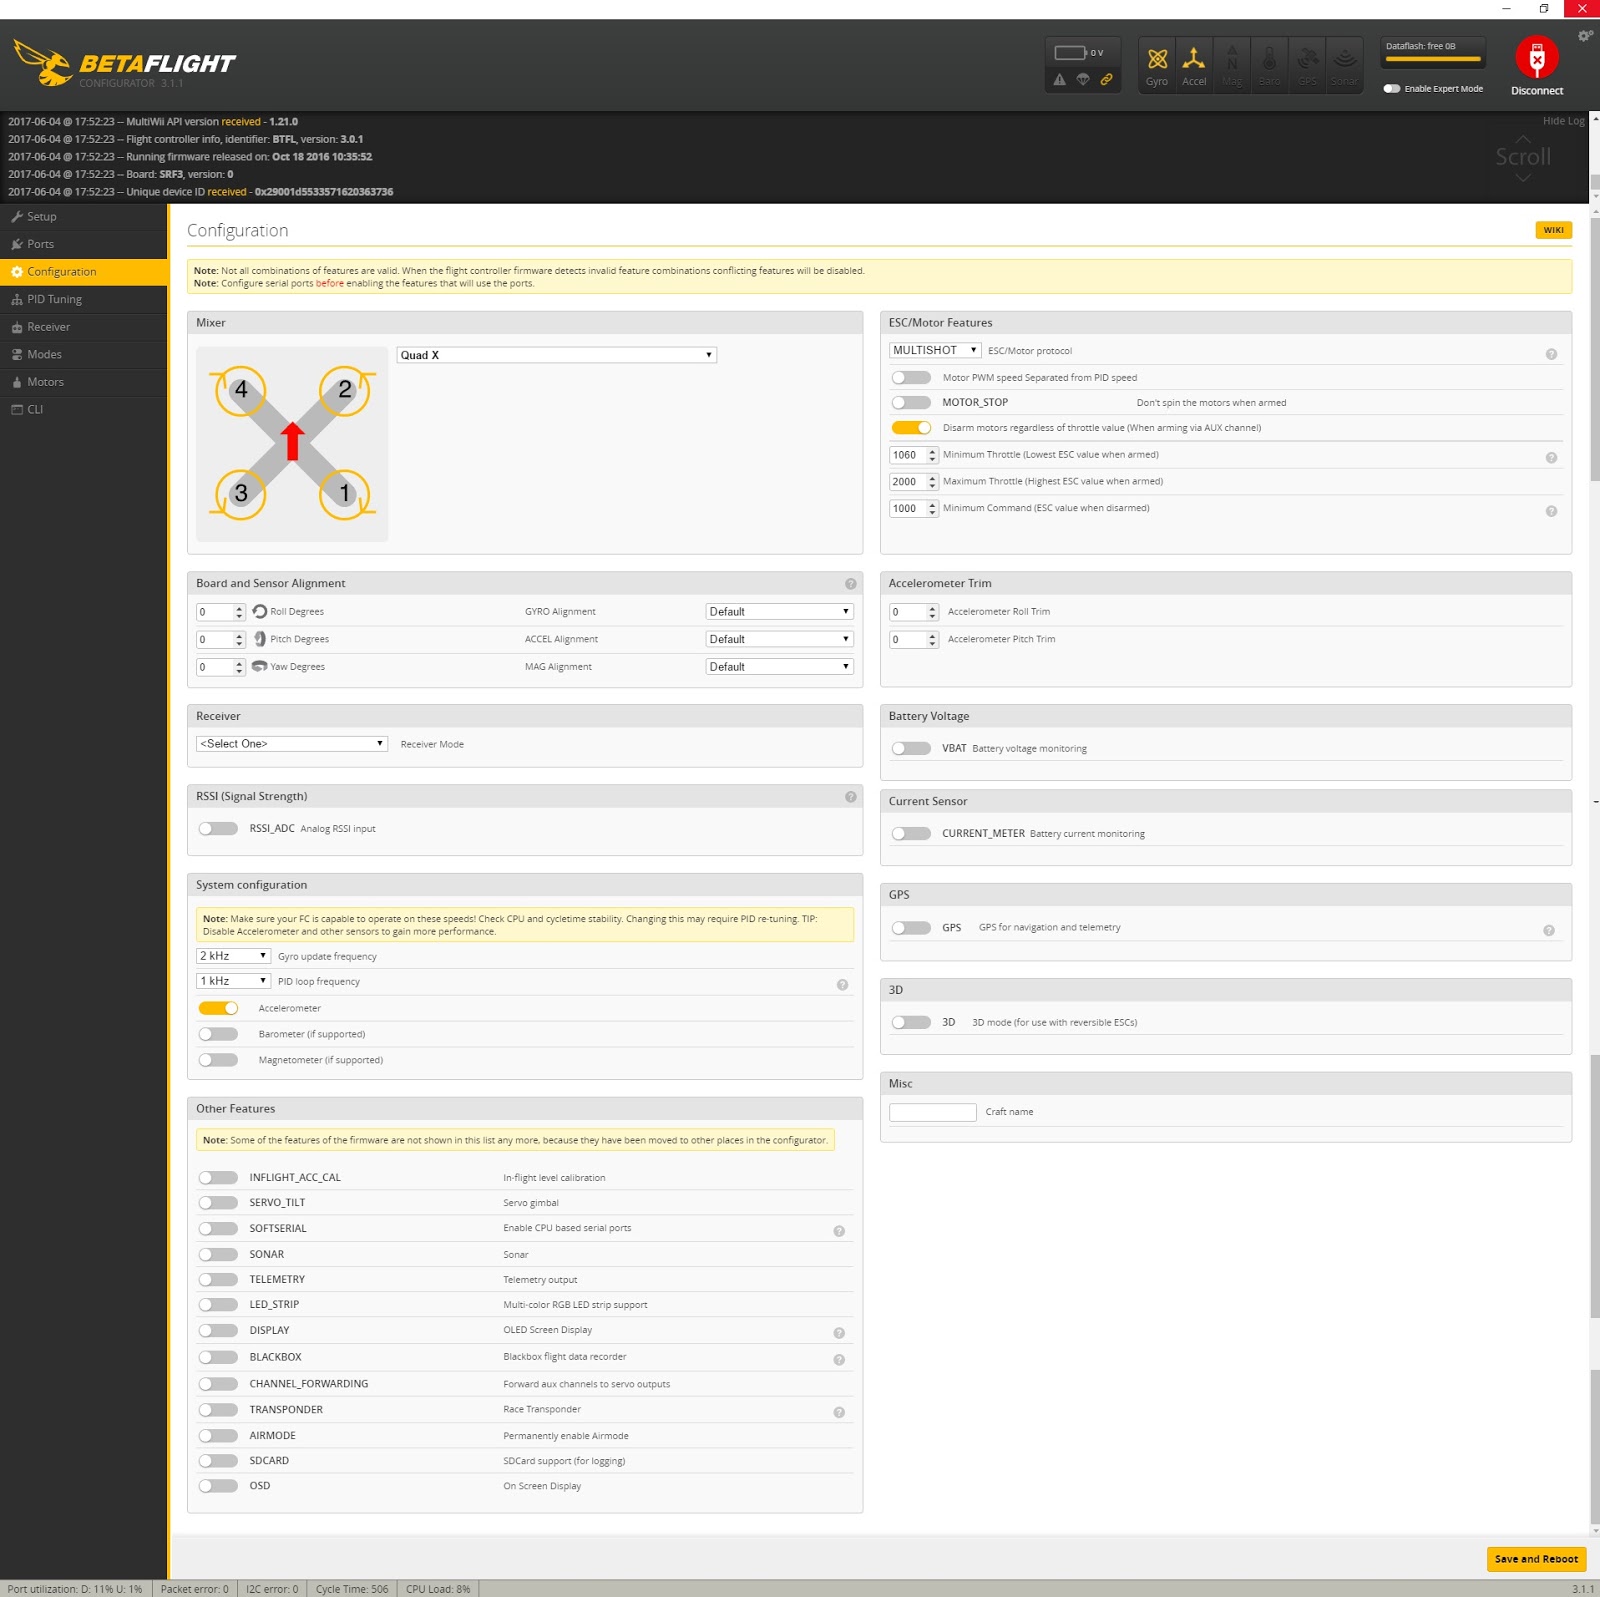
6a. ESC/Motor protocol
First, go to the ESC/Motor Features section in the upper right. Click the dropdown for “ESC/Motor Protocol” and you will see several protocol options, depending on your flight controller.
Those may include:
PWM
ONESHOT125
ONESHOT42
MULTISHOT
BRUSHED
DSHOT600
DSHOT300
DSHOT150
ESC protocols are constantly being updated and there are hours and hours of YouTube videos explaining the differences of each one. For a new pilot, the differences are indistinguishable so the only thing that matters is to pick a protocol that is compatible with your flight controller and ESCs.
If you know for sure which protocol your ESCs take, then select that protocol. Don’t worry about your flight controller, as the only options that will show up in the drop down are options compatible with your flight controller.
The safest bet is to select ONESHOT125 or MULTISHOT as most ESCs made in 2016 and later support those protocols. However, if you know your ESCs will take DSHOT600, for example, and that option is available, then select it. Once selected, click the SAVE AND REBOOT button in the lower right corner of the window.
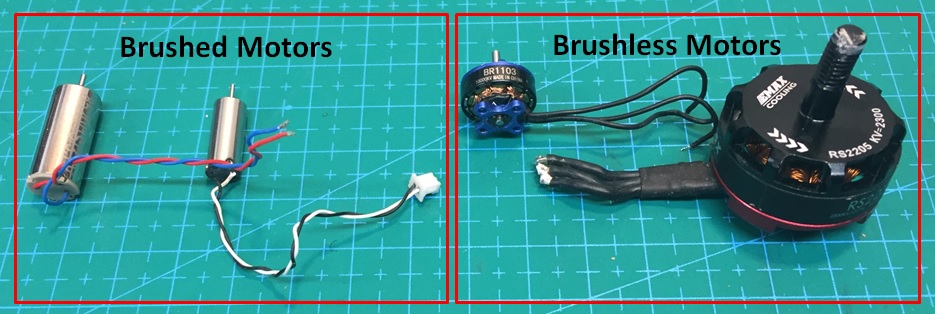
The only odd option listed is BRUSHED. The BRUSHED protocol is for brushed motors typically found on the smallest micro quads, like a Tiny Whoop. Note the differences below and only select BRUSHED if you are using brushed motors.
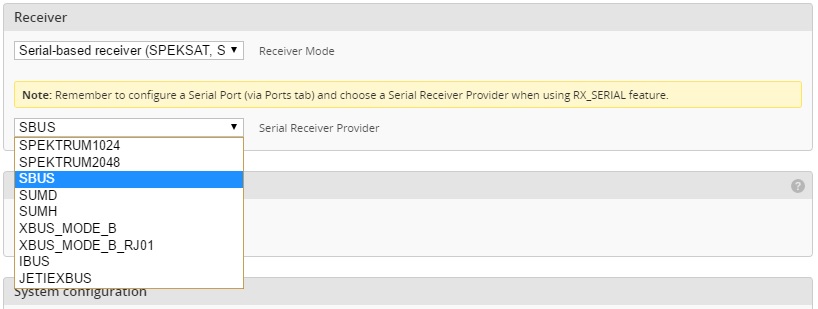
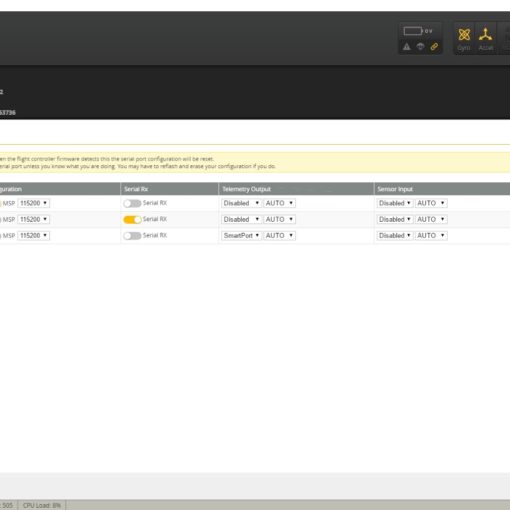
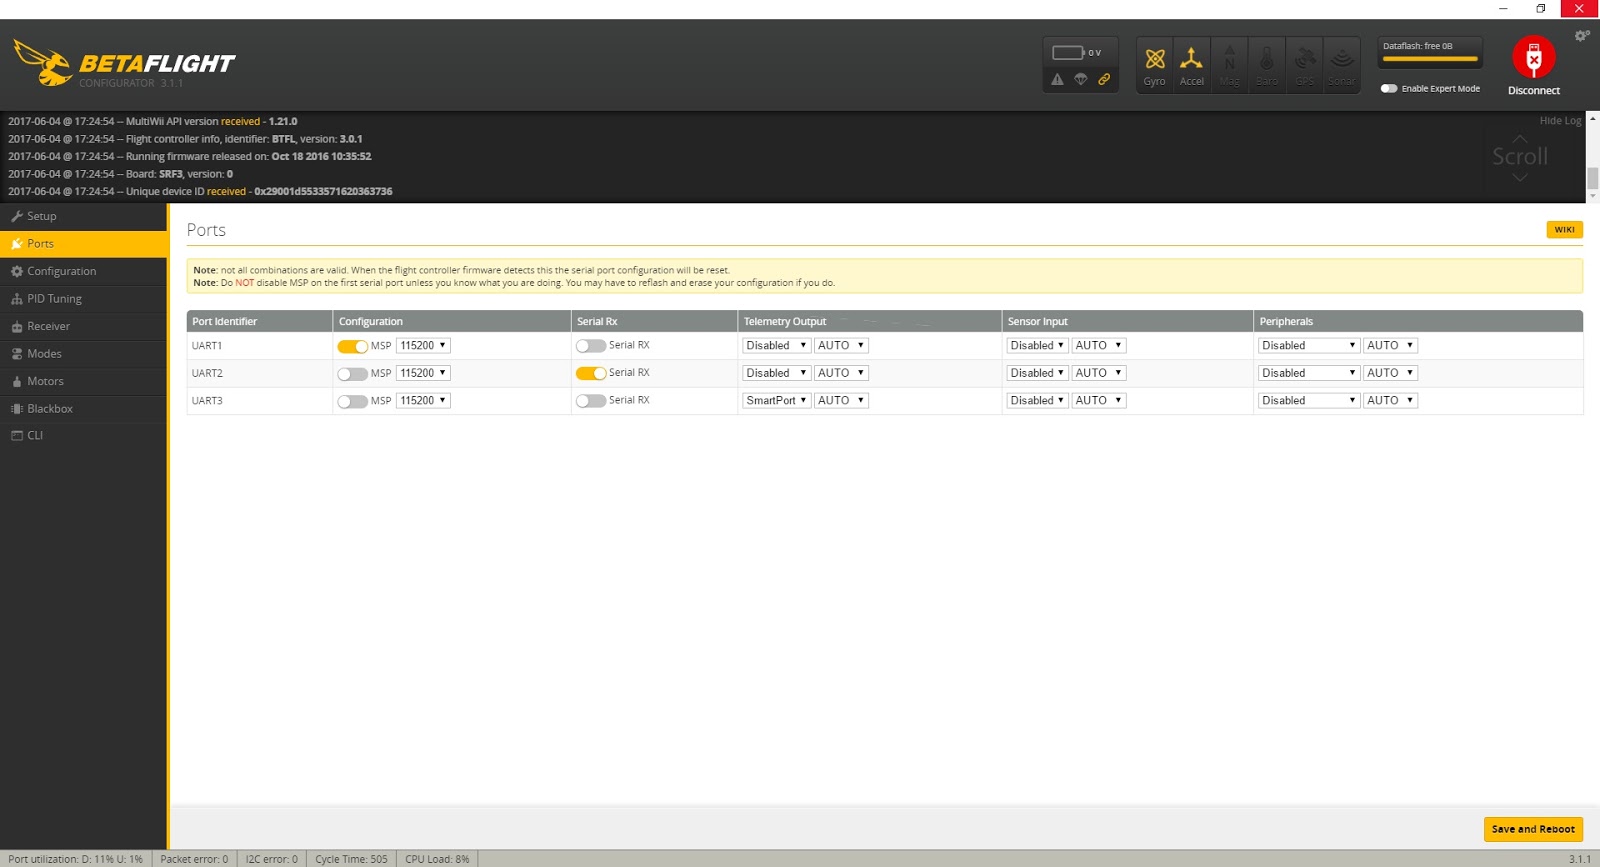
6b. Receiver configuration
Next we will move on to the Receiver section of the Configuration tab. This initially features a single drop down and allows you to set the protocol for your flight controller to communication with your receiver. In this example we are using an SBUS receiver so click the drop down and select “Serial-based receiver (SPEKSAT, SBUS, SUMD)”. This will cause another dropdown to appear where you will set the specific serial-based protocol you are using. Again, we are using an SBUS receiver so select SBUS.
Note that you will also see a reminder to set the serial port in the Ports tab. We did that in Step 5.
Once Serial-based receiver and SBUS have been selected, click SAVE AND REBOOT.
6c. Board and sensor alignment (rarely needed)
Finally, check the Board and Sensor Alignment section of the Configuration tab. This is only used when the flight controller is NOT mounted right-side up and with the direction arrow facing forward, which is not common. The entries are usually all zeros. If you saw issues in Step 4 when moving the board and watching the reaction of the 3D model, this is where you can correct them.
Changes to the board alignment settings are most often used when the flight controller is mounted at a 45 degree angle to the front of the quad, like in the FlexRC Owl https://flexrc.com/product/owl-3-frame/. In this case, you would change the Yaw Degrees to either 45 or -45 depending on which direction you rotated the board to fit in the frame.

Again, board alignment changes are never needed if you installed your flight controller with the direction arrow on top and facing the front of the quad.
And that’s it for the Configuration tab!
