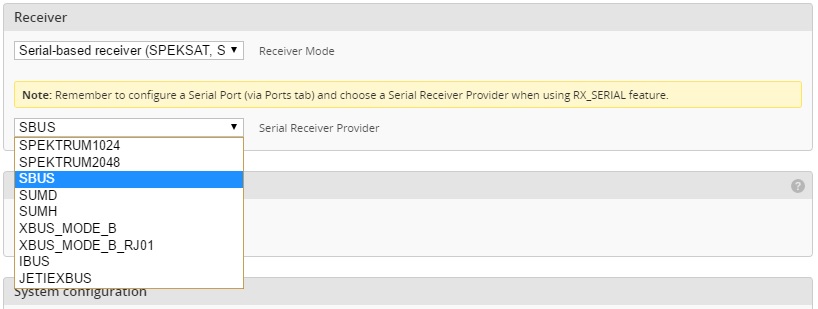
On the left margin, click the Ports tab. The Ports tab is where we designate which connections (UARTs) on the flight controller are connected to which devices on the quadcopter. But, as this is a bare-bones setup, there is only one device we need to allocate to a port: the SBUS receiver.
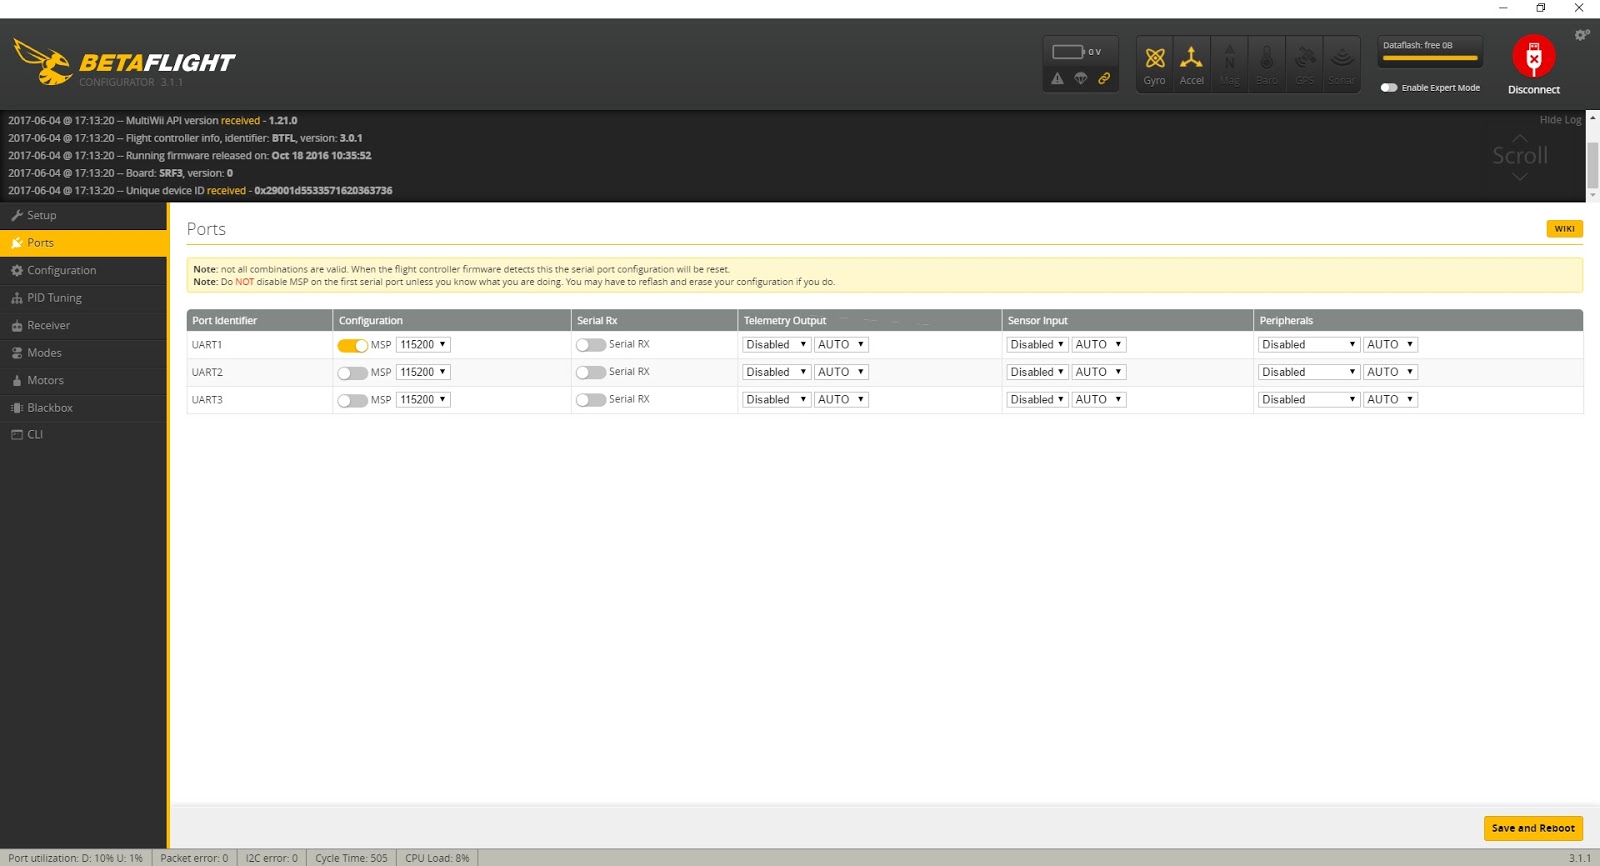
Depending on your flight controller, you will see a number of UART listing with a series of selection options. UART1 is usually dedicated to the USB port and will not be changed.
Determine which UART pin your SBUS receiver is soldered to on your flight controller. It should be marked on the board and may read something like “UART2” or “UART2 Rx.”
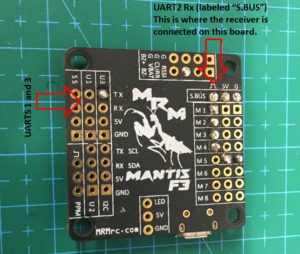
Also note that some flight controllers have a UART that is dedicated specifically for an SBUS receiver. That pin is typically labeled “SBUS” but it’s nothing more than a standard UART. If it’s not numbered (like on this Multirotor Mania Mantis F3 board pictured below), then it is probably UART2.
After determining which UART pin is connected to, find the corresponding port identifier on the configurator and click the “Serial Rx” button. In the example below, the SBUS receiver is connected to the UART2 Rx pin on the flight controller so we turn on the Serial Rx switch for UART2 in Betaflight.
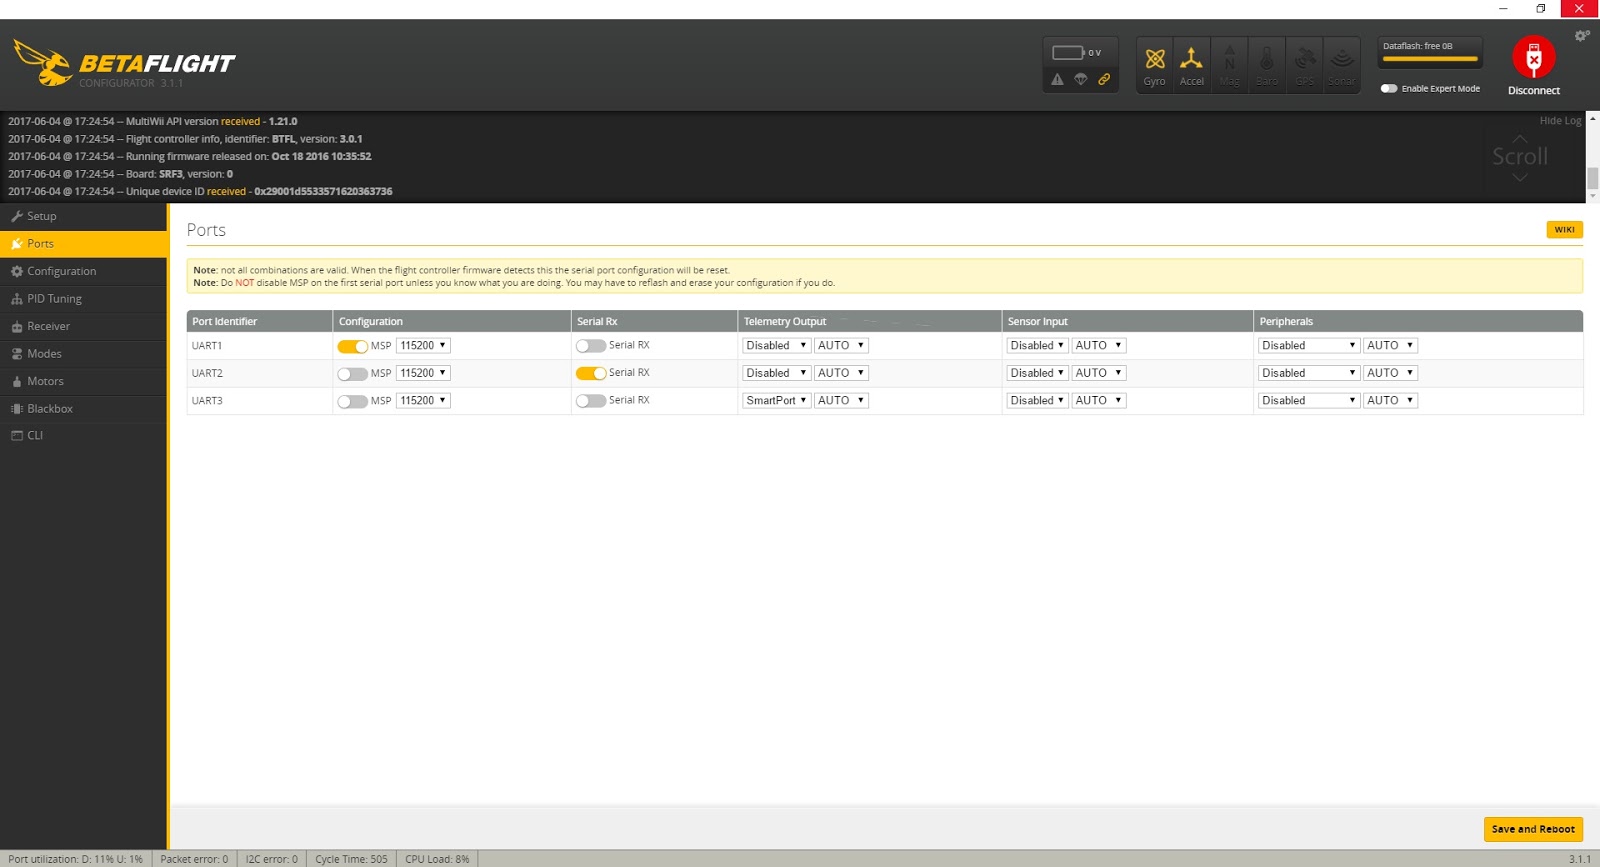
Click the “Save and Reboot” button in the bottom right corner of the configurator and wait for the flight controller to reboot. It’s always a good idea to click to another tab, like the Setup tab, and click back to the ports tab to ensure your changes were saved. On some older flight controllers, it could take a few tries to get changes to the Ports tab to hold.
That’s it for the Ports tab!